

CarmenZoom allows instructors and students to record lectures, interviews, and presentations from their desktops or other personal devices. CarmenZoom is available to all Ohio State faculty, students, and staff members. It can be installed on university-owned or personally-owned computers. For more information about downloading and logging in to CarmenZoom, see the Getting Started with CarmenZoom guide.
CarmenZoom cloud recordings can be stored for 120 days in the Zoom cloud and distributed to students through a shareable link. PowerPoint lectures and other types of presentations can be recorded via CarmenZoom's screenshare function.
Record a Lecture
- Navigate to carmenzoom.osu.edu.
- Click Sign In.
- Enter your Ohio State username (lastname.#) and password.
- Click Schedule a Meeting to create a new CarmenZoom meeting.
Image

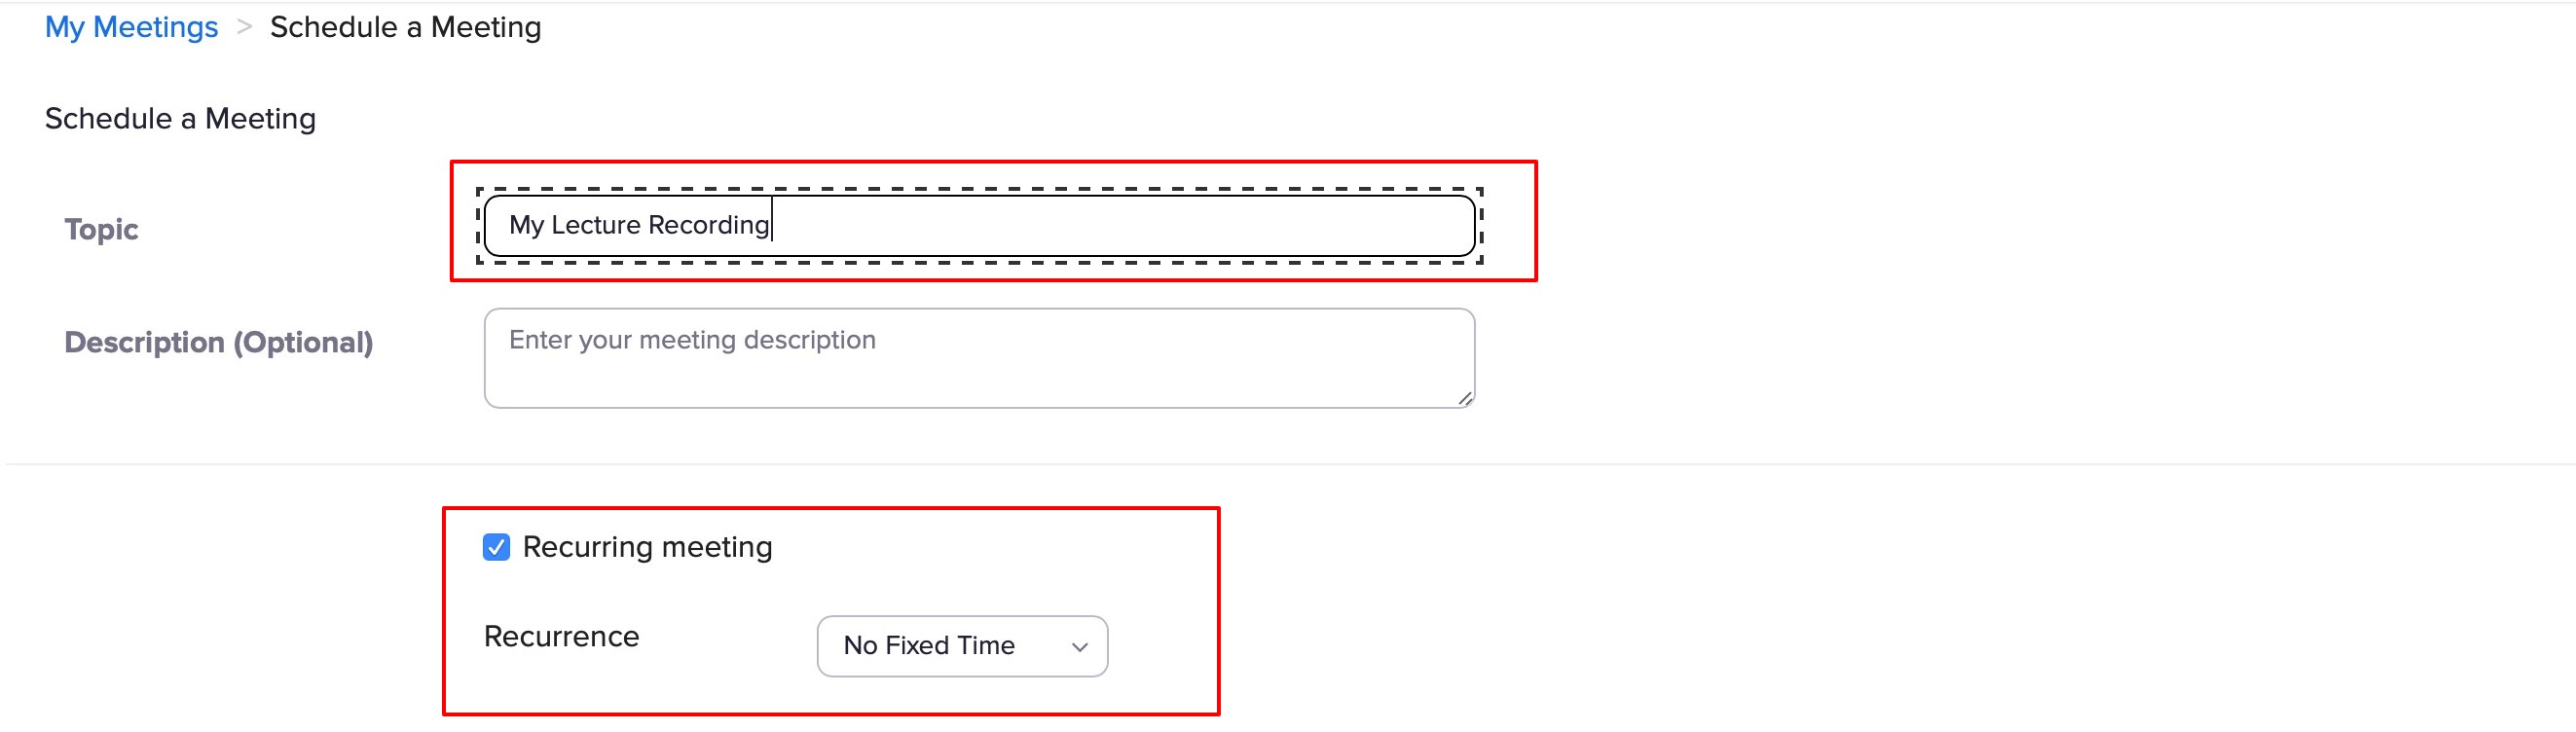
- Enter a descriptive name for the Topic.
- Select Recurring meeting.
- In the Recurrence drop-down menu, select No Fixed Time.
Image
- Click Start This Meeting.
Image

- From the pop-up menu, select Allow.
- Follow the prompts to configure your audio output and input. Test out your USB microphone or headset, if applicable.
- There are numerous ways to approach your video lectures, including the following:
- Direct Address: If you wish to record a direct first-person address to your students, select Start Video from the bottom toolbar to begin your lecture.
- PowerPoint Lectures: If you wish to record narration with a PowerPoint lecture, select Share Screen from the bottom toolbar and select the desired screen to share (Desktop 1; Desktop 2, if applicable). Click Share.
- Whiteboard Lectures: If you wish to record a whiteboard lecture, select Share Screen from the bottom toolbar and click Whiteboard. Click Share.
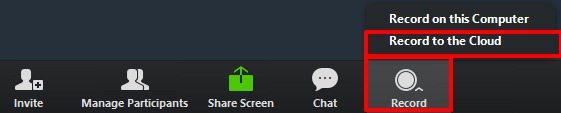
- To begin recording, click on Record.
From there, you will be prompted to select one of the following options: Record to Cloud or Record on this Computer. - Click Record to the Cloud.
Image
- Begin your lecture. If you need to take a break or regroup your thoughts, select Pause from the bottom toolbar.
- After you are done, select Stop Recording from the bottom toolbar.
Image

- Click Stop Recording again on the pop-up menu to confirm your decision.
This is an important step. Failure to stop the recording correctly can often lead to the creation of large, multi-hour videos with inordinately long processing times. - Select End the Meeting from the bottom toolbar.
Optional: If you would also like to save your chat before ending the meeting, click Chat from the bottom toolbarImage
Click Save Chat from the options menu indicated by three dots.Image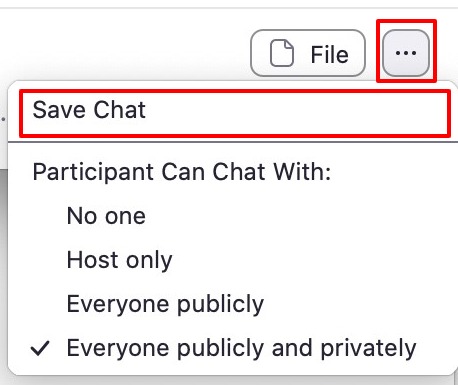
Your recording will now be processed and exported. If your meeting has not finished converting, the recording will show in the list with a Processing Recording label. Please be patient, as this can take some time. You will receive an email notification when the Cloud recording is ready to share with your students.
See Manage CarmenZoom Cloud Recordings for more information on accessing, downloading, and editing cloud recordings.