

Use the Mosaic app to create presentations within Mediasite. See the Installing Mediasite Mosaic guide for information about how to install and register Mosaic.
Be sure you have a stable internet connection. If the internet cuts out during your recording, the recording will not upload and the MyMediasite Portal will show your recording as "scheduled". This means you've inadvertently created a placeholder for recording. See Upload a Mediasite Recording to a Scheduled Presentation for details.
We strongly recommend against modifying settings in Mosaic. Doing so may cause the app to function unexpectedly. If you need to modify settings, please first contact mediasite@osu.edu for assistance.
Launching Mediasite Mosaic
There are two methods you might use to launch Mediasite Mosaic: the MyMediasite Portal or a shortcut on your computer.
On your personal computer, you might launch the Mosaic app using your computer's shortcut. By launching the Mosaic from your personal device, the finished recording will automatically upload to the MyMediasite Portal. You can also create the presentation offline using Mosaic and then upload it to the MyMediasite Portal later.
When you launch Mosaic on your private computer, your name.# should appear in the upper-right corner of the app. This means your app is connected to your MyMediasite account and will upload recordings to your account.
On a public computer, or if your name does not appear on your private device, launch Mediasite Mosaic from the MyMediasite Portal to ensure your presentation uploads your MyMediasite.

Create a Presentation with Mediasite Mosaic
We recommend recording a quick 15 - 30-second test prior to creating your official presentation. A quick test allows you to determine audio and video are working properly. You can view your recordings under the Presentations tab in Mediasite Mosaic.
If you are launching the Mediasite Mosaic from your desktop, skip to step #6. You will need to edit the presentation at a later time to change its description or add it to a Channel.
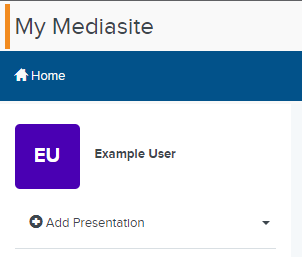
- Log in to your MyMediasite Portal.
- Click the Add Presentation button in the upper-left corner of the page.
Image
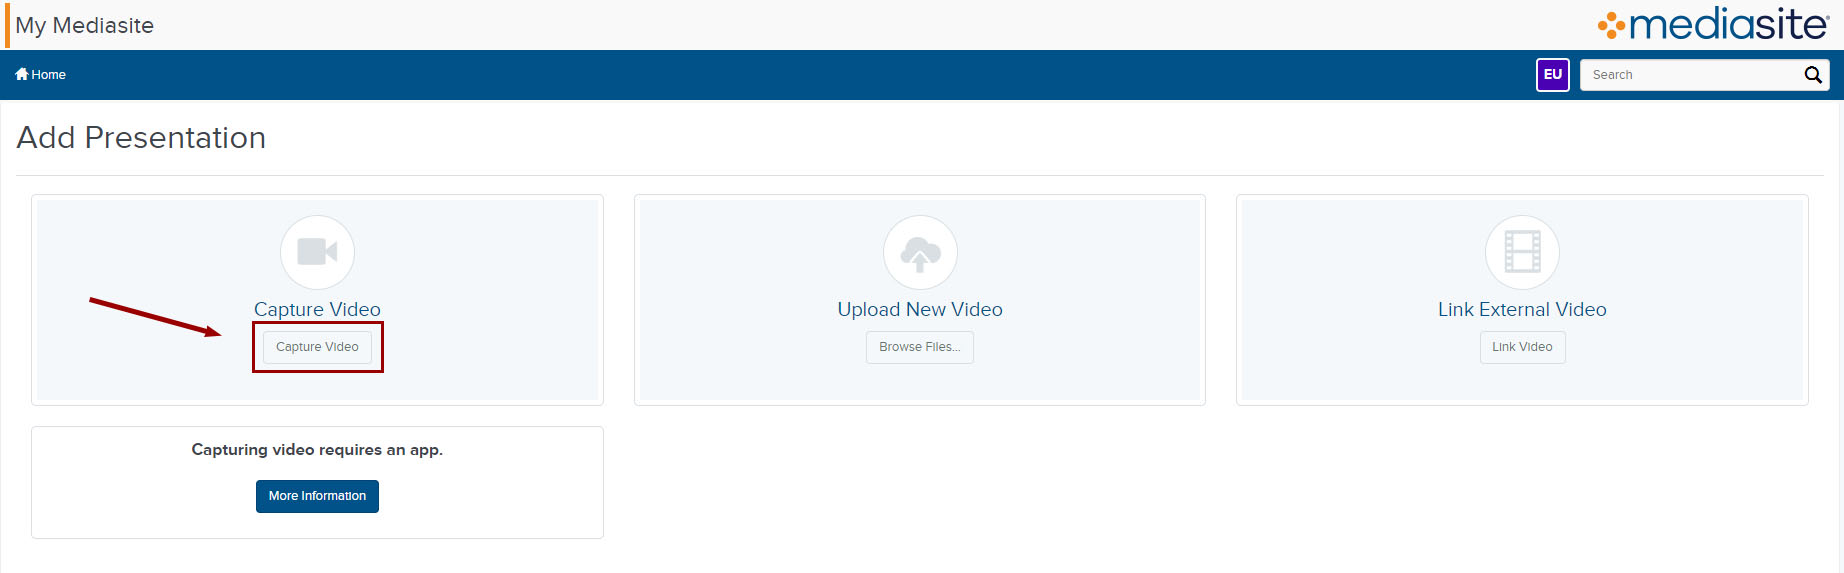
- Select Capture Video.
Image
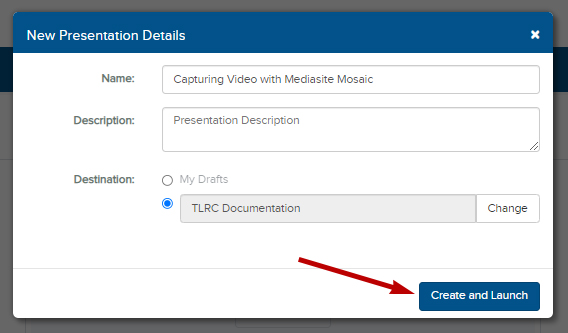
- Give your video a name and description. If applicable, choose the Channel or Shared Folder to which you would like to publish your recording. If you do not choose a destination, the presentation will by default appear in My Drafts.
Remember, all presentations default to Private. The destination of a presentation refers to where the recording lives and whether it appears within a Channel or a Shared Folder. No matter where you initially publish the presentations, you must set the presentation to Viewable within the MyMediasite Portal, in order for others to see the recording. - Click Create and Launch. If you have not already downloaded Mediasite Mosaic, or an update has occurred since your download, you will be prompted to download the app at this point.
Image
- Mediasite Mosaic launches. If your computer asks if you wish it to remember this action click yes, so future recording sessions will launch automatically.
- Set up your recording inputs:
- Click on the Microphone icon at the top of the window to select the microphone you want to use.

- The Webcam icon will allow you to select your webcam.

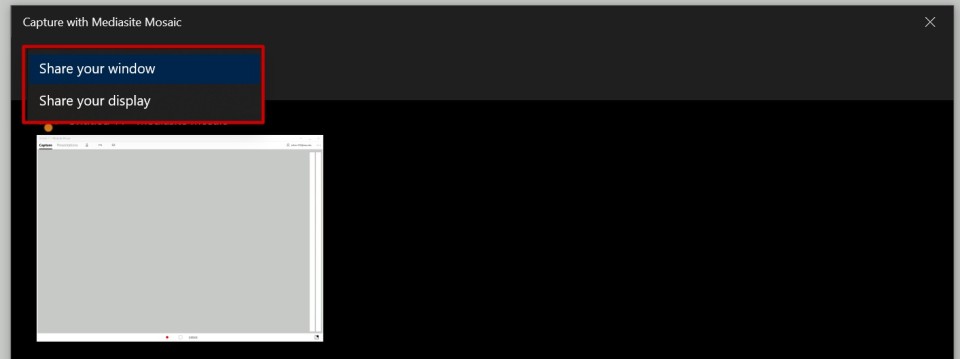
- The Display Source icon will allow you to choose between recording your full desktop display or selecting a specific window.

- Click on the Microphone icon at the top of the window to select the microphone you want to use.
- To begin recording, click the red Record button
 at the bottom of the screen.
A three-second count will start and then automatically minimize Mosaic so that it does not get in the way of your presentation.Image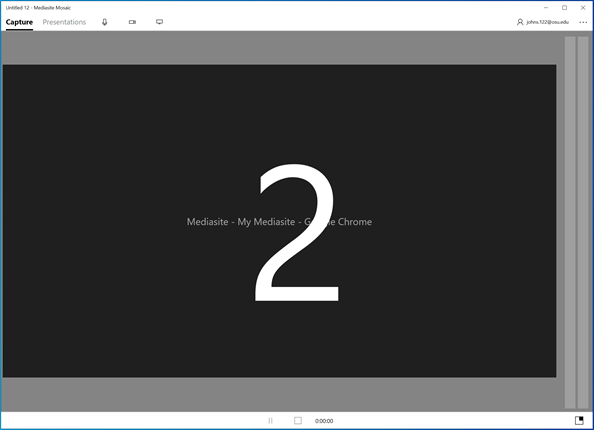
- You can bring Mosaic back up from your taskbar to Pause
 your recording should you need to.
 - Click the Record button
again to resume the recording.
- Once you have finished recording, click the Stop button
 .
.
Your presentation will immediately start uploading to the Mediasite server. Once the upload has finished, it appear in your MyMediasite Portal. It will not be available for viewing until the red triangle icon changes to a green circle after transcoding and OCR are complete.