

There are two main ways to add posts to your site. Using the Add Post page allows you to add rich content, control post display settings, and set desired publishing options all from one page. Using the Quick Draft plugin, you can quickly create a new post draft directly from your dashboard and return to it at a later date. Depending on the purpose of your post, you may find one option suits your needs better.
Adding a Post using the Add Post page
- Login to u.osu.edu and navigate to the dashboard of the site that you would like to edit.
- You can add a new post in one of two ways:
- Click Posts from the left-side Main Menu and then click Add New,
OR - Hover over + New in the top Admin Toolbar and select Post.
- Click Posts from the left-side Main Menu and then click Add New,
- The Add New Post page appears
Image
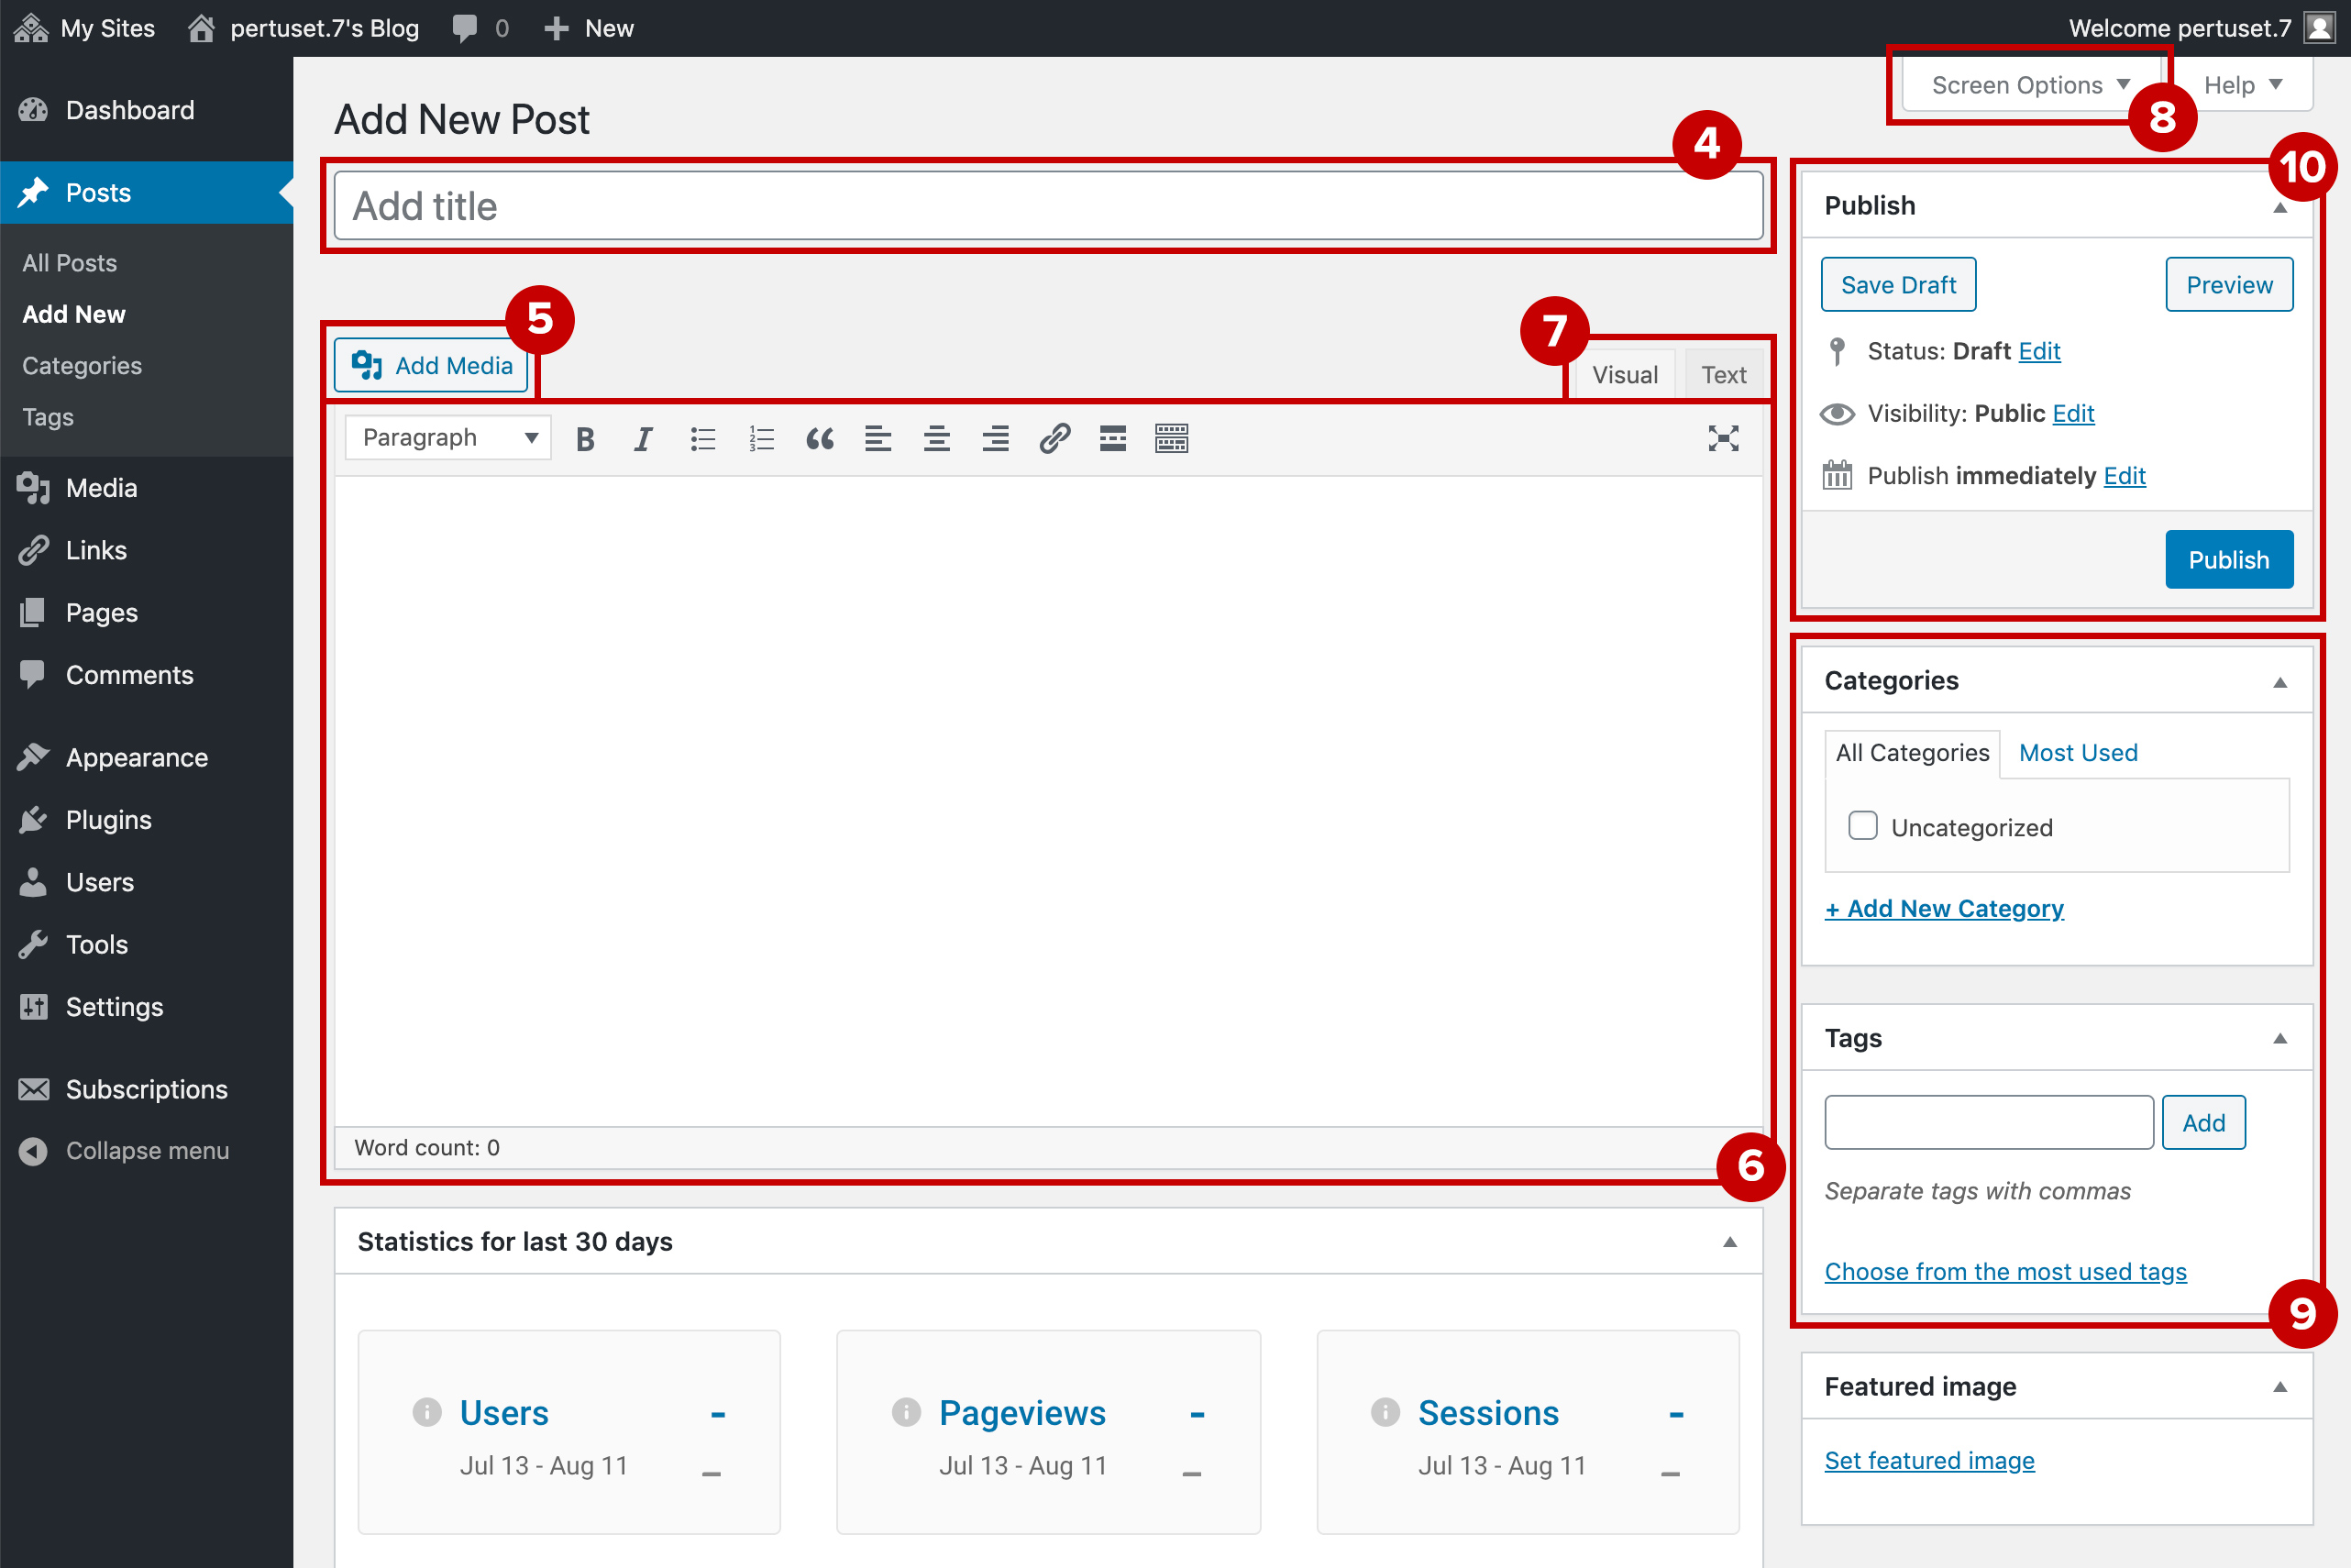
- Type the page title in the Title field.
- Click the Add Media button to add media to the post if needed.
See the Working with Images guide for more information about the various ways to use images and media on your site. - Use the editor to add post content.
See the Embedding Videos and External Content guide for more info on embedding content - There are two different views of the editor window, Visual and Text. Toggle between these tabs as needed.
UX Tip
Click the Distraction-free Writing Mode button

to remove all elements surrounding the title and content from view. Click the button again to allow the elements to reappear. Note that the Distraction-free Writing Mode button appears by default; however, you can enable / disable the button by clicking Screen Options and checking / unchecking "Enable full-height editor and distraction-free functionality".
- The Visual tab shows a rich text version of the post content, and includes editing tools to assist with formatting and styling your post content. This is the default view.
- The Text tab shows the raw HTML version of the post content. Use this view mode to embed code.
- Click the Screen Options button at the top of the screen to toggle the visibility of additional post setting options such as:
- Categories
- Tags
- Featured Image
- Excerpt
- Send Trackbacks
- Custom Fields
- Discussion
- Slug
- Author
- Statistics – Last 30 Days
- Add Categories and Tags to your post as needed.
See the Tagging and Categorizing Posts guide for details. - To save your changes, click Save Draft in the Publish box or select the desired publishing options and click Publish.
See the Publishing Pages and Posts guide for more details.
Adding a Draft using the Quick Draft plugin on the Dashboard
- Login to u.osu.edu and navigate to the dashboard of the site that you would like to edit.
- Activate the Quick Draft Plugin if it is not already displaying on your Dashboard.
- Click Screen Options at the upper-right corner of the Dashboard page.
- Check the Quick Draft checkbox. The plugin will appear on your site's Dashboard.
- In the Quick Draft widget, type the Title and Content for your new post.
Image
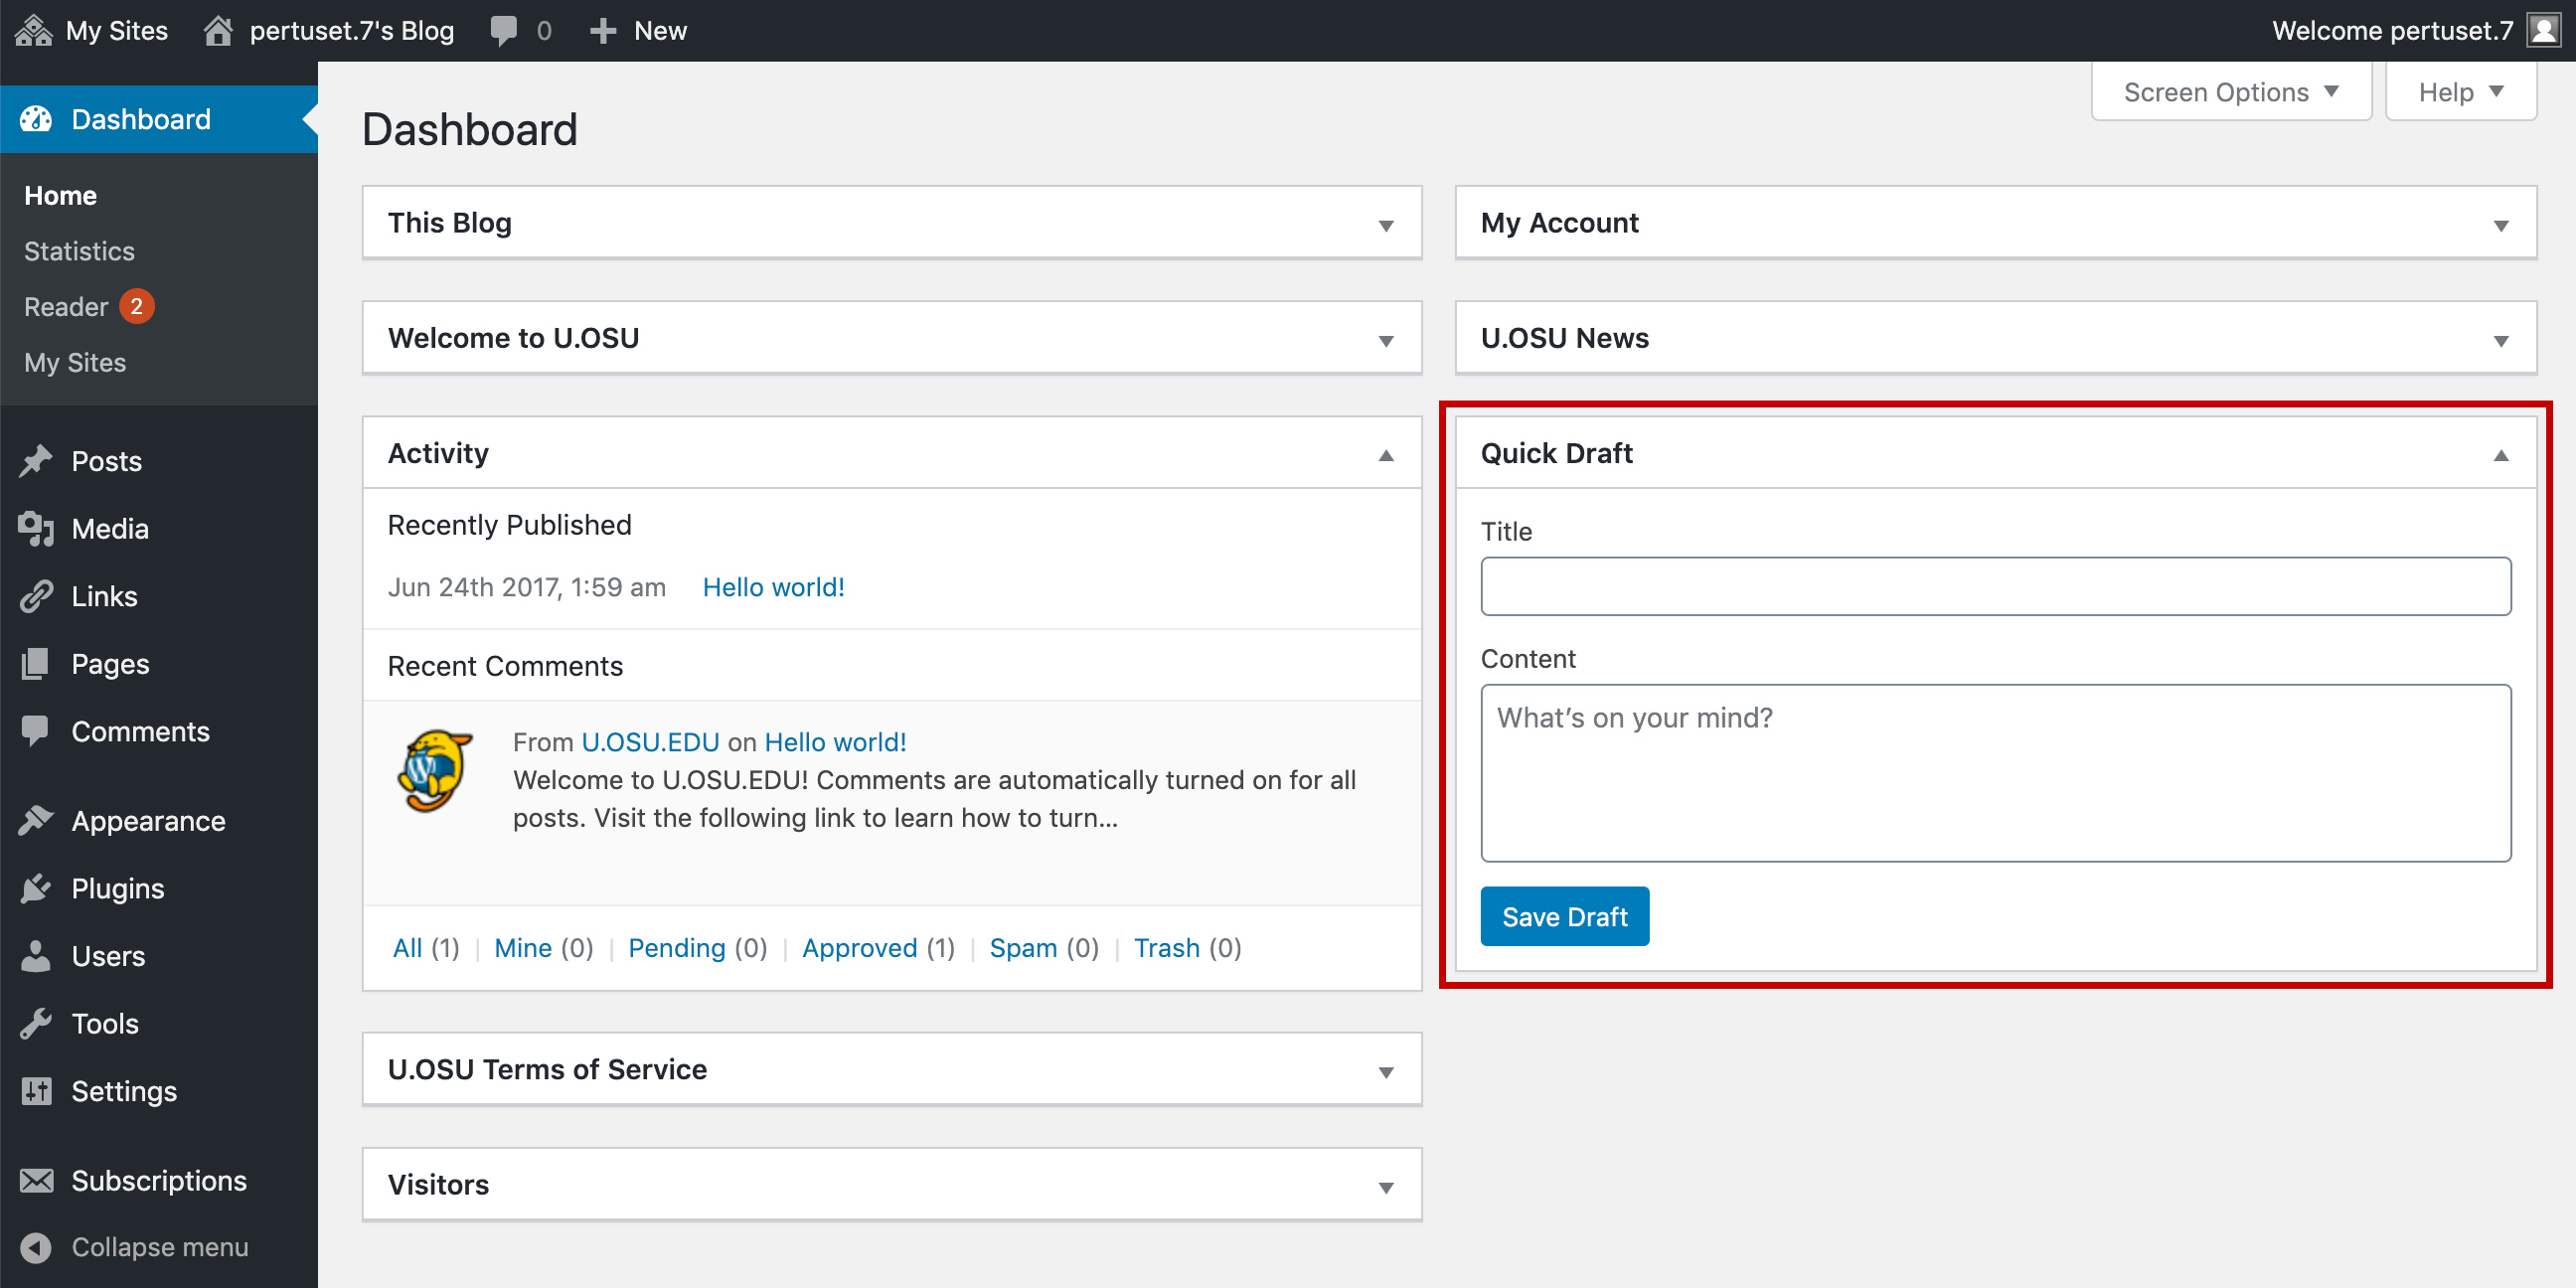
- Click Save Draft. Your draft post can be edited or published at anytime.