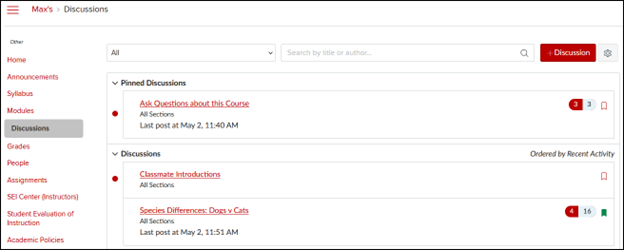
The Discussions tool is a collaboration area to post, read and reply to messages on different topics, share thoughts about course materials, ask questions, share files, or work with your peers on assignments and homework. Discussions can be graded or ungraded. Depending on the settings your instructor has enabled, you may even be able to create your own discussions.
Access Discussions
To access CarmenCanvas discussions:
- Log in to Carmen.
- Enter the desired course.
- Click Discussions.
If your instructor has Pinned any discussions, those will show at the top of the page.

Navigate Discussions
There are several options for viewing Discussions, including:
When to Reply: Discussions can remain open indefinitely, or your instructor may have specified a date range within which you have access to the discussion.
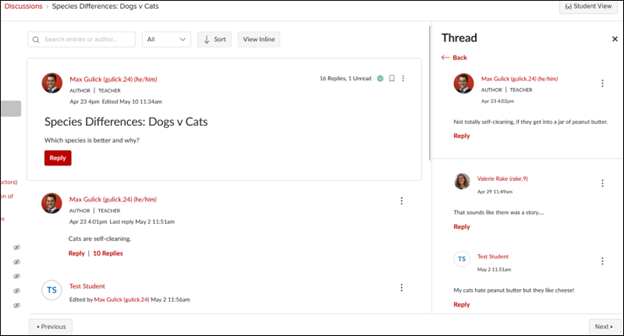
Sort by Date: Discussions are automatically arranged with the most recently active topics toward the top. You can click the Sort button at the top of any discussion to arrange replies from oldest to newest, or newest to oldest.
Flexible Viewing Options: View Split Screen keeps the original reply in view (on left side) while you scroll through the additional replies (on right side). Split screen is especially helpful when there are multiple replies to an original reply. Click the View Split Screen button at the top of the page to toggle between Split Screen and the classic Inline view.

Participate in Discussions
There are several methods for interacting within discussions including:
Share Files: Uploading files to discussions can be problematic if the files are large:
When you upload a file to a place in CarmenCanvas that isn’t a graded assignment, a copy of that file is automatically saved in your User Files. Over time, or after uploading large file sizes, this can prevent you from uploading any new files.
To share large files, you can upload files to your Microsoft 365 OneDrive account and share a OneDrive link in the discussion.
Mention Users: Address replies to specific users by mentioning other users in a reply. Type the @ symbol and select a user from the drop-down menu. Only users in the course will display as options.
Edit History: Edit or delete your replies and view your edit history. If you (or your instructor) have edited your reply, the View Historylink will appear under your name.

Click Expand All on the pop-up box to view the content of each edit.

Deleted Replies: If a student (or instructor) has deleted a reply, only the phrase “Deleted by [user’s name]” and a timestamp will appear. It is not possible to see the reply that was deleted.
Edit a reply by clicking the three dot menu on the right side of the reply and clicking Edit. All versions of the reply will be visible to the instructor and the student via the View History link.
Report a reply: Your instructor may have enabled a feature that allows you to “report” replies that you feel are inappropriate or offensive. Instructors are notified when a response is reported; they may then choose what, if any, action to take. Students receive no indication if a response is reported.
Note: Not all the functions listed above will be available in the mobile app.
See the Canvas Student Guide for more information about discussions.

