

This guide uses the GE Launch Workbook as an example but the process is the same for adding an asset as supporting evidence to any Workbook in Pebble+.
- Click the +Add...icon.
Click Add evidence option from the dropdown menu.
Image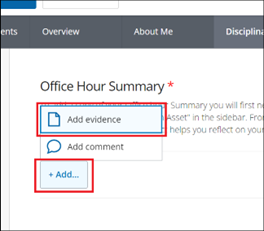
In the Add Evidence sidebar pop out, click the Add an asset box.
Image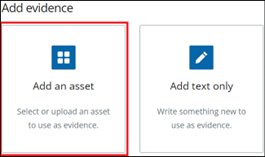
- If the asset you want to include already exists in your Assets Store, enter the name of the asset in the Keyword Search box. If the asset does not already exist, click the Upload New button and proceed to the New Assets instructions.
If the asset already exists, click the icon representing the asset then click the Done button and proceed to the Existing Asset instructions.
Image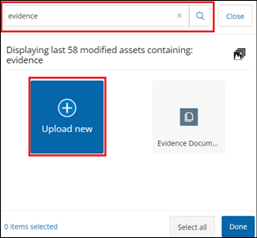
New Assets
In the Upload a File dialogue box, if you have your file(s) easily accessible, drag and drop the files into the Drag a file here box. Otherwise, click Or choose a file... to search your computer for the file(s) you want to upload.
Image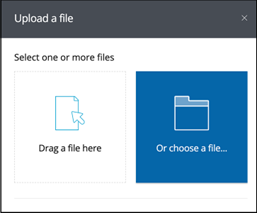
- For each file you want to upload fill in the following fields.
- In the Title field, add descriptive title. This will make finding the uploaded file easier when you return to your Assets Store.
- Add a description in the Description field. This can be seen by whomever you share the asset with.
- Add Alt Text in the Alt Text field. Short for alternative text, this descriptive text is used by screen readers explaining the content in the file for people with visual impairments. Learn more about writing alternative text.
Add Tags in the Tags field. Tags can be used to group like items together. Tags can be anything you want, for example: #GE ePortfolio; #Academic Integrity PSA; etc.
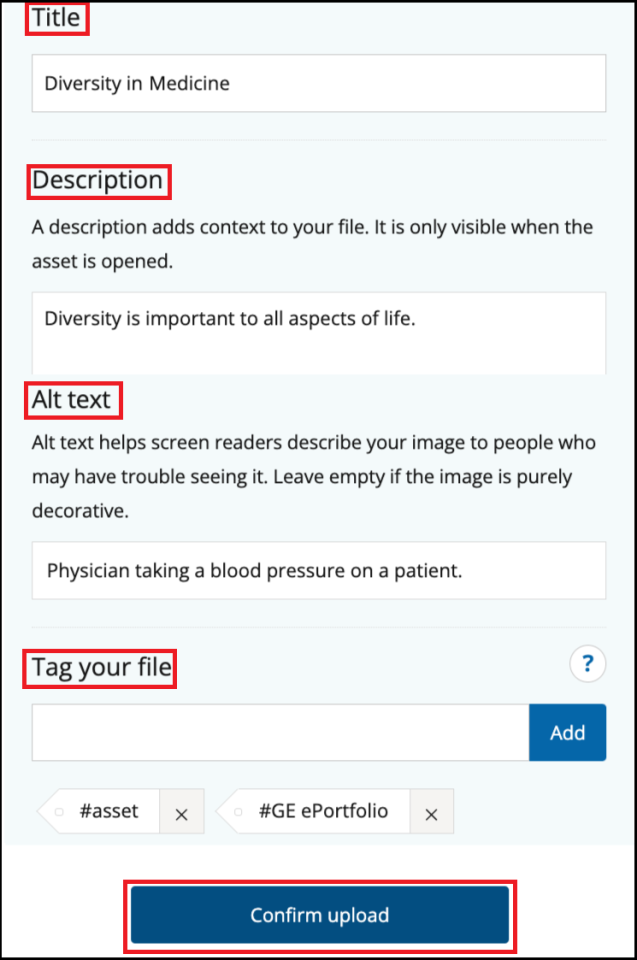
- Once you have filled in all the fields, click the Confirm Upload button.
Existing Assets
In the Add a Justification editor that appears, add additional information or context for why you believe the asset you have chosen constitutes evidence of your understanding of what you have been asked to show.
Image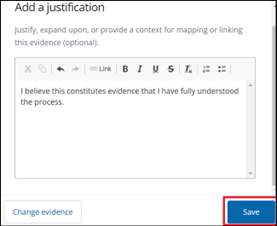
- Click Save. The asset has been added as supporting evidence.