- Log into PebblePad via the login page or click the PebblePad link in your course navigation menu.
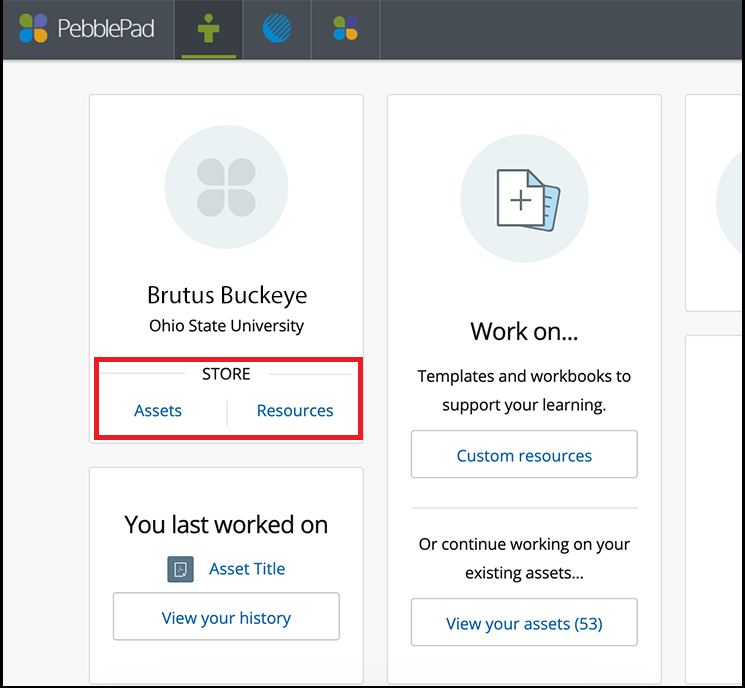
From the Pebble+ home page, under your name in the Store card, click the Assets link.

- At the top right of your screen, click the Upload File button.
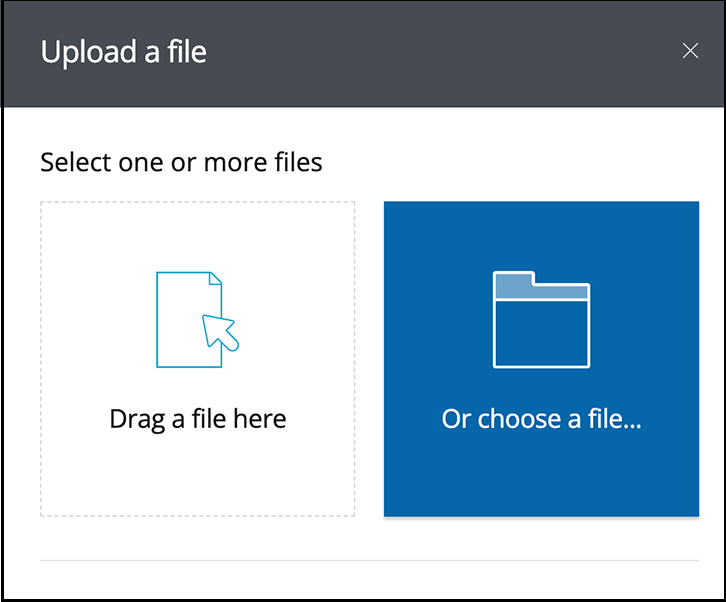
In the Upload a File dialogue box, click the Or choose a file... box to search your computer for the file(s) you want to upload. Alternatively, if you have your file(s) available, you can drag and drop them into the Drag a file here box.

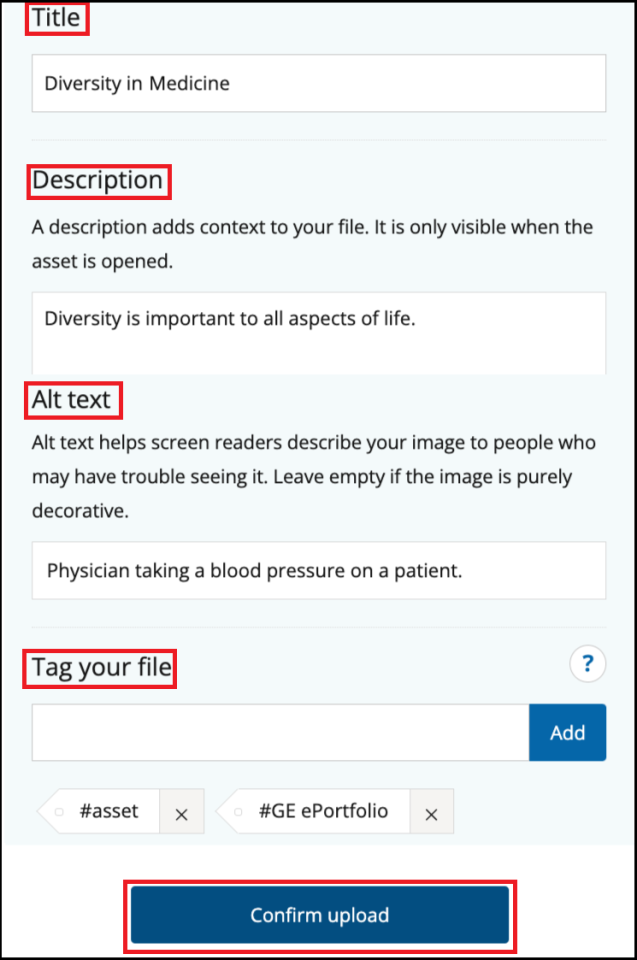
- For each file you want to upload fill in the following fields.
- In the Title field, add descriptive title. This will make finding the uploaded file easier when you return to your Assets Store.
- Add a description in the Description field. This can be seen by whomever you share the asset with. Descriptions should include a short summary about the asset so you know what it is later (what class it was from, reflection about why you saved it, what it shows about you. etc.).
- Add Alt Text in the Alt Text field. Short for alternative text, this descriptive text is used by screen readers explaining the content in the file for people with visual impairments. Learn more about writing alternative text.
Add Tags in the Tags field. Tags can be used to group like items together. Tags can be anything you want, for example: #GE ePortfolio; #Academic Integrity PSA; etc.

- Once you have filled in all the fields, click the Confirm Upload button.
Repeat this process for uploading additional files, if applicable.
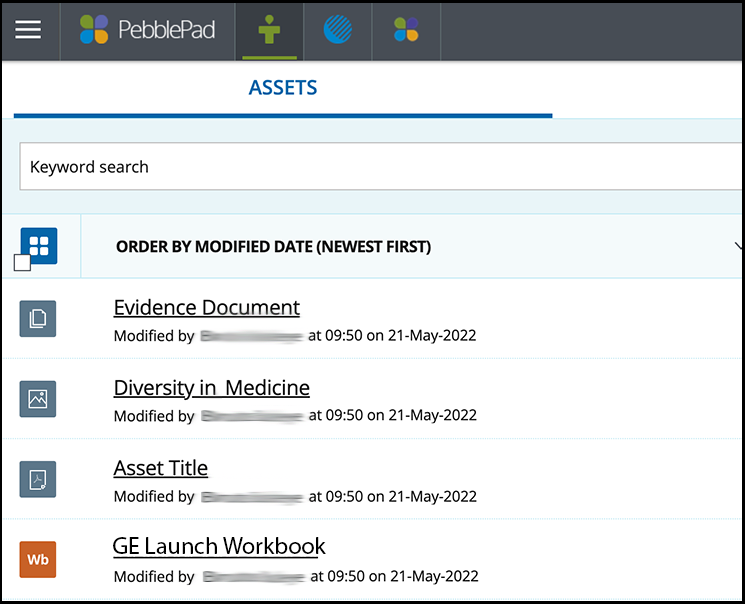
Once you have uploaded your file(s), you should be returned to the listing of assets in your Assets Store.


