

Hardware recorders are available in select lecture halls. The Mediasite Hardware Recorder captures whatever is projected on the room's screen, as well as the instructor audio.
Depending on the lecture hall you are using, the Hardware Recorder may be visible to you in the podium (as shown below) or it may be located in a locked cabinet.
Audio & the Hardware Recorder
Please note that the lecture halls with Hardware Recorders are not wired to pick up audio throughout the classroom. Sound is recorded from the podium only. If you have a tendency to walk away from the podium while lecturing, be aware that this affects the audio on the recording. A wireless mic can be used if you need a greater range of motion. We also urge you to repeat student questions so they are clearly recorded.
If needed, you can borrow a wireless microphone from Classrooms. Contact your Classrooms representative for how to set up the wireless microphone to record.
Check the Recording Preview on the Podium
From the classroom podium, you are able to access a preview of your recording. We recommend you check this to be sure your presentation is recording correctly.
To access the preview:
- Navigate to the podium screen. Four options appear on the left area of the screen.
Image
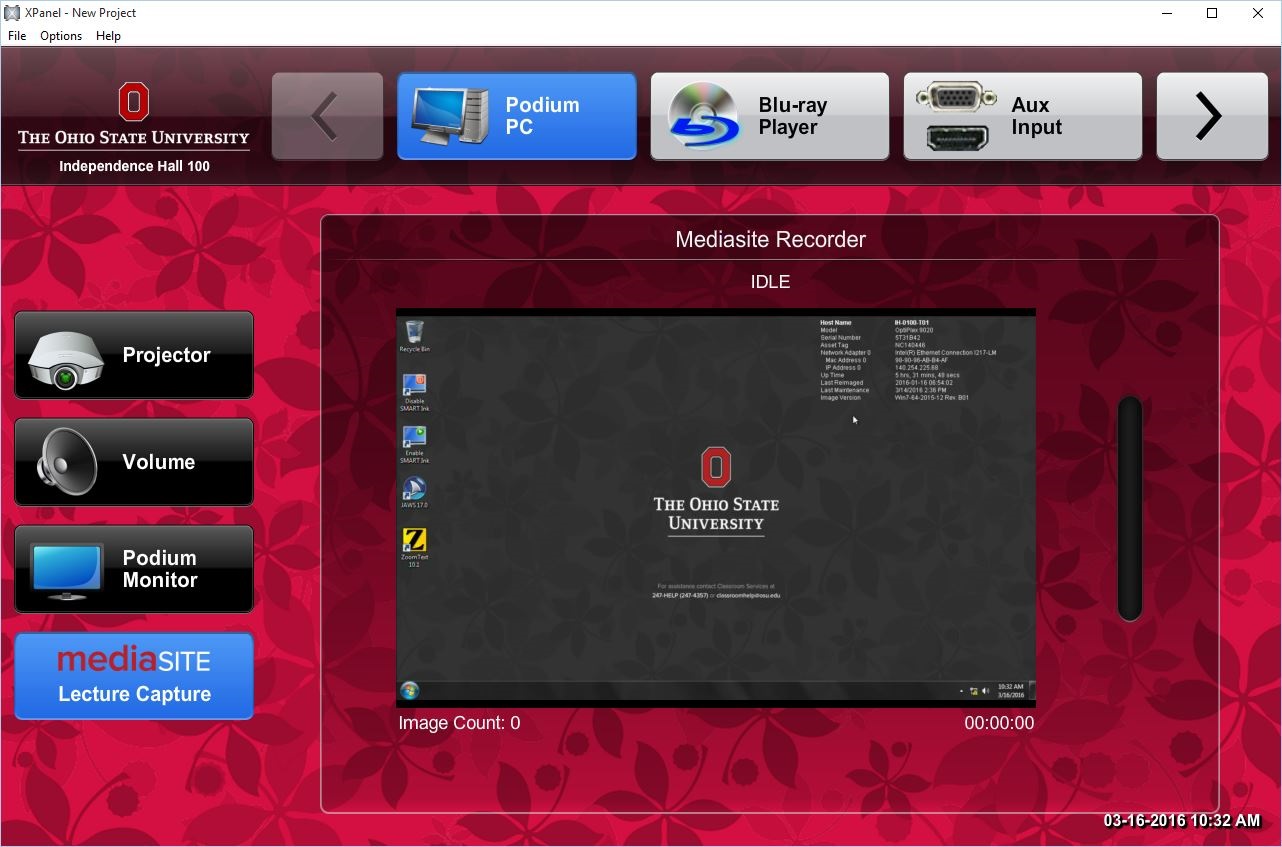
- Click Mediasite Lecture Capture on the bottom-left of the screen.
- The right area of the screen displays a preview of your recording. There are three main areas of the screen:
Image
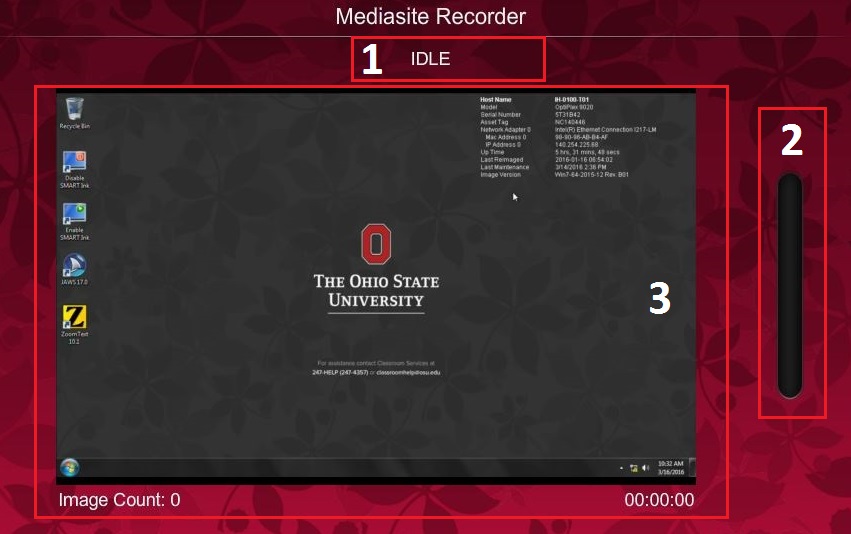
- Status of the Recording - There are three possible statuses: IDLE, BUSY or RECORDING:
- Idle - Waiting for the next recording.
- Busy - Preparing to start a new recording or finishing the end of a recording.
- Recording - A recording is in-progress.
- Audio Level - This shows the audio level. If no audio level is indicated, contact 4-HELP.
- Image of Recording - This is an image snapshot of what is being recorded. The image updates every 5 seconds. If the Hardware Recorder is recording and does not correctly display the image that should be recorded, contact 4-HELP.
- Status of the Recording - There are three possible statuses: IDLE, BUSY or RECORDING:
Check the Status of the Hardware Recorder
If the Hardware Recorder is visible, you can check the status of the recorder by looking at the LED light color.
| Recorder Status | LED Colors | Action to Take |
|---|---|---|
| Recorder Interface Idle | Blue | None |
| Recording | Red | None |
| Pause | Pulsing Red | Contact Classroom Support* |
| Error | Alternating Red, Blue | Contact Classroom Support* |
| Recorder Not Running | Pulsing Blue | Contact Classroom Support* |