

Now that you have downloaded and registered Mosaic, you are ready to configure your microphone, webcam, and desktop recording and begin recording.
Setup
- Launch Mosaic on your device.
- Click on the Microphone icon at the top of the window to select the microphone you want to use.

- The Webcam icon will allow you to select your webcam.

- The Display Source icon will allow you to choose between recording your full desktop display or selecting a specific window.

If you are going to switch between multiple programs in your recording, we recommend using the Share your display option. If you are only planning on recording one program, then Share your Window is an acceptable option.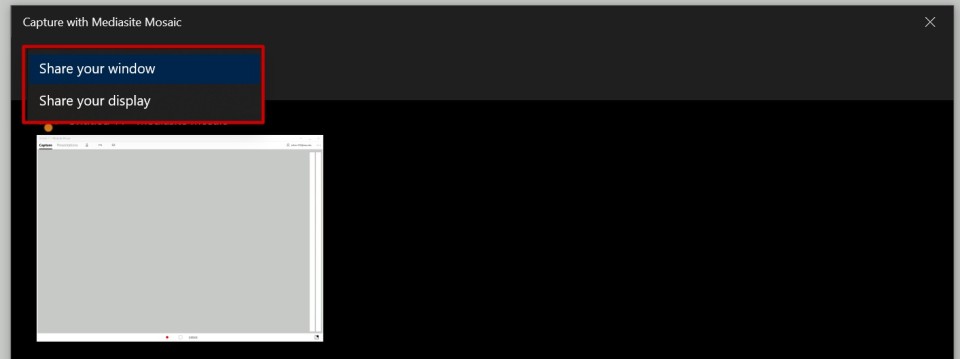
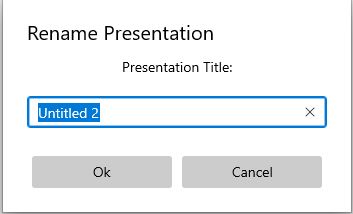
Your presentation title defaults to Untitled. You will want to rename your presentation to give it a more descriptive title. To do this:
- Click the ellipsis next to your login name in the upper right-hand corner, then click Rename Presentation.
- Type in the new title, click Ok.
Image
Record
- To begin recording, click the red Record button
 at the bottom of the screen.
A three-second count will start and then automatically minimize Mosaic so that it does not get in the way of your presentation.Image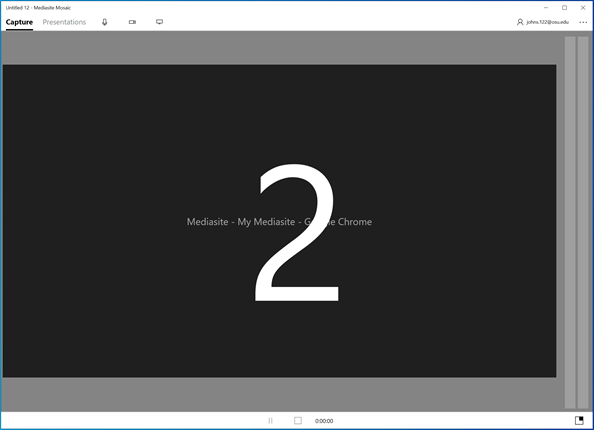
- You can bring Mosaic back up from your taskbar to Pause
 your recording should you need to.
 - Click the Record button
again to resume the recording.
- Once you have finished recording, click the Stop button
 .
.
Mediasite will save your recording locally, you still need to upload the presentation to the MyMediasite portal.