

Once you have recorded your presentation, you can view and upload your video.
- Click the Presentations tab. This will list your recordings and give you the option to search and filter recordings.
Image

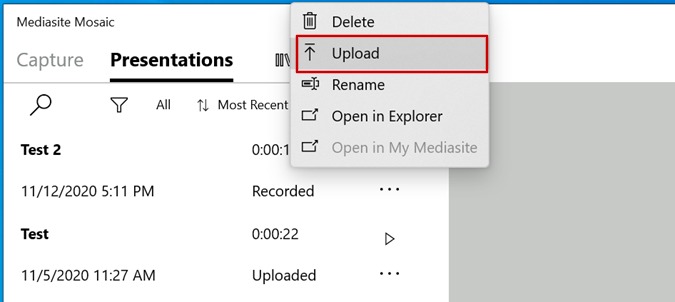
- Click on the desired recording, right-click (option-click on Mac) or click the ellipsis for options, and select Upload.
Image
Once your video has finished uploading, you can view it on mediasite.osu.edu. You can also use the options in this ellipsis to delete, rename, open the file location on your local drive, and open in Mediasite.
Auto Upload Presentations
You can set your recordings to automatically upload once you have completed a recording. Using the auto-upload is a good option if you are always recording from a place with a reliable internet connection. If you record from different locations or have unreliable internet, you might want to stick with manual uploads, so you have more control around uploading your presentations.
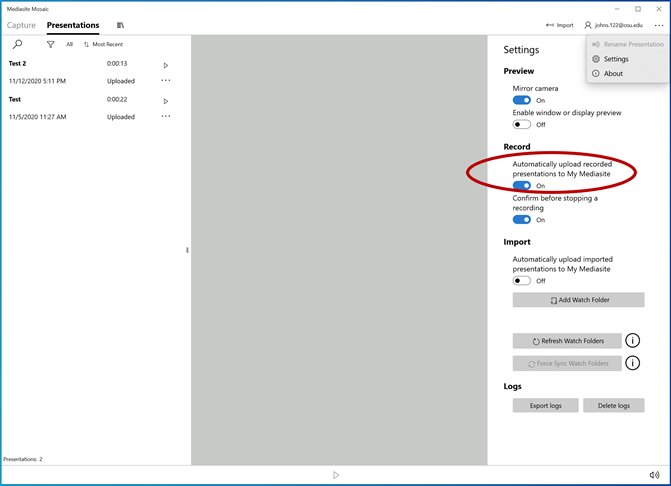
- Click on the ellipsis next to your login name and click Settings.
Image

- Under the Record heading, toggle On the option to Automatically upload recorded presentations to My Mediasite. Any recordings you produce will automatically upload after you have hit the Stop button and finish recording.
Image
Now you are ready to use Mediasite Mosaic to record and upload instructional material easily. See the Add Mediasite Presentation to Carmen guide for directions on sharing the recordings with your students.