When working on a Page or Portfolio within PebblePad, you can include files that you created with tools such as Word, PowerPoint, Canva, and Adobe, among others.
While these files can be added to a Template or a Workbook as evidence or embedded files, the Page and Portfolio tools do not allow for embedded files for most document types. However, you can still add them to a Page or Portfolio by transferring the content from the file to the Page directly, or by adding hyperlinks to the files in the asset store or on other platforms.
This guide will walk you through workarounds for adding a document or file made outside of PebblePad into a Page or Portfolio in the Get Creative space.
Transfer content to PebblePad.
You can transfer content from your document and add it to a PebblePad Page or Portfolio by clicking the +Add Content button and then selecting the relevant content type from the block content menu.
For example, you could:
- copy and paste text from your document into a text block,
- retype your content into a text block, and/or
- take a screenshot of the document and insert it using an image block.
One benefit of copying and pasting your content in this way is that you can modify the formatting and layout to match your Page or Portfolio structure. Consider this method if it’s important that your content be visible to the viewer directly within the Page or Portfolio or if maintaining a cohesive style throughout the Portfolio is important to you.
Link to an Asset.
One way to include a document within a Page or Portfolio is to link to that Asset within a text box using the rich content editor. This will not embed the document onto the Page, but it will create a hyperlink readers can click to access the document.
- First, upload the document into PebblePad as an Asset. You may have already done this if you have added it previously as evidence to a Workbook or Template.
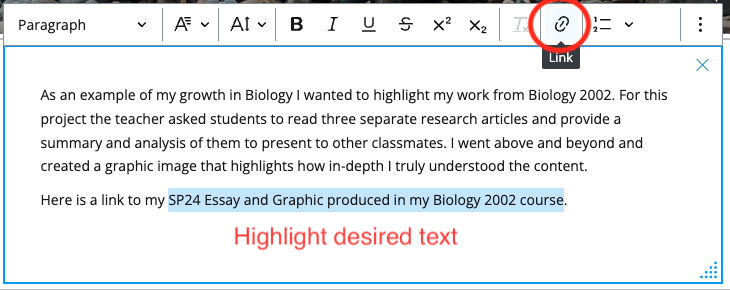
- Once the document is an Asset in your Asset Store, go to the text block on your Page. Highlight the text you want to convert to a hyperlink.
- Click the Link icon on the rich content editor toolbar.
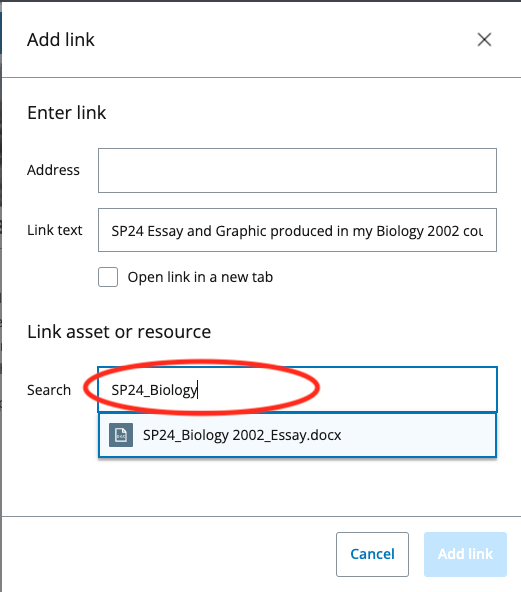
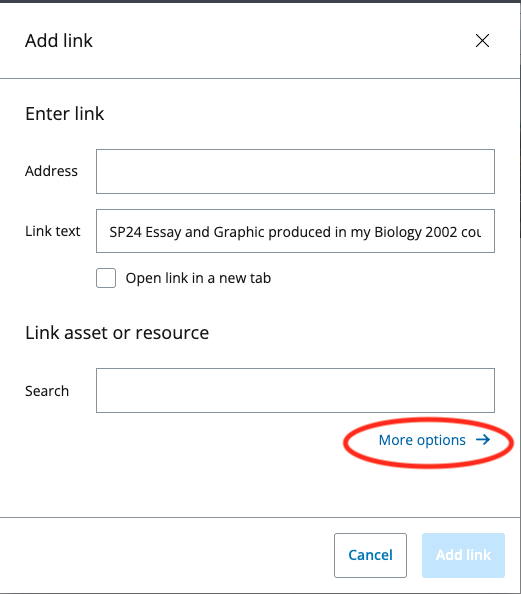
- Under the Link asset or resource section, search for the name of the document and select the file from the dropdown. (You can also click More options to see a list of all your Assets.)
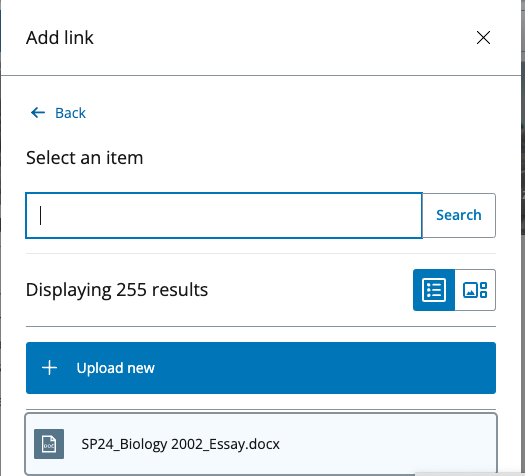
- Select the Asset you want to hyperlink.
- This will take you back to the Add link pop-up, where the Asset link has been added to the Address field.
- If desired, select the Open link in a new tab option.
- Click the Add link button.
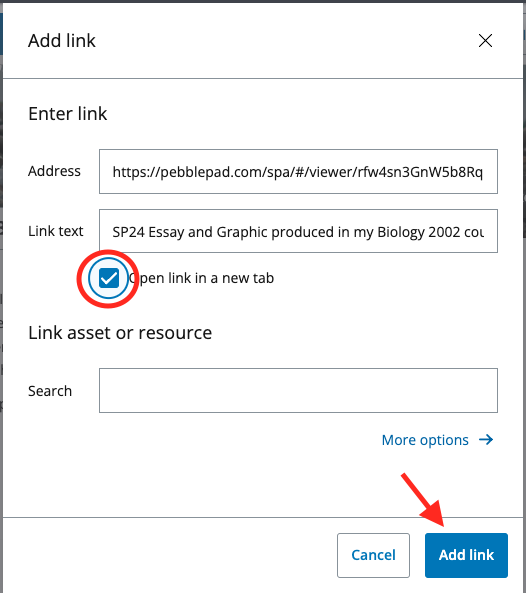
- The hyperlink will now be added to your Page, and the document will be available to anyone that clicks the link to open the Asset.
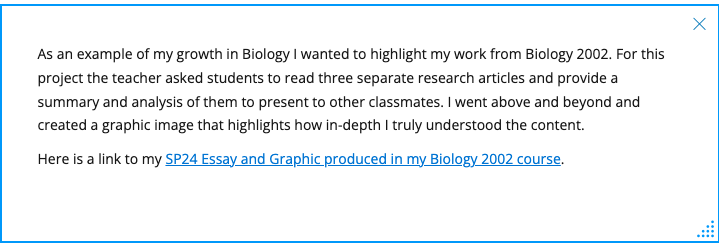
Don't forget to save your Page. To see how your teacher or viewer will see your Page, you can click the Preview button.
Link to documents housed in OneDrive.
Another way to share your document within a PebblePad Page or Portfolio is to use the rich content editor in a text block to link to an external source. This will not embed the file or document directly into the page, but it will create a hyperlink your viewer can click to access the document. For this method to work, you will need to set the permissions for your file in OneDrive to determine who can view the document.
- Start by uploading your document or file to your OneDrive folder.
- Then find the document in OneDrive and click the Share icon.

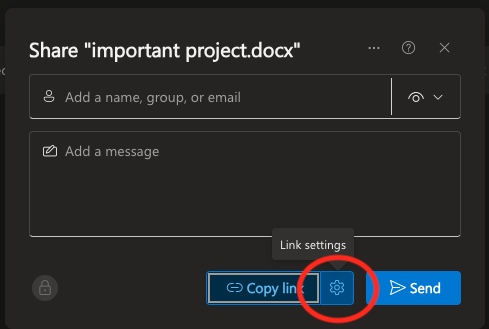
- Click the Gear icon next to the Copy Link button to access the Link settings.
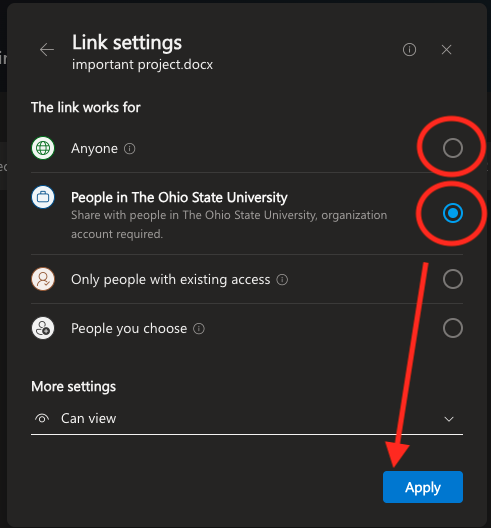
- In the Link settings window, choose the option that best meets your needs. If sharing outside of Ohio State, be sure to select Anyone. If sharing with your instructor or for a class, you may select the People in The Ohio State University option. Then click Apply.
- Next, click Copy Link to grab the URL for your document.
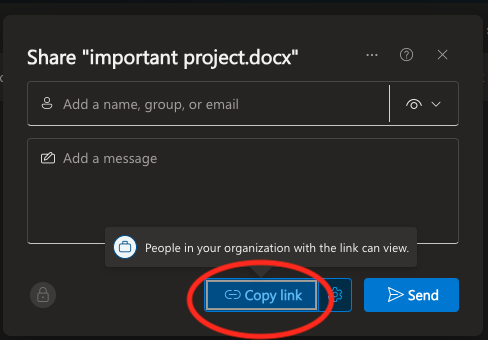
Now that you have copied the link, return to your Page or Portfolio in PebblePad. Add a text block to the desired location. Highlight the text you want to convert into a hyperlink where readers will click to open your document.
- Click on the Link icon on the rich content editor toolbar.

- Under the Enter link section of the pop-up, paste the link you copied from OneDrive into the Address field.
- Click the checkbox to Open link in a new tab.
- Click the Add link button.
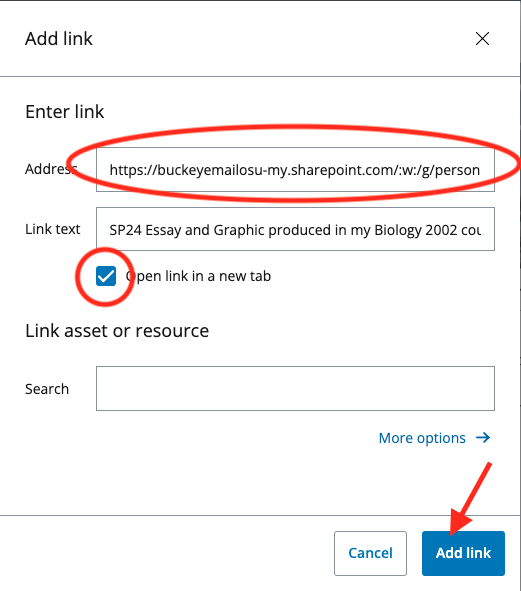
- The hyperlink will now be added to your Page. When users can click the hyperlink, your document will open in the Microsoft online viewing tool.

Don't forget to save your Page. To see how your teacher or viewer will see your Page, you can click the Preview button.
Add a snapshot and link to a document.
While you may not be able to embed a document or file directly in the Page, there is a way to visually represent your document. You can do this by taking a screenshot of the document and then converting the image into a hyperlink that will take your viewer to the document.
- First, take a screenshot of the portion of your document that you want to visibly display on the Page or Portfolio.
- Then add an image block using the +Add Content button on the Page.
- Click the Open asset store button.
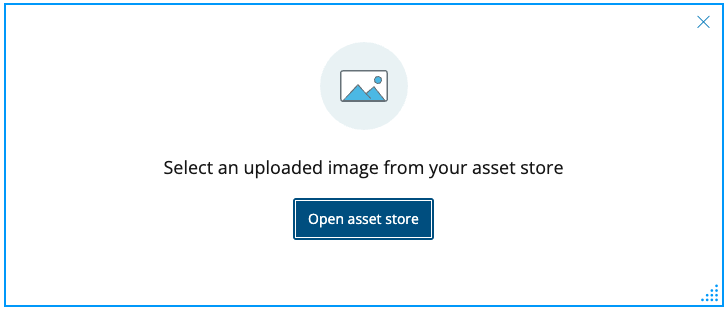
- Upload the screenshot to your Asset Store, if needed, or select the image from your Asset store if it already there.
- The image of your document is now added to the Page. Don't forget to add alt text to your image for accessibility. To do so, be sure you are still actively working in the image block. To do so, click the +Add alt text button on the image.
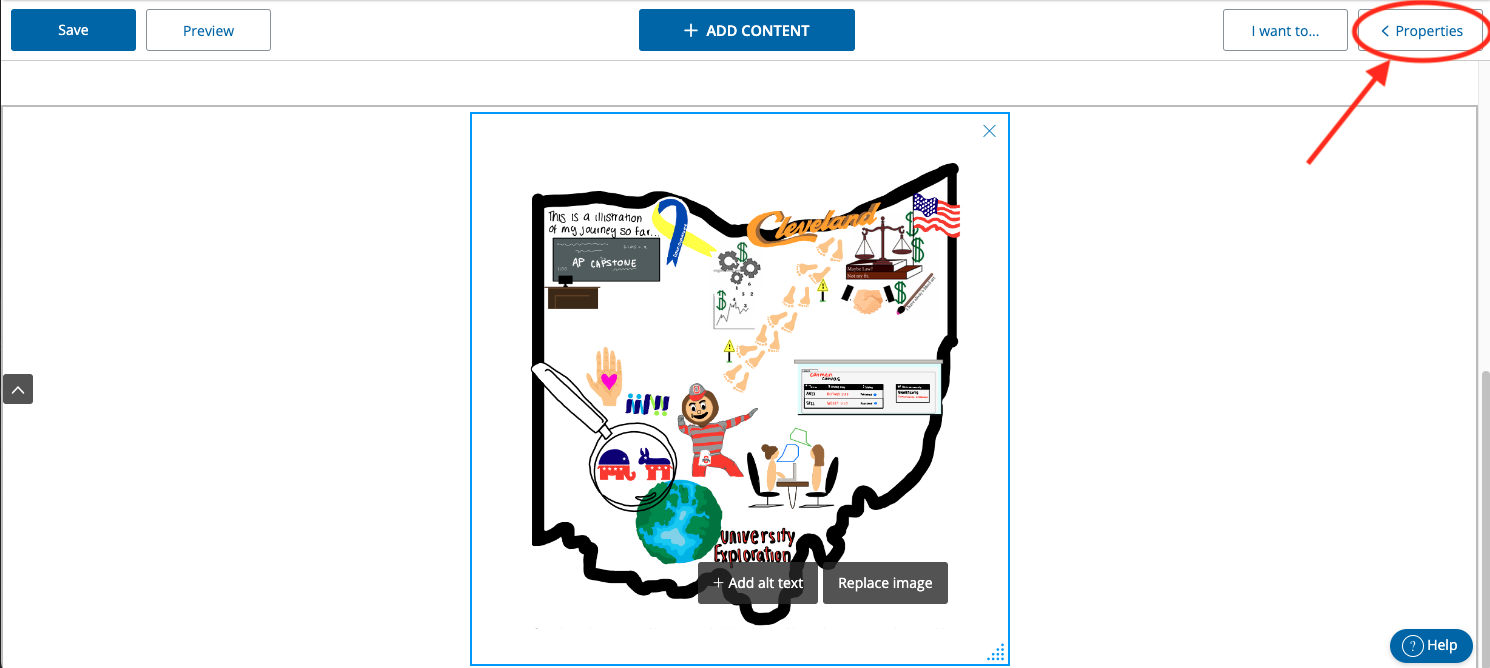
- Next, click Properties in the top right corner.
- In the Block tab, scroll down until you see the On clicking image section.
- Select your preferred option for how your document will open when the image is clicked.
- If your document is hosted in OneDrive, select Link to Website and then enter the URL for the document.
- If you are linking to an Asset in your Asset store, select Open asset in new tab or Open asset in current tab, and then select the Asset.
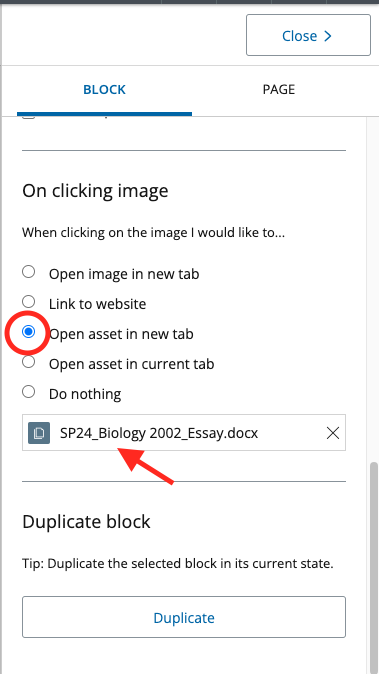
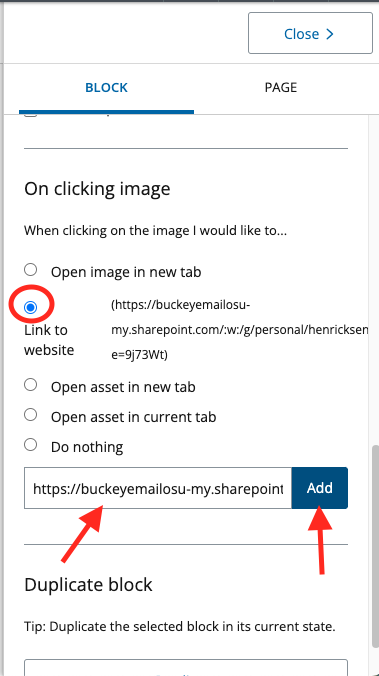
- The hyperlink to your document has now been added to the embedded image on your Page.
- Before wrapping up, you need to indicate to your audience that the image is a hyperlink. We recommend adding a caption to the image that lets viewers know clicking the image will open the document. To add captions, go to the Block tab in Properties and select Add a caption.
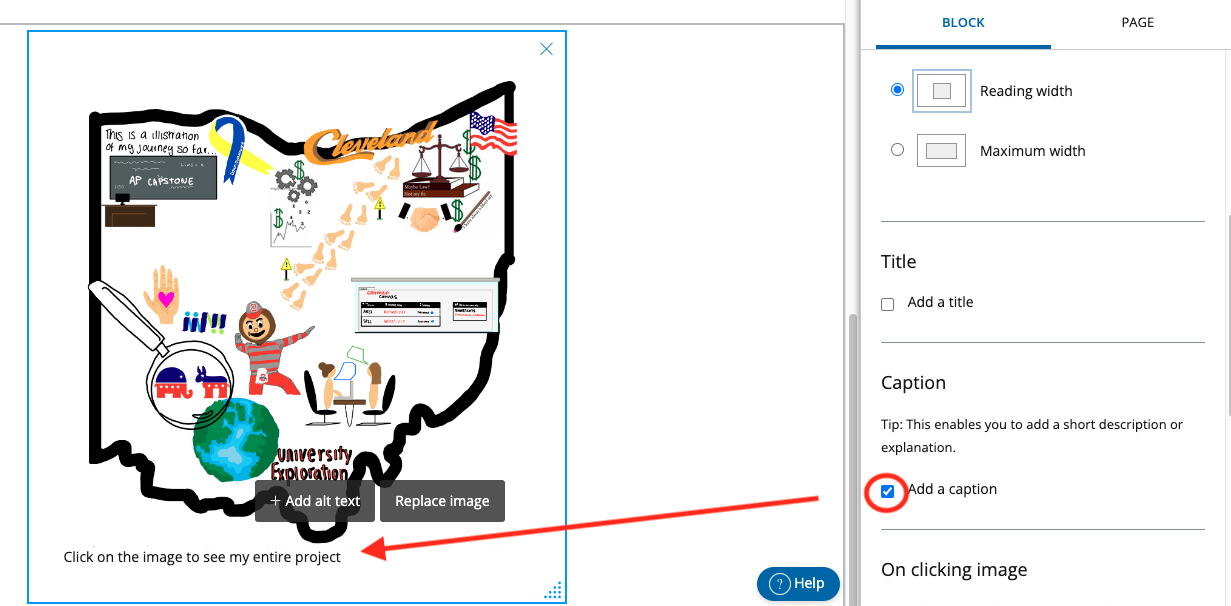
Don't forget to save your Page. To see how your teacher or viewer will see your Page, you can click the Preview button.
Embed a document.
Depending on the tool you use to create your content outside of PebblePad, you might be able to embed the project on your Page or within a Portfolio. This works for a number of tools including Adobe Express, Canva, GoogleDocs, Echo360, YouTube, Prezi, and ThingLink. See PebblePad’s full list of tools that are available to embed.
Use the following steps to embed your content.
- Grab either the URL or embed code for the project (which one is required will depend on the tool). Remember to ensure the permissions for accessing the project are set appropriately for your viewers.
- Click the +Add Content button to open the block content menu.
- Click Embed to add an embed block.

- Add the URL or embed code.
- Click the Embed button.

- Once the embedded project shows, click Properties on the top right.
- Select the Add a Title option, and then add the title in the embed block.
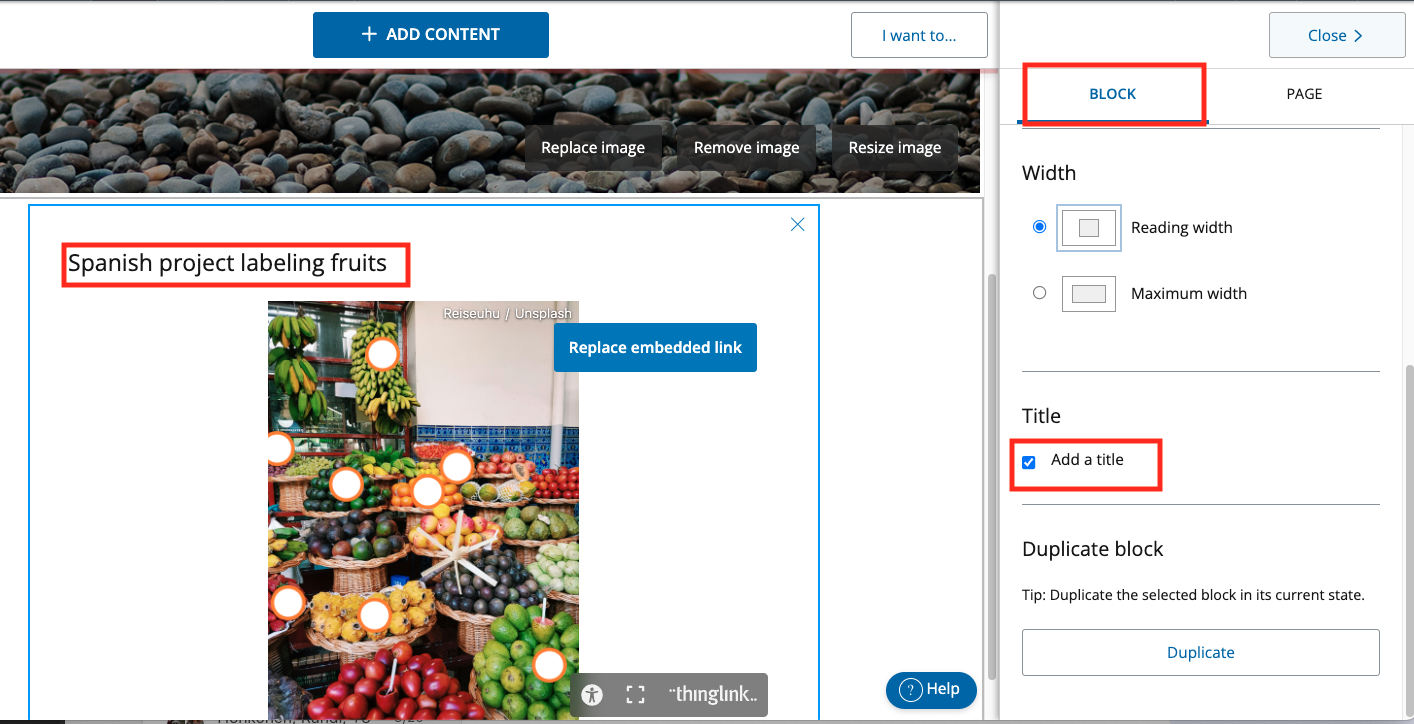
Don't forget to save your Page. To see how your teacher or viewer will see your Page, you can click the Preview button.

