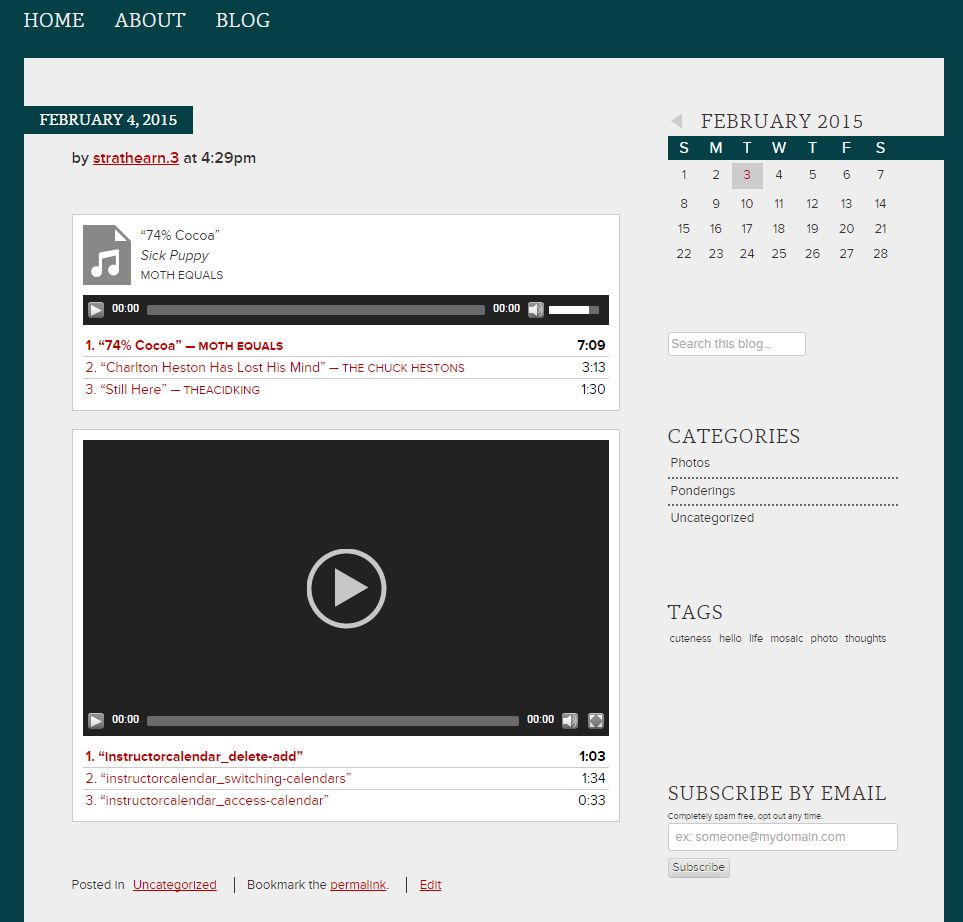
You can create audio and video playlists within your site to display your work or favorite media.
Viewers will be able to see all audio or video tracks within the playlist. The media will not begin playing automatically. The viewer can choose to start with any track and the tracks will then play in succession automatically.
The process to create both playlists is the same. The option to create a playlist only appears after you upload MP3 or MP4 files.
Create a Playlist
- Login to u.osu.edu and navigate to the dashboard of the site that you would like to edit.
- Navigate to the appropriate post or page.
Click Add Media. If no MP3 or MP4 files exists, the Create Audio Playlist and Create Video Playlist links will not appear.
Image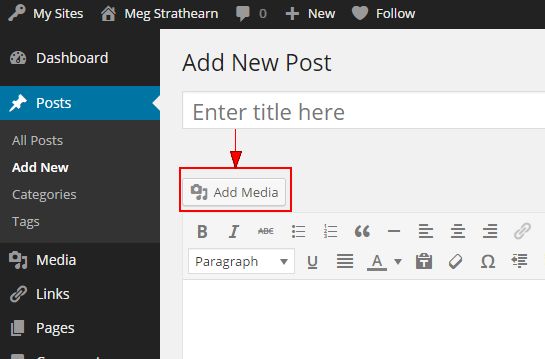
Click the Upload Files tab.
Image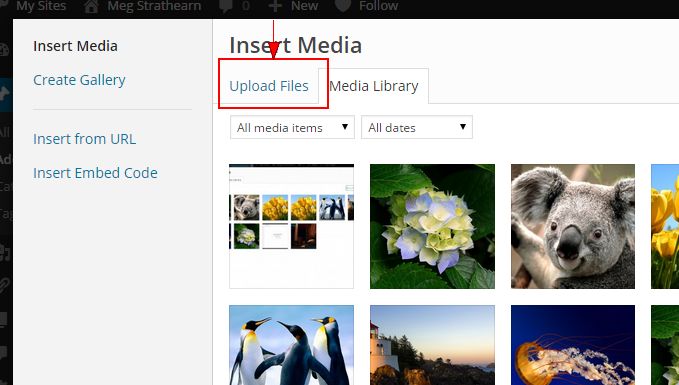
- Click Select Files or click and drag the appropriate MP3 or MP4 file(s).
The Create Audio Playlist link appears when MP3 files are uploaded.
Image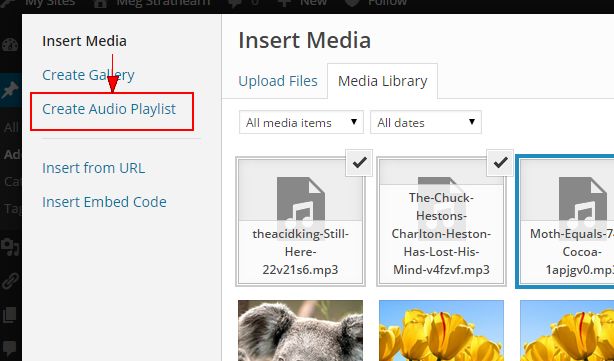
The Create Video Playlist link appears when MP4 files are uploaded.
Image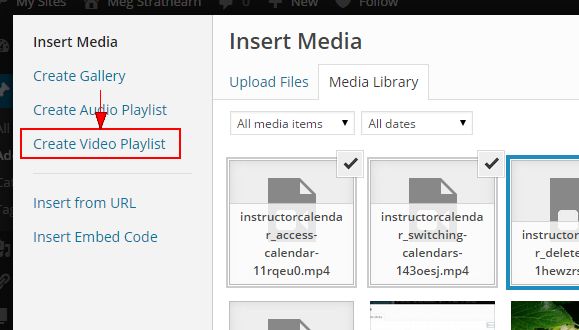
- Click Create Audio Playlist or Create Video Playlist. The Create Audio Playlist or Create Video Playlist page displays.
- Select the MP3 or MP4 files to add to your playlist.
Click Create a new playlist. The Edit Audio Playlist or Edit Video Playlist page displays.
Image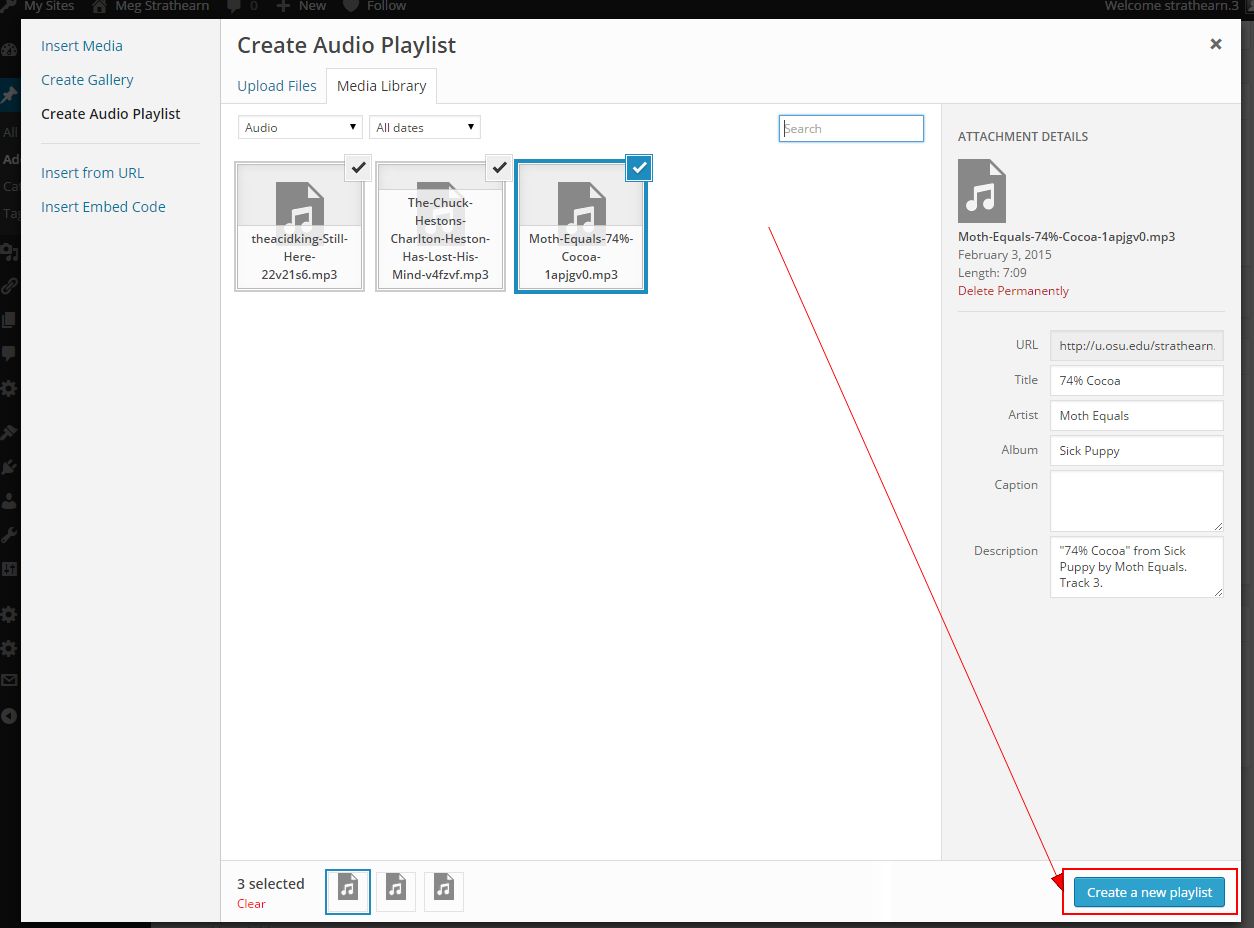
- Choose the appropriate playlist settings. The setting options differ slightly for the Audio and Video Playlists.
Audio Playlist Settings allow you three options: Show Tracklist, Show Artist Name in Tracklist and Show Images.
Image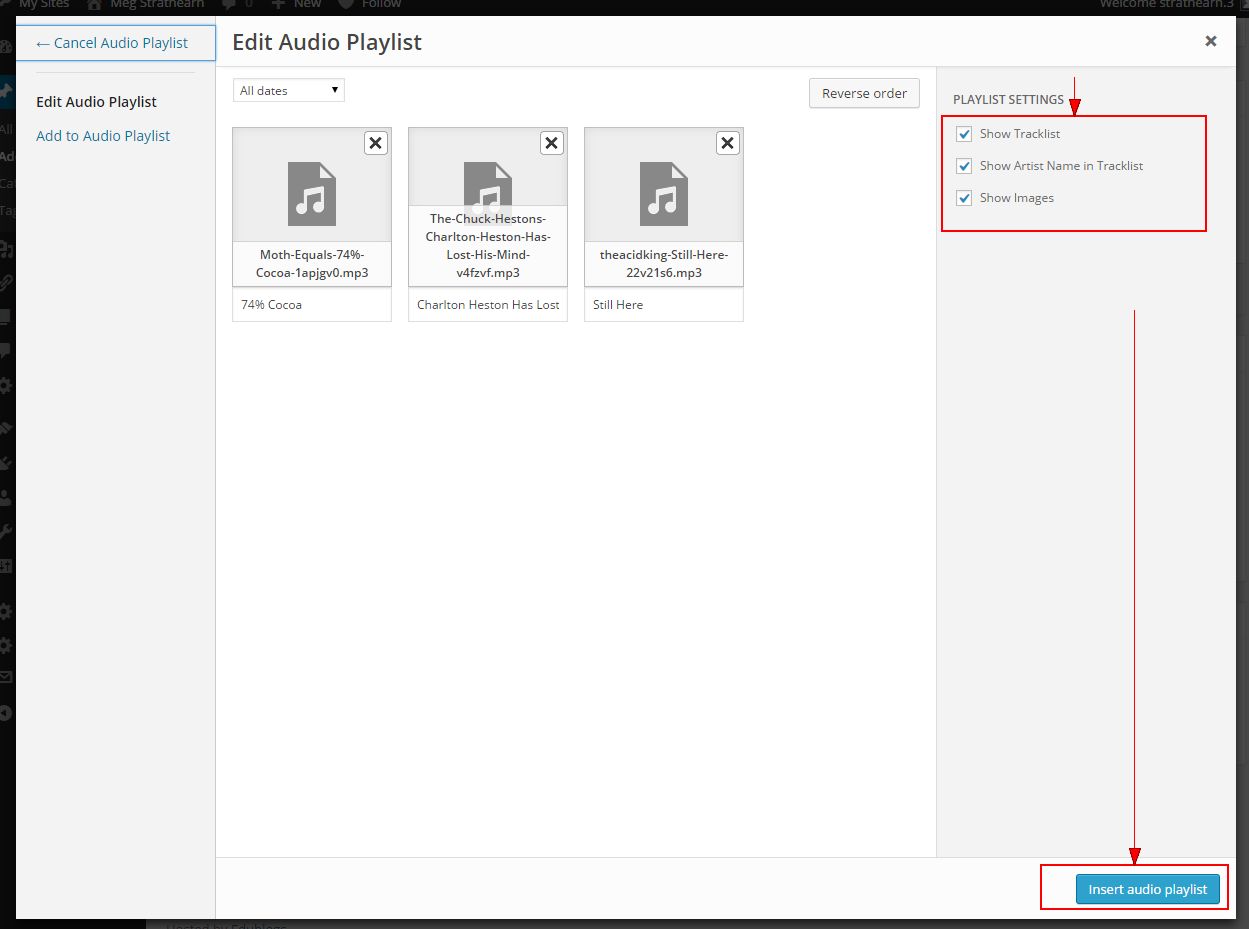
Video Playlist Settings allow you two options: Show Video List and Show Images.
Image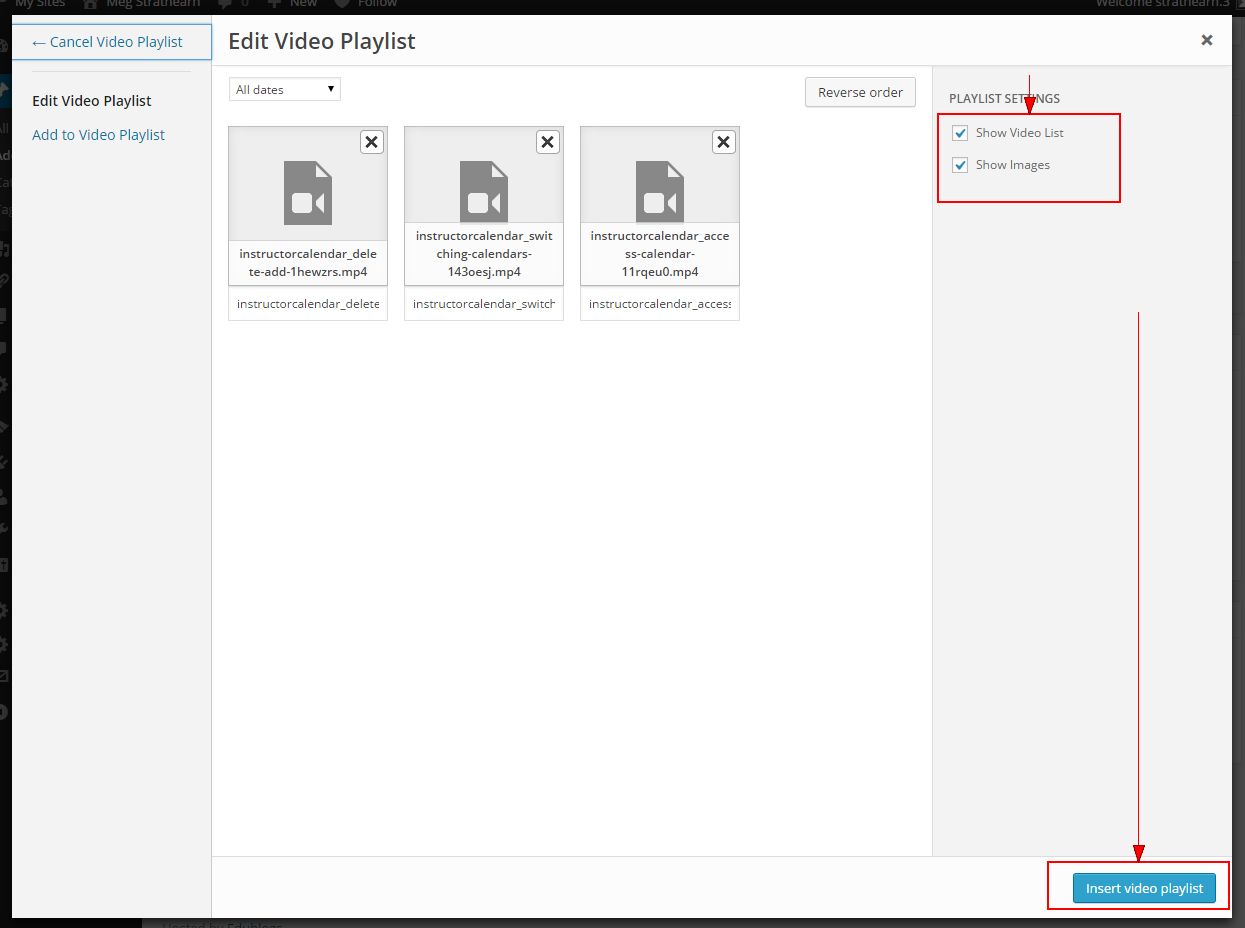
Click Insert audio playlist or Insert video playlist. See below for an example of how both and audio and video playlist on a single post.
Image