If you want to collaborate with another user on an Asset or Resource within PebblePad, you can use the collaboration feature. This gives the user full access to the project allowing them to change content, modify the settings, and make a copy.
If you only want to allow a user to make a copy of the Asset or Resource rather than full collaborative access, you will want to share it and allow user to make a copy. This puts the item in the user’s store and allows them to view and copy their own version of the asset, without getting editing permissions to your version.
How to Collaborate
1. Go to the Asset or Resource you want to collaborate on.
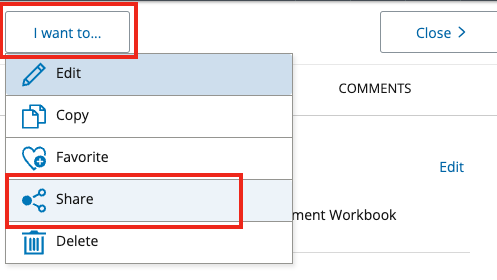
2. Click on the I want to… button.
3. Click on Share.
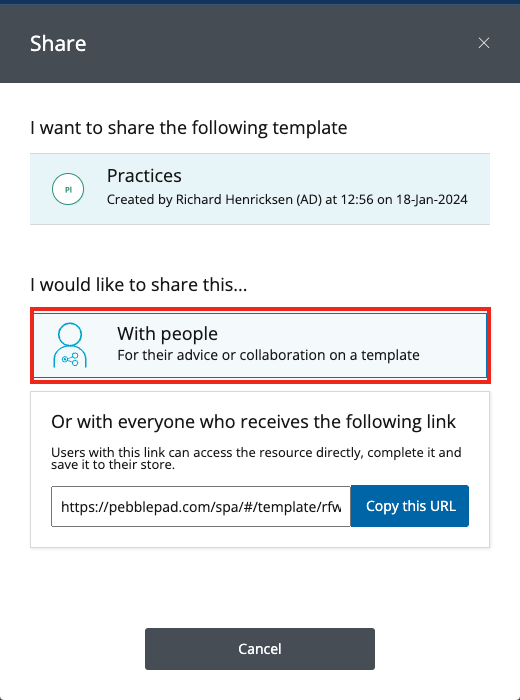
4. On the pop-up window, under I would like to share this… select With people.
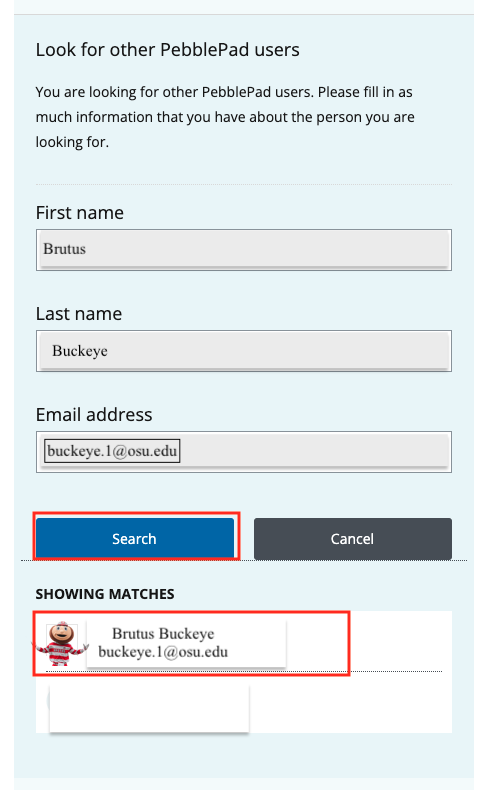
5. Search for the person you want to share with. Their name will not appear unless you have shared content with them before. Instead, click on Look for other PebblePad Users.
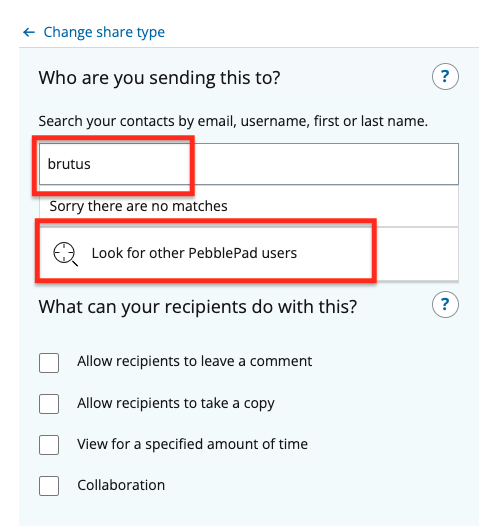
If this is your first time collaborating with a user, enter the user’s information in the fields then click the Search button. This will pull up all the users with that information in PebblePad.
Click on the user you want to collaborate with. Repeat if adding more than one collaborator. If a user doesn’t appear, the user may not have activated their PebblePad account. Have them login to eportfolio.osu.edu to activate the account.
6. Under What can your recipients do with this? select the Collaboration option. This will automatically select other options required along with the collaboration.
7. Add any message to the user. This will be included in the email the collaborator will receive.
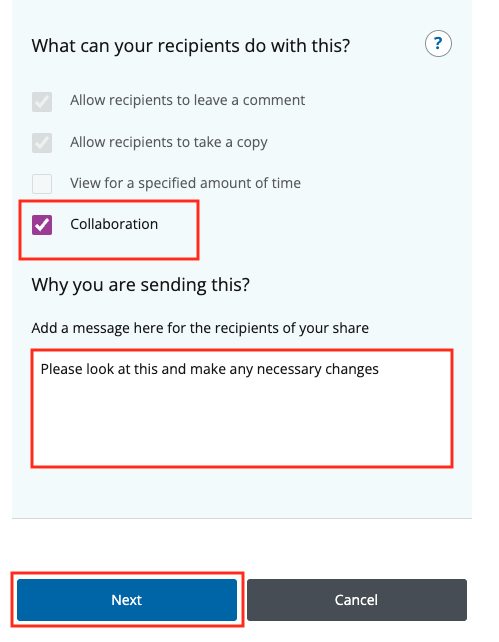
8. Click Next.
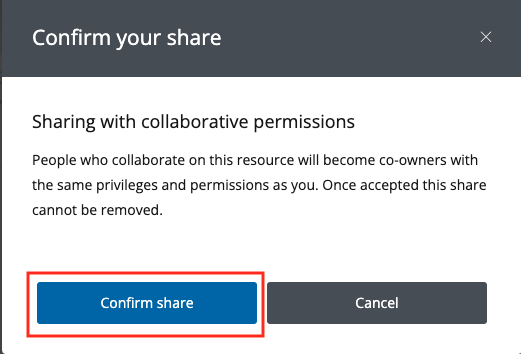
9. A message will appear indicating that the person you are collaborating with will have the same access and privileges to the document that you have. In addition, the warning indicates that collaboration is permanent and cannot be undone.
Accepting a Collaboration
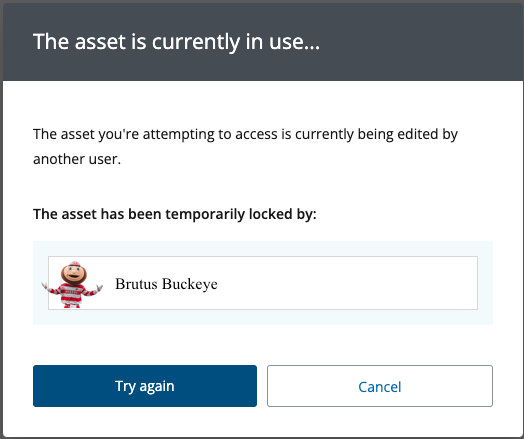
Once an Asset or a Resource has been shared with you for collaboration, you must accept the collaboration before you can begin working on the project. To accept a collaboration:
1. Go to the Asset store if what is being shared is an Asset or the Resource store if what is being shared is a Resource and find the newly shared item.
2. Click on the Asset, or click on the Edit Response option for a Resource. You will see a pop-up indicating that the item has been shared for collaboration.
3. Click Accept & Edit to proceed.

You will now be able to edit the document.
To view Collaboration information
Viewing which Asset or Resource has been shared for collaboration and with whom, can be done through the store.
If an item has been shared, the Shared with people icon will be highlighted in the appropriate store. This could mean the item has been shared for collaboration or viewing purposes only.

To determine how it was shared:
In the Asset or Resource store, click on the “i”menu for an item to view the details.
Image
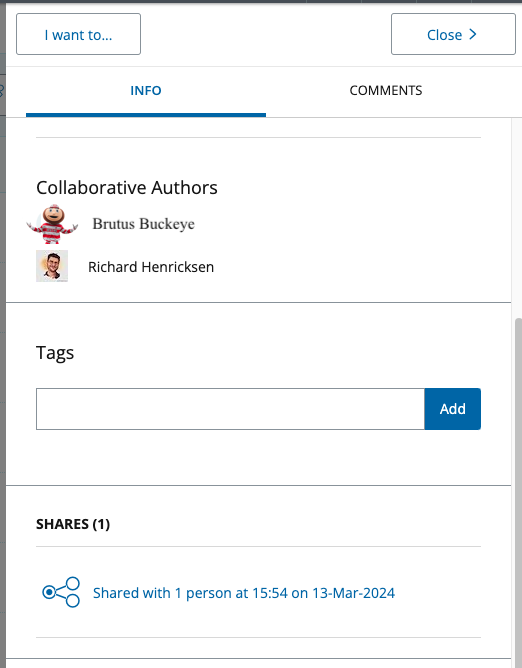
There you will see the list of Collaborative Authors and, further below, you will see the date and time the item was shared.
Image