Your Assets in PebblePad are private. No one but you can access them unless you share your Assets with others. This also means that if you run into an issue, Ohio State’s Learning Systems support team cannot access your Assets to troubleshoot the problem. In most cases, sending a detailed description of the issue along with a few screenshots to eportfolio@osu.edu will be enough for Learning Systems support to resolve the concern.
For more complex issues, PebblePad has an option that allows you to provide the support team with temporary access to your account so they can view all your Assets. You can limit how many days temporary access is granted, and you can remove access at any time. In addition, you will receive an email notification when support has accessed your account.
In general, it is best to contact the Learning Systems support team prior to granting Temporary access.
To provide the Learning Systems support with temporary access to your PebblePad account for troubleshooting purposes, follow the steps below.
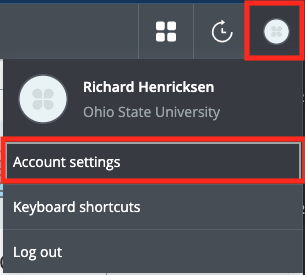
- Click your User Profile Menu on the top right corner.
- Select the Accounts settings option.
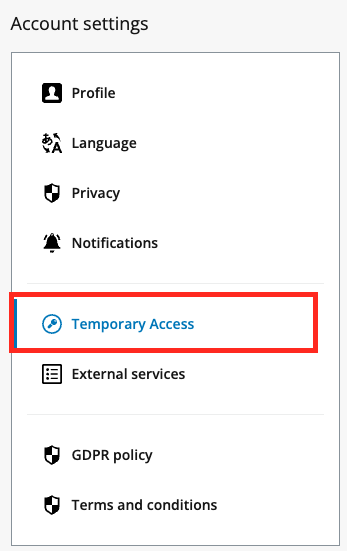
- On the profile options on the left, select Temporary Access.
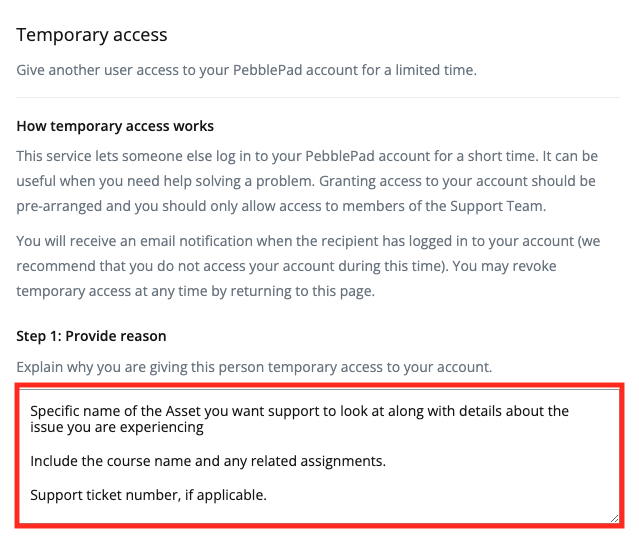
- Read over the How temporary access works information to better understand how this feature works.
- Provide a detailed reason why you are providing temporary access.
- Include specific names of Assets or Resources you need the team to investigate and details about the issue you are having.
- Include the course name and related assignment, if applicable.
- If you already have a support ticket open with Learning Systems support, be sure to include the ticket number here as well.
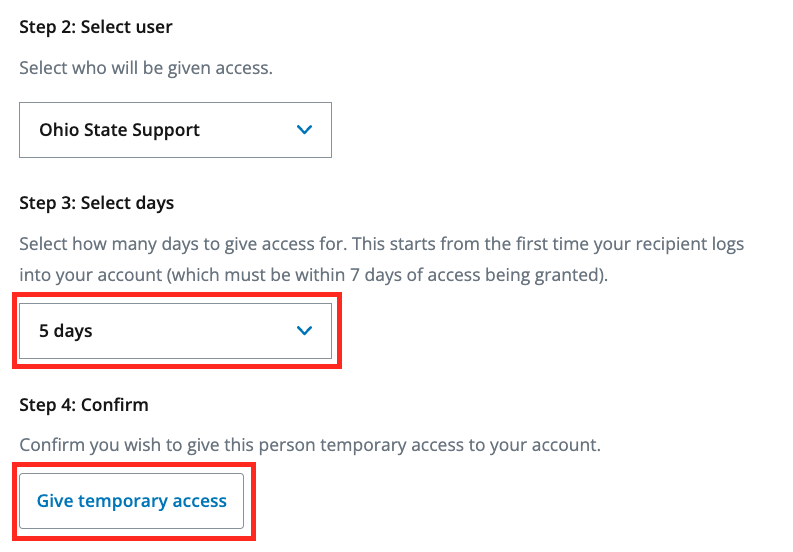
- Select Ohio State Support as the option under select user. The Ohio State Support option refers to Ohio State’s Learning Systems support team. Selecting PebblePad Support gives temporary access to the vendor’s support team; they will not be able to help with course-related questions.

- Select the number of days you want to grant temporary access. Access will expire the selected number of days after the support team enters your account for the first time.
- Click the Give temporary access button to confirm your request.
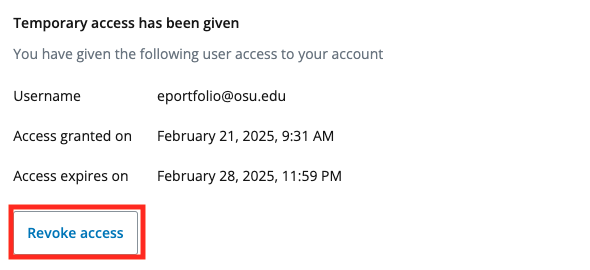
Once you have granted access, you will see a confirmation message that temporary access has been given, along with a summary of when it was granted and when it expires. You will also get an email when the support team enters your account for the first time.
At any time before the set expiration date, you can remove temporary access by clicking the Revoke Access button and confirming your intention to revoke it.