Tags are labels that you can add to your Assets and Resources to help you organize and search for them in PebblePad.
Think of tagging as connecting similar projects based on themes, course or semester work, skills you’ve developed, learning outcomes you’ve achieved, or any number of other ways you want to categorize them. Because the Store doesn’t have a folder system to organize your Assets or Resources, consistent tagging can help you keep your work more easily searchable within the system.
The more Assets you have, the more important tagging becomes.
Adding Tags
You determine how your tags are used – create the tags that will be most useful to you. Tags are not visible to other users and are not included when sharing your Assets.
You can add as many tags as you like to an Asset or Resource. For example, let's say you did a project on academic identity for your GE Launch course. This project could be tagged with a GE Launch tag to group it with other GE Launch work, an Identity tag to group it with other projects on identity exploration, and a Video tag (if the project was done in video format) to group it with other video Assets.
Develop the tagging system that allows you to best manage your Assets.
How to Create a Tag
To create a new tag, go to where tags are added (explained below) and type in a keyword or phrase that most aligns with the Asset or Resource. You can even add a hasthtag (#) if you want, but it is not required. Then click the Add button to attach the tag to your Asset or Resource. The first time you use a tag, it will be added to your existing tags so you can reuse it for other Assets.
How to Reuse Tags
To reuse a tag that already exists, start by typing the keyword or phrase. Existing tags related to the search will automatically appear in a list. Select the tag from the list, and it will be added to the Asset or Resource. Keep in mind that some Workbooks and Templates may come with built-in tags. These tags can be reused on other Assets just like tags that you create.
Where to Add Tags in PebblePad
Below are three places in PebblePad where you can tag your Assets and Resources.
When Uploading An Asset
You can add tags to an Asset when you upload it into your Asset Store.
- Follow the steps to Upload an Asset.
- Before finalizing the upload process, enter your chosen tags in the Tags field and click Add.
Through the I want to... Menu
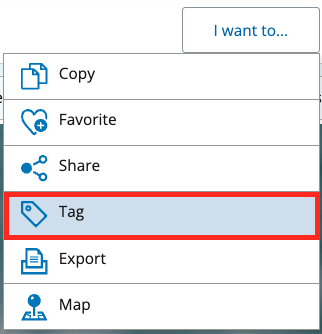
If you want to add, change, or modify tags for any Asset or Resource, you can do so through the I want to… menu in the top right corner of the Asset itself or through the Edit Resource option.
- Go into the Asset or Edit Resource option.
- Click the I want to… button.
- Select the Tag option from the menu.
In the Asset or Resource Store
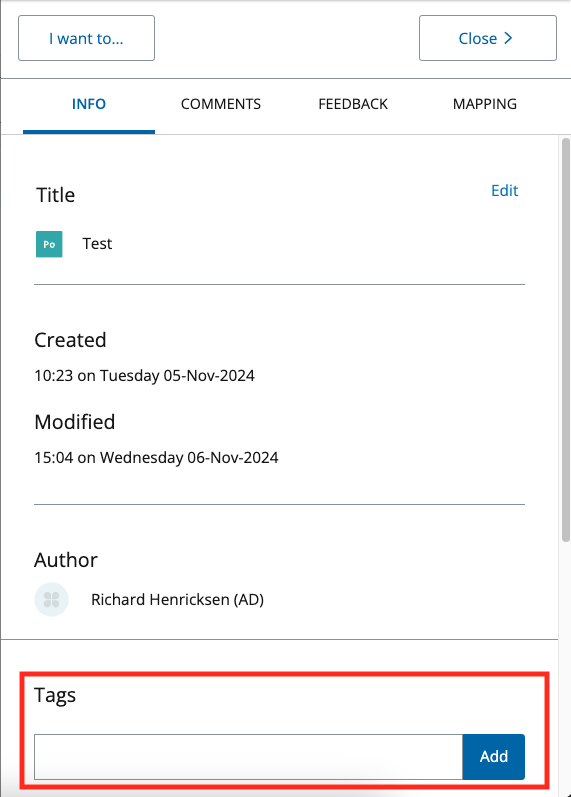
You can also add, change, or modify tags in PebblePad through the circle-i menu in the Asset or Resource Store.
- Go into the Asset or Resource Store.
- Click on the circle-i menu.

- On the Info tab, scroll down until you find the Tags section.
Searching for Tags
When you add tags to your Assets and Resources, you can then search for them in a number of ways. Here are some ways you can search for Assets and Resources in PebblePad using tags.
In the Asset Store
In addition to searching your store for a specific title or keyword, you can also search Assets and Resources by tags.
- Go to the Assets or Resources Store.
- Click the Advanced search button on the far right.

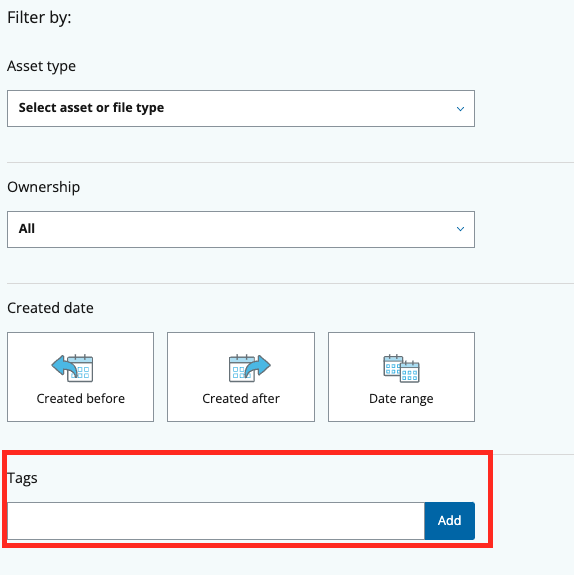
- Under Filter by: scroll down to the Tags section.

- Begin typing your tag in the Tags field – a list of all related tags will appear.

- Select the tag and it will add it as a flag.

- Repeat if you want to filter by an additional tag. You can also click Search Now to bring up a list of Assets or Resources that use the tag.
When Adding Evidence
When working in a Workbook or Template that has been shared with you, you might be asked to add evidence. You can use tags to search for the Assets you want to include as evidence.
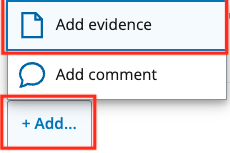
- In the Workbook, click the +Add... button, and then select the Add evidence option.
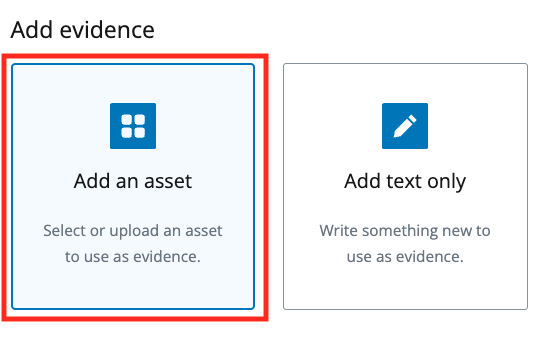
- Select the Add an asset option on the sidebar.
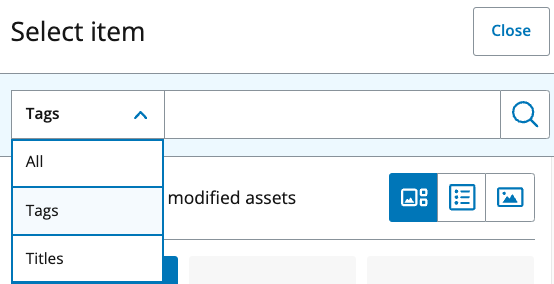
- By default, the system searches for titles, keywords, and tags. If you want it to only search for tags, select Tags from the search options in the dropdown menu.
When Adding a Hyperlink to an Asset
When working in the rich content editor anywhere within PebblePad, you can create hyperlinks to other Assets. Tags will help you search for Assets that you want to link.
- In the rich content editor, click the Link icon.

- The search option in the Add link pop-up only searches for titles. To search for tags, click the More options button.
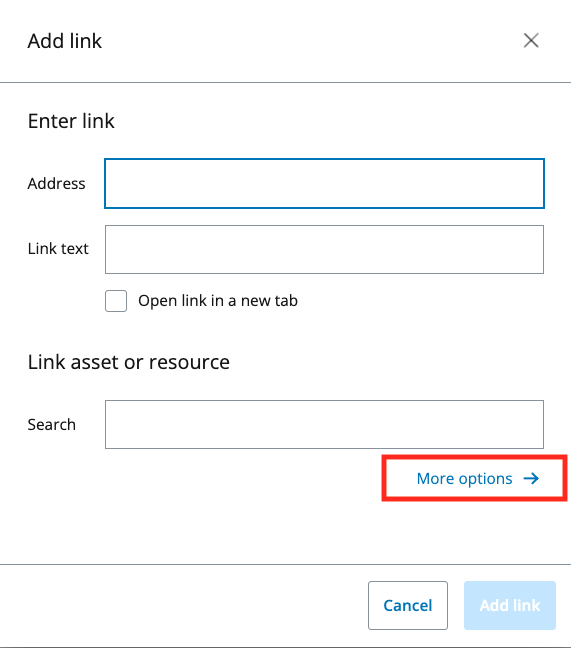
- In the next screen, you can search for Assets and Resources by tags.

- Find your chosen Asset and add it as a link.
Creating Collections with Tags
A Collection, part of PebblePad’s Get Creative toolset, is a list of Assets grouped together based on specific criteria, such as a tag, Asset type, or date range. Collections can be either static or dynamic. A static Collection is one where you add or remove Assets manually. A dynamic Collection has defined criteria. When you add Assets that fit those criteria to your store, they are automatically added to your Collection.
Tags are an excellent way of aggregating Assets as part of a Collection.
Use the following steps to build a dynamic Collection using tags.
- Select the Create a Collection tile in the Get Creative space.
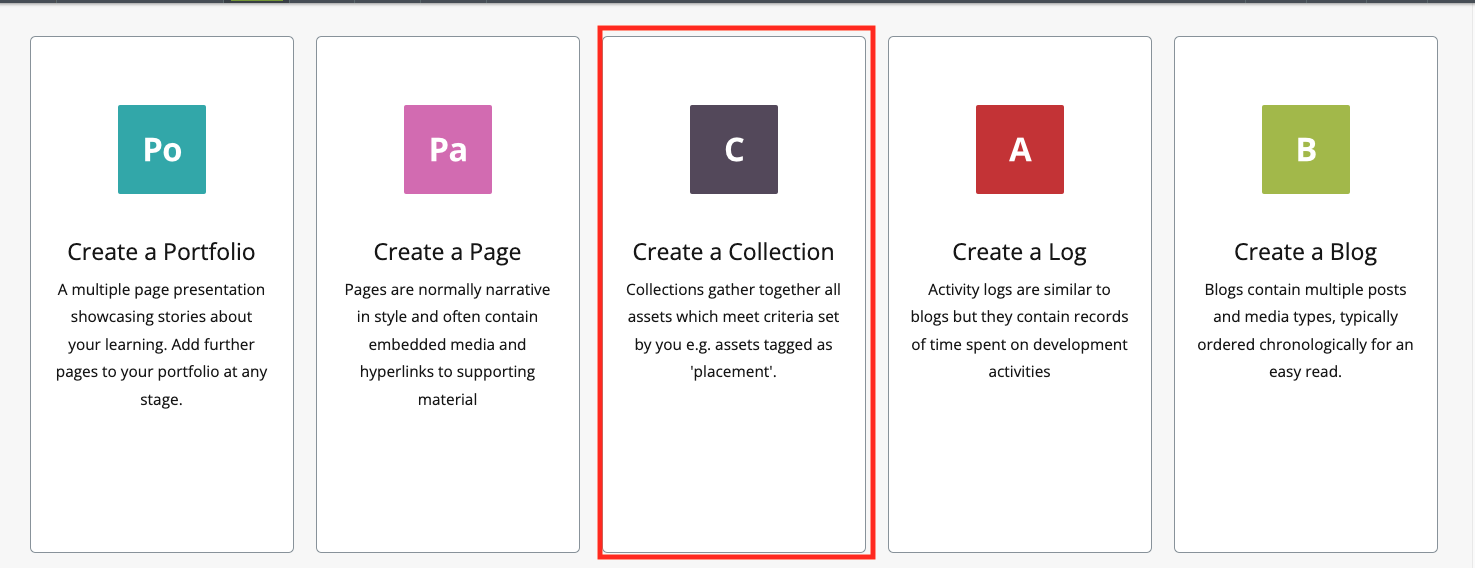
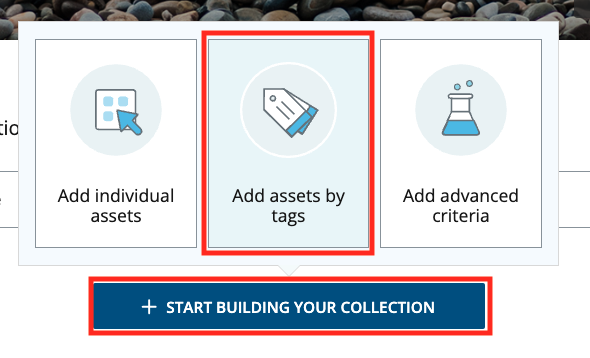
- Click the + Start Building Your Collection button and select the Add assets by tags option.
- On the sidebar add the tag(s) you want your Collection to compile.
- A list of all Assets with the tag(s) will populate below – review the Assets that will be included.
- Click the Confirm button to add the Assets to your Collection.
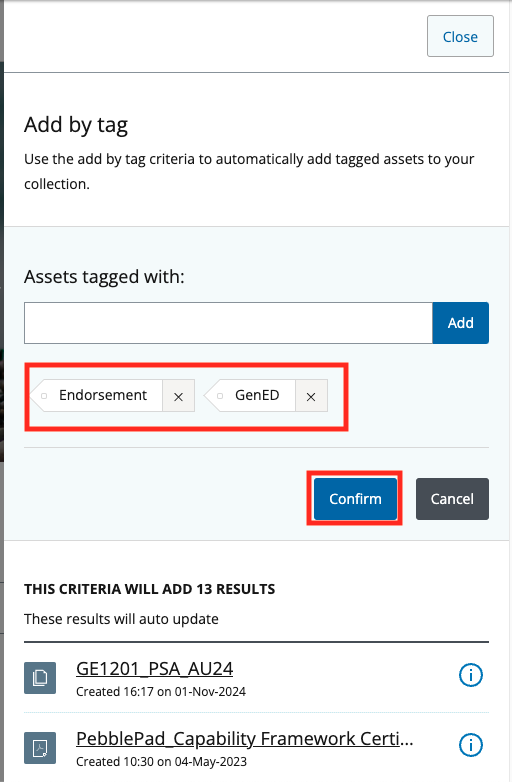
From now on, any Asset tagged with a tag included in this Collection will automatically be added to it.
Setting Cascading Tags on Resources
When creating Workbooks or Templates to share with learners, you can add tags that the Resource will retain after it is shared. These are called cascading tags. Cascading tags will also be added to the learners' available tags to reuse for other projects.
Follow the steps below to set cascading tags for a Resource.
- Go into the Edit resource mode of the Workbook or Template.

- Select Properties on the top right.

- If creating a Template, go to the Template tab. If creating a Workbook, go to the Workbook tab.
- Click the Cascade tags box under the Cascade tags section.
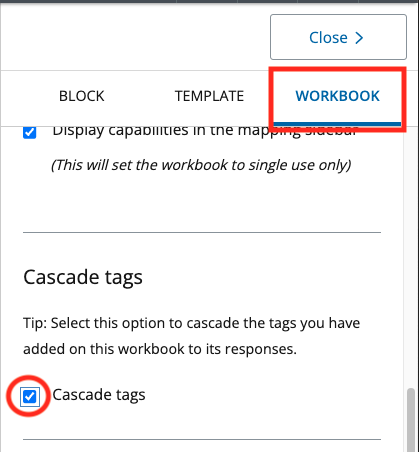
Once this option is selected, any tags you have attached to the Resource will follow it when shared with other users.

