

We recommend that you create a new table in Simple Syllabus when needed, rather than copying and pasting one from another source. This encourages you to examine your table for accessibility and avoids format inconsistences that can appear when copying content from outside sources.
Here are some helpful tips for creating tables using Simple Syllabus.
Creating a Table
Use these steps to create a table. Remember that you can use undo/redo as you build your table structure.
Insert Table
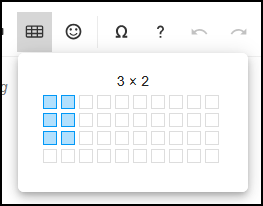
To begin, click the toolbar at the top of the editor, then select the number of rows and columns you anticipate needing. Hint: When you first click the “insert table” icon, you’ll be shown a grid of cells that is two cells high. To create your table with more than two cells high, hover your mouse over the cells and slowly drag your mouse down and more rows will appear. Use your mouse to select what size of table you want.
The maximum number of rows you can select is ten rows, but once the table is inserted, you can add more rows.
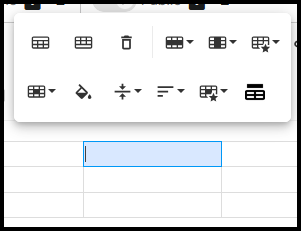
Once the table is in place, click into any cell to display the tools that assist with table customization.
Inserting and Deleting Rows and Columns
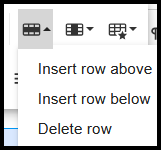
You can insert/delete rows and columns as needed by clicking into any of the cells in the table and selecting the icons for these options in the table editing tools.
Widen or Narrow Columns
To widen or narrow the columns, drag the columns to the desired width. To do this, hover your mouse over the divider between two columns and your mouse will change from the normal arrow icon to a double line with two arrows. Click and drag the column to the desired width.
Merge and Split Cells
Use the Merge cells option to combine two or more adjacent cells within your table. To merge cells, click-and-drag your mouse to highlight the cells you want to merge. The editing tools box will appear; select the editing tool button called “Cell” then select “Merge cells.”
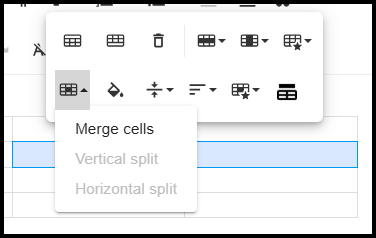
To split cells, click in the cell you want to merge; this will highlight the cell and the editing tools box will appear. Select the editing tool button called “Cell” then select “Vertical split” to create two cells on either side of each other, or “Horizontal split” to create two cells above/below each other.
Add a Table Header
Using proper table headers is a requirement for tables to be accessible. Click on the Table Header icon to automatically generate a Table header. A new row will be added at the top of the table. The cells will be shaded gray by default, but the cell color, as well as font color, style, and size, are all customizable using the table editing tools provided.
Editing Content
Use these steps to edit your content within a table.
Pasting Content into a Table
While pasting an entire table into Simple Syllabus is not recommended, content can be pasted directly into table cells. HINT: Strip any formatting first to help maintain consistency and avoid formatting issues. Strip formatting by using these keyboard shortcuts:
- On PC/Windows devices: Ctrl + Shift + V
- On Apple/Mac devices: Shift + Command + V
Hyperlinking Text
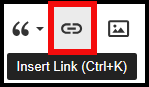
To hyperlink text within a cell, type your desired text and click the “insert link” icon.
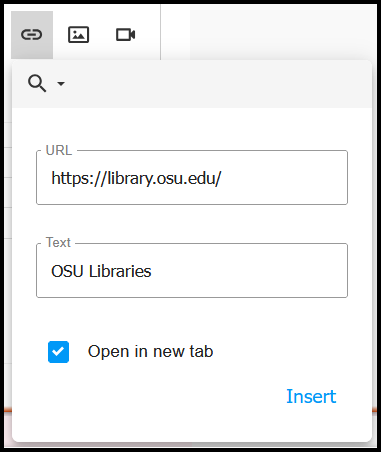
Paste your desired link in the URL box and verify that it is accurate. Check the “open in a new tab” box to ensure students who click on the link are not navigated away from the syllabus.
For more help with formatting tables, please email syllabus@osu.edu.