By default, your site starts with the blog page as home, plus 1 additional page. New pages are added as part of the top navigation of your site as they are published.
There are a number of reasons you might choose to create a custom menu. For example,
- you want your menu items to be different from your page names,
- you want to create a drop-down affect by adding sub-menu items,
- you want a menu item linking to an external site.
Before you begin, we recommend that you create all necessary pages and categories. Note that if you begin without all pages created and check the option Automatically add new top-level pages to this menu, only top-level pages (e.g. Parent pages) will be automatically added to your navigation. Sub items (e.g. child pages) must be manually added.
Creating a Custom Menu
- Login to u.osu.edu and navigate to the dashboard of the site that you would like to edit.
- Click Appearance from the left navigation.
- Select Menus from the displayed menu.
- Click Screen Options at the top of the screen to choose which items are displayed, or not displayed on this screen. Choices include: pages, posts, links, categories and tags. Check the box next to each option you want displayed. Click Screen Options to close the Screen Options. By default, the Posts item is hidden by default.
From the Menus page, type a menu name and click create a new menu. New menus appear as a tab in the Create Menu box.
Image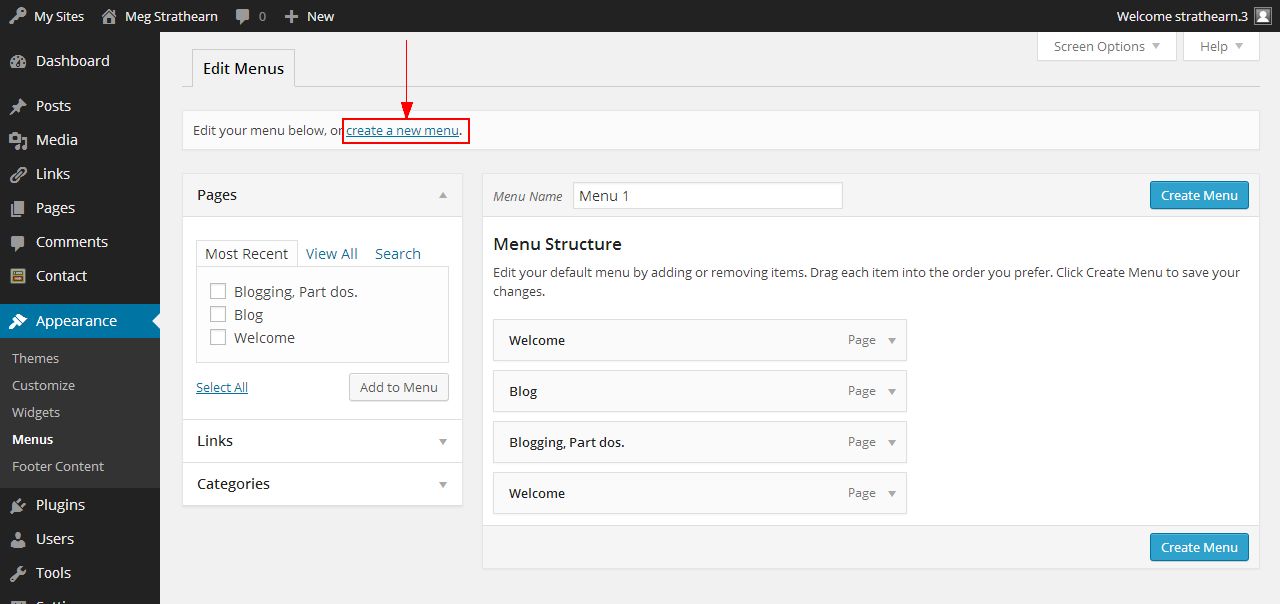
Give your new menu a name and click Create Menu.
Image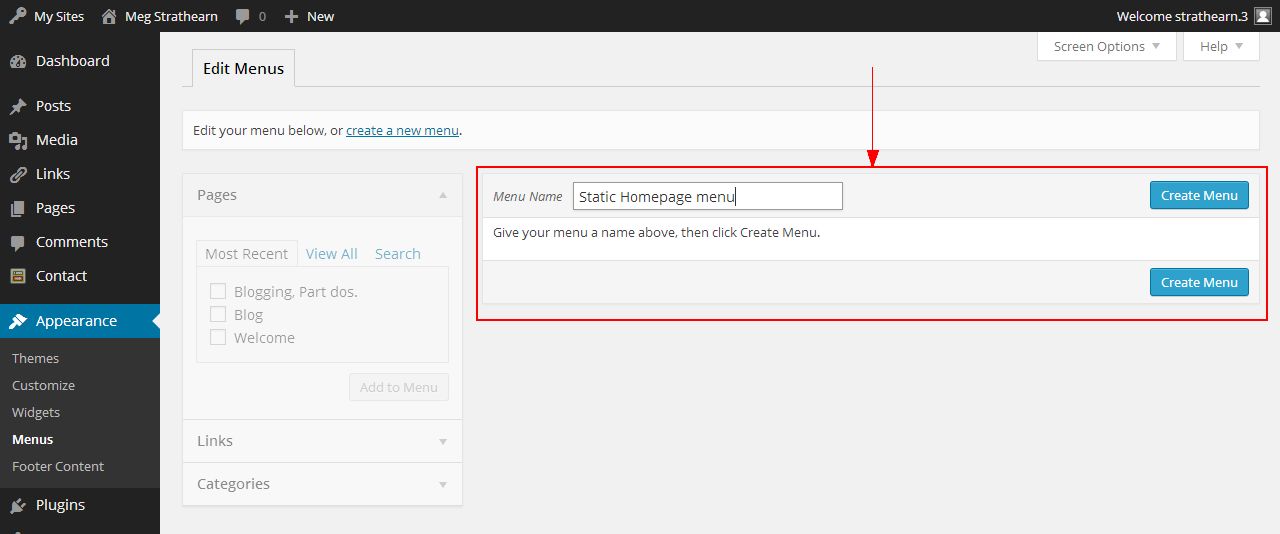
From the selections on the left (Pages, Links, Categories) check your desired choices.
Image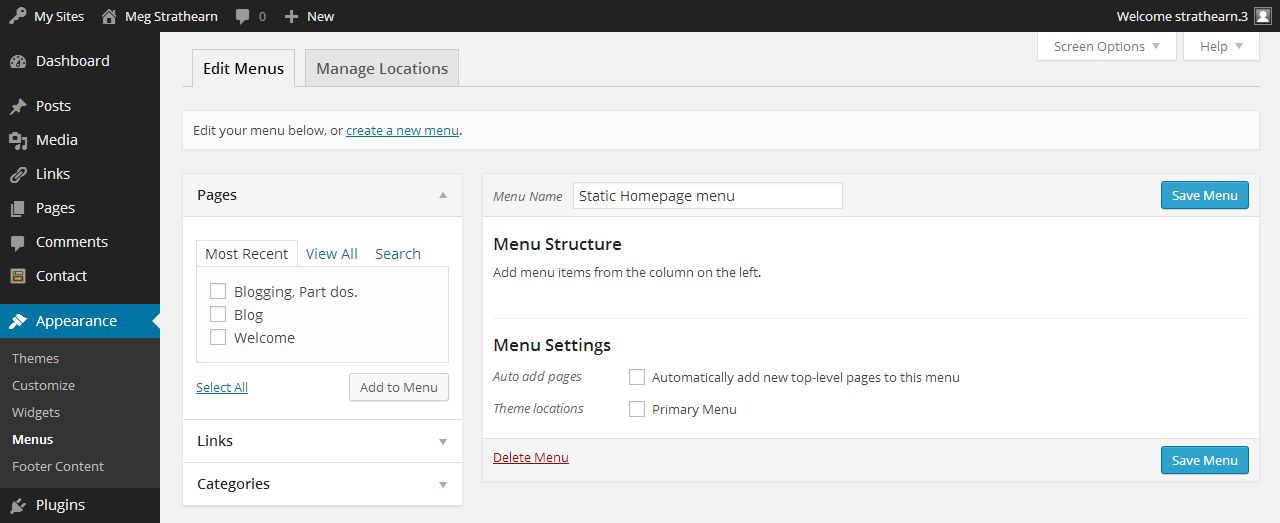
- Click Add to Menu.
Organize your menu items by clicking and dragging them into the appropriate order.
If desired, create sub items by clicking and dragging the item to the right. This will create a drop-down affect on your site. All sub items become part of the drop-down menu beneath the top-level menu item.Image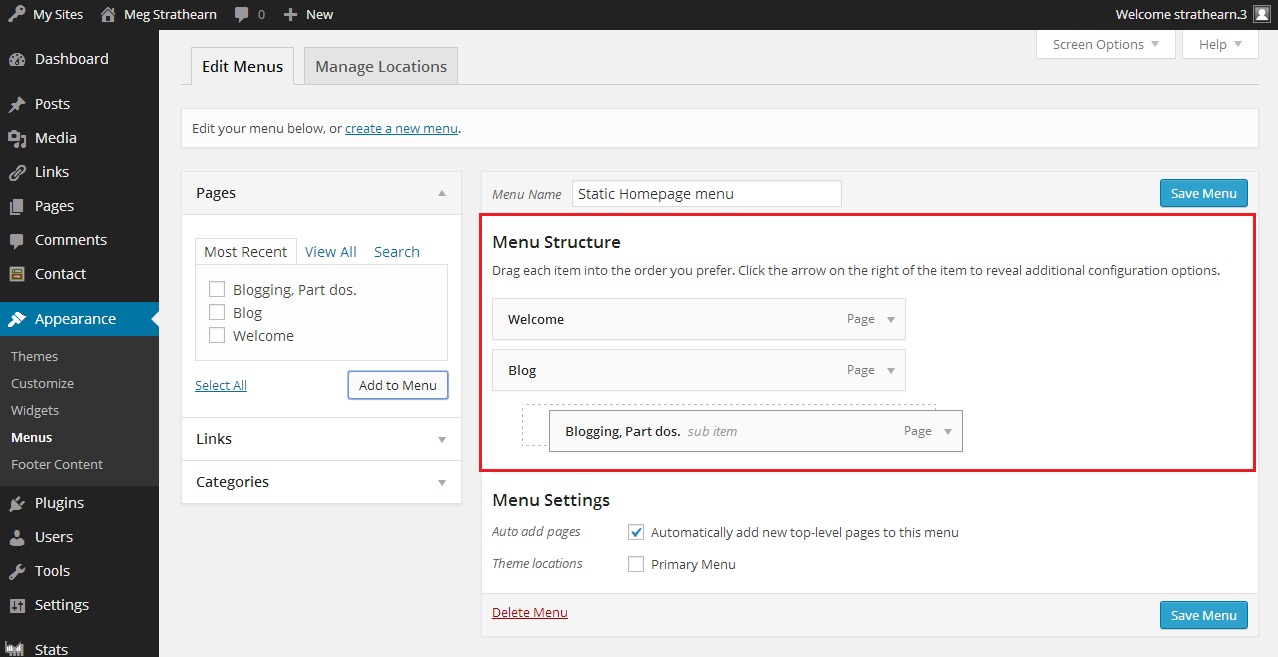
- Check Automatically add new top-level pages if desired.
Check this box if you want to automatically link to each top-level page when it is created. Otherwise, you will need to do so manually. Note that sub items (e.g. child pages) of the top-level page (e.g., Parent) will not automatically appear here. They will always need to be manually added. To activate your menu, check Primary Menu to automatically make the menu your primary menu once you save it.
The Primary menu is your top navigation menu; it is part of your site's theme. You can have multiple menus for different times in the semester or different purposes. However, only one menu can be used as your top navigation menu (e.g., Primary).- Click Save Menu.
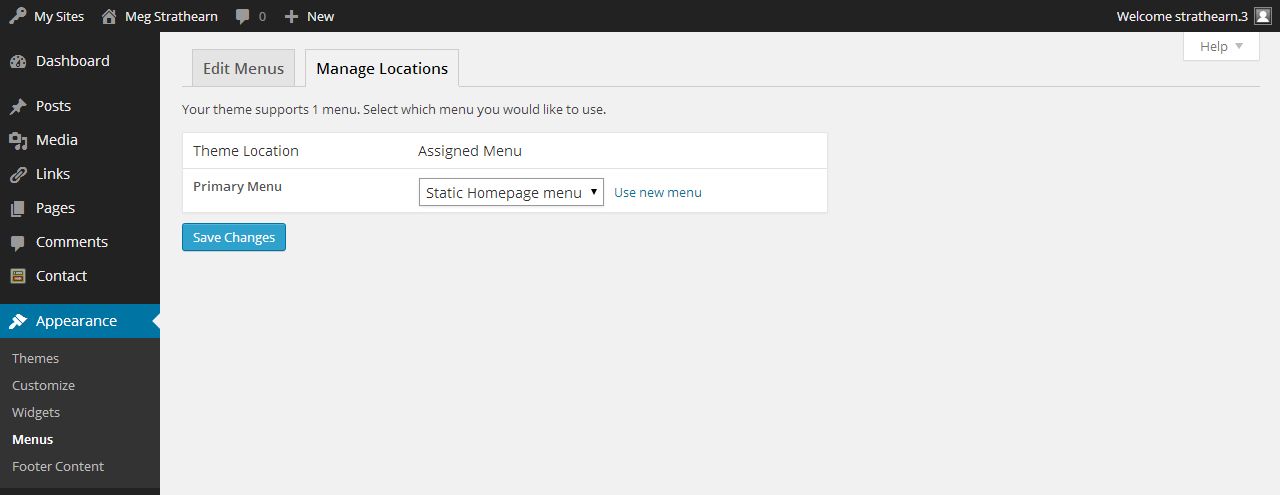
- Alternatively, you can activate your menu, or switch Primary menus, by clicking the Manage Locations tab at the top. The Manage Locations page displays.
- Click Select a Menu next to the Primary Menu.
- Choose the menu you would like to be your Primary menu.
Click Save Changes.
Image