A photo gallery allows you to share multiple photos in a post or page. To add single image(s) instead, see Adding Images to a Post or Page.
To add a photo gallery, use the following instructions:
- Login to your u.osu.edu account.
- Create, or navigate to an existing, post or page.
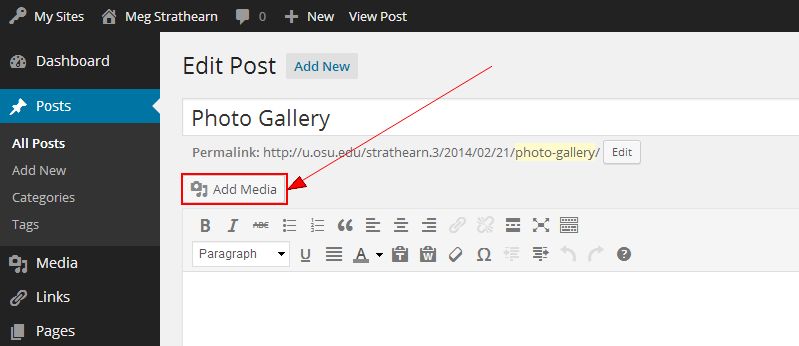
- Click the Add Media button above your main content field. A pop-up window appears.
Image
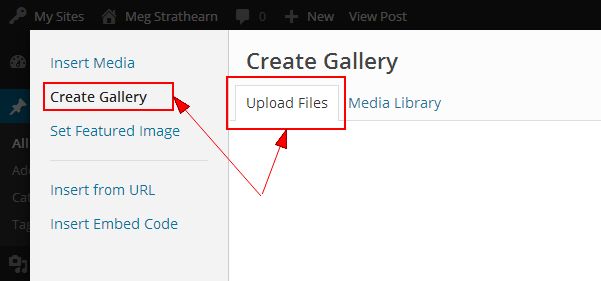
- Select Create Gallery from the left-side Main Menu.
- Click the Upload Files tab.
Image
- Drag the image files from your computer into the upload window.
OR
Click Select Files and choose the appropriate images. - Once the upload is complete, the Media Library tab opens. Check the images from the Media Library that you would like to add to the photo gallery.
You can add to each image a title, caption, alt text and description as needed.Image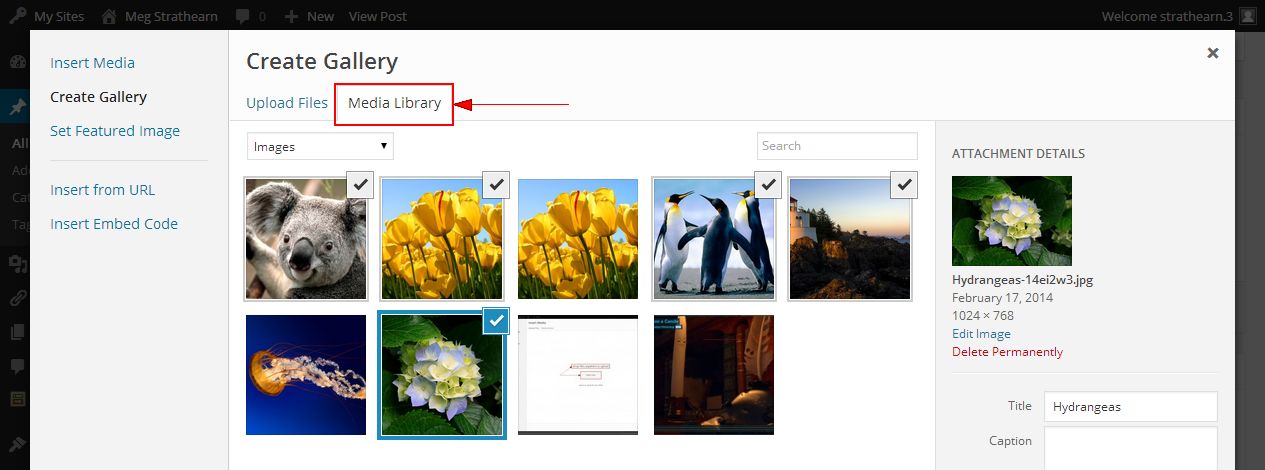
- Click the Create a new gallery button. The Edit Gallery page opens.
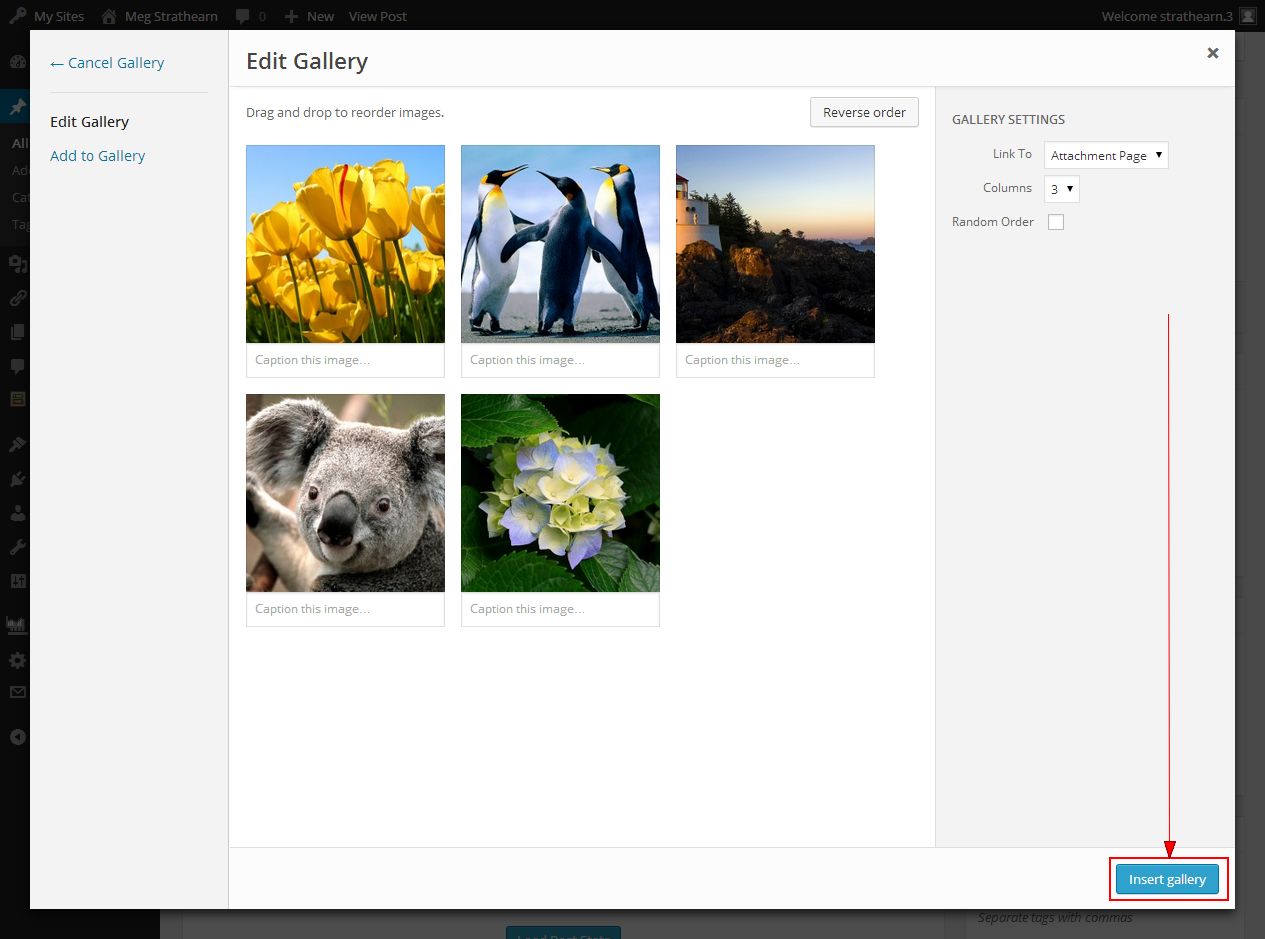
- The Edit Gallery page allows you to modify your gallery settings.
Deciding between the gallery options is a matter of personal preference and we encourage users to experiment with the available choices and preview their posts before publishing to see what works best for them.- Order - Drag and drop the images to reorder them, or click "Reverse Order" to change the order easily.
- Add - Click "Add to Gallery" in the left navigation to add more images.
- Delete - Delete the image from the gallery by hovering over it and clicking the 'x' in the upper-right corner of the image.
- Captions - Click "Caption this image" to type a caption for your images.
- Choose Display Settings - Use "Gallery Settings" on the right to change column numbers, set random order and set a "link to" setting.
- Choose "Link to Attachment Page" to place the image in an HTML page, along with the caption you provided and other information.
- Choose "Link to Media Image" for a large full-size version of the image you selected. However, no captions or navigation links display.
- Enable the JetPack Plugin to activate the Slideshow Embeds and Tiled Galleries widgets. This allows you to choose Gallery Types (e.g., titled mosaics, slideshows, etc) in addition to linking to an attachment page or media image. Doing so grants you the ability to both show captions and full-size versions of the images you select.
- Cancel Gallery - Click "Cancel Gallery" in the left navigation to cancel out of the gallery.
- Click Insert gallery. A placeholder box appears in the post. Preview your post to view the photo gallery.
Image