

Differentiation Tags (or tags for short) are used in the Carmen People menu to assign content selectively to specific users. You can create your own customized tags for your courses, depending on the reasons you need to easily identify certain groups of students to differentiate assignments, materials, due dates, and so on.
You might be wondering how tags differ from Sections and Groups in Canvas. Learn about their different purposes and functions in the dropdown below.
Understanding Sections, Tags, and Groups
There are three ways to organize students within a CarmenCanvas course: sections, groups, and tags. While there is some overlap, they differ in how they are created, how students are added, what functions they provide, and how visible they are to students.
Sections
Sections are typically used to organize students in multi-section courses, and they are set up when the course itself is created.
Sections can be used with the Assign To function for assignments, quizzes, modules, and announcements. The gradebook can be filtered by section in multi-section courses. Inbox messages can be sent to specific sections. The TA and Grader roles can only see people in the sections in which they, themselves, are enrolled. The Student role can see section names on the People page. When adding people to a course via Manage Participants, at least one section must be chosen.
- Academic courses: Sections in Carmen align to enrollment sections from the Registrar’s system. Students and instructional staff are added and removed via the overnight enrollment sync. Instructors can manually add individuals but cannot currently change section membership.
- Forums: Users can create and name additional sections when they first request a forum course. Please note that additional sections cannot be added once a course has been created. Instructors cannot currently change section membership.
Differentiation Tags
As noted above, Differentiation Tags can be used to assign content selectively to specific users.
Tags are created by instructors from the People page in a course. You can create single tags (e.g., “Graduating Students”) or Tag Sets (e.g., a set called “Accommodations,” with tags for “time and a half” and “double time”). You can assign and remove students from tags via the People page. Users in the student role will not see tags anywhere in the course.
Tags can be used with the Assign To function for assignments, quizzes, and modules. The gradebook can also be filtered by tag, and inbox messages can be sent to specific tags.
Groups
Groups are a collaborative tool to facilitate group discussions and group assignments (which can be graded as a group or individually). When in a Group site, students will be able to create pages, upload files, and engage in discussions with other group participants.
Groups are created by instructors from the People page in a course. Members of a group have access to a “mini site” within the course. You must create a Group Set (e.g., a set called “Research Projects,” with groups for each topic). You can assign and remove students from groups via the People page or can set up groups that students add themselves to. The Student role can see groups on the People page and can access groups in which they are members from the Groups icon on the global navigation bar.
Groups cannot be used with the Assign To function but can be used to filter the Gradebook. Inbox messages can be sent to specific Groups.
You might use Differentiation Tags to:
- Identify students who have accommodations through Student Life Disability Services, so you can more easily set a longer availability window.
- Identify graduating students so you can calculate their final grades early.
- Tag athletes or other students who frequently need adjustments to assignment dates.
- Assign differentiated homework, quizzes, or other materials to groups of students.
Using Tags in Your Course
Explore the dropdowns below to learn how to set up tags, assign tags to students, differentiate content and assignments by tag, and filter the Gradebook by tag.
Create New Tags
- Navigate to the People page in your CarmenCanvas course.
Click the Manage Tags button.
Image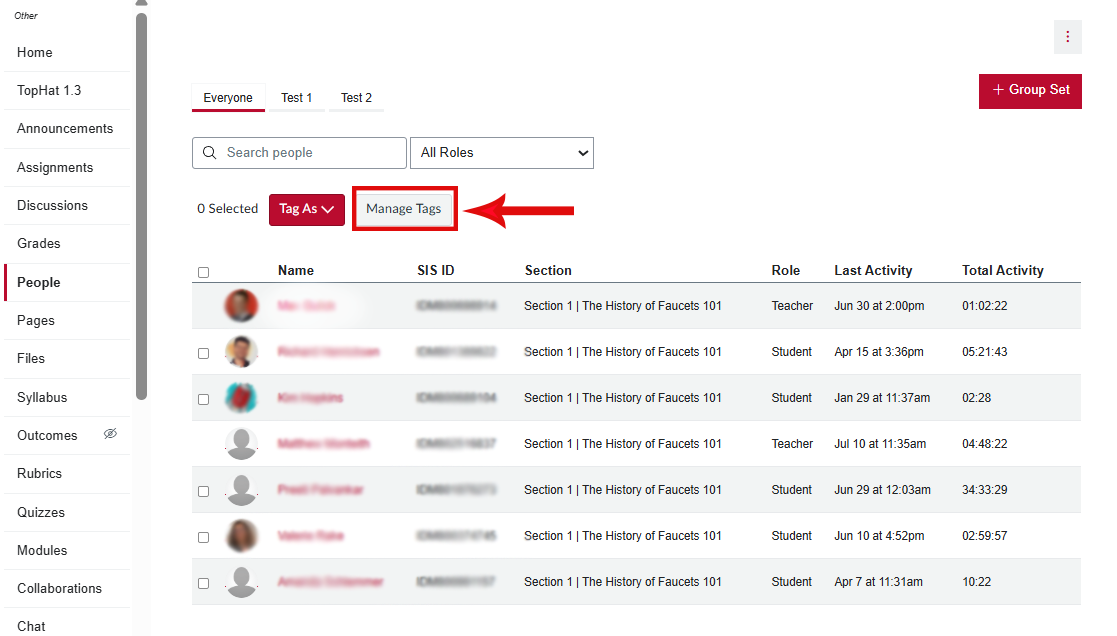
This will open the Manage Tags interface on the right-hand side of the screen. Here you can manage your existing tags or create new tags by clicking the Red + Tag button.
Image
- When you click + Tags, you can choose whether to create a single standalone tag or a Tag Set that has variants.

- Click the Save button.
Assign Tags to Individual Students
- To assign tags to specific students, return to the course roster on the People page.
Click the box next to each student name that you wish to tag.
Image
Click the Tag As dropdown menu and select the tag to apply it to the students you have selected.
Image
You can remove tags by following the same steps, then selecting Untag from the option’s menu.
Image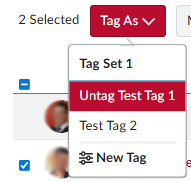
You can see which Tags a student has by clicking the tag icon next to their name in the course roster.
Image Image
Image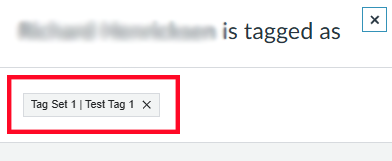
Assign Content by Tags
- Navigate to the Assignment for which you intend to assign tags.
- Click the three-dot menu on the right-hand side of the assignment Then click the Assign To... button.
- Image

Select the tag you wish to use from the dropdown menu.
Image
- Adjust the Assign To dates as desired and click Save.
Filter the Gradebook with Tags
- Navigate to the Gradebook section of your course.
- Click the Apply Filters button to open the dropdown menu. Then click Differentiation Tags.
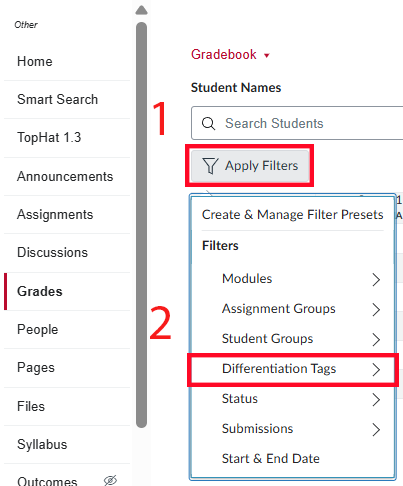
- Select the Tag you wish to filter.
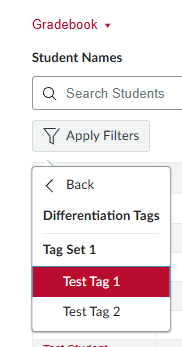
- Your gradebook will now be filtered by which tag or tags you selected.
Importing Tags
You can assign tags by importing a spreadsheet. A downloadable template is provided as a foundation for this process. This can be found under the Import Tags section of your CarmenCanvas Course's People tab.
You can create the tags as well as assign students to them during the import process. If you have already created tags and assigned one or more students, the exported template will include the Canvas IDs associated with the tags. A successful import needs to have at least one correctly formatted field for “tag_name,” “canvas_tag,” or “tag_id.” You may wish to delete unneeded columns from the spreadsheet before starting your import.
If you need to assign multiple tags to a single student, you will need one row in the spreadsheet for each tag that student will be assigned to.
A technical explanation about the requirements for the import file is available.
Navigate to your course’s People menu, and then click the Manage Tags button. Next, click the Upload CSV button.
Image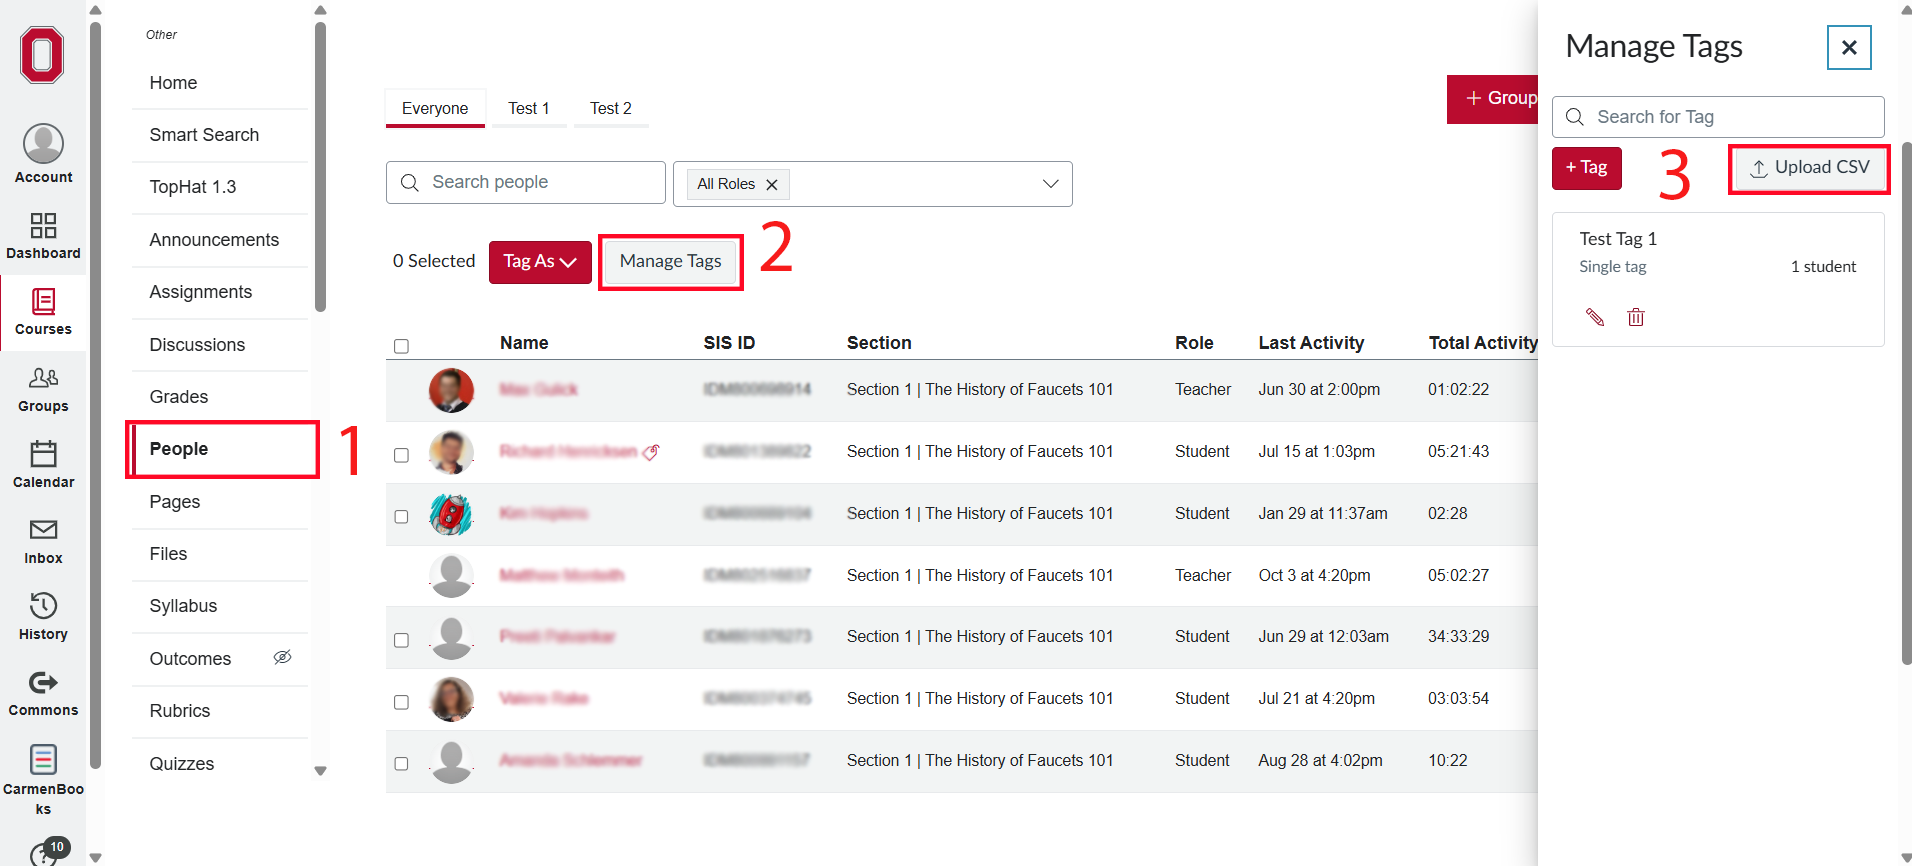
Click the Download Template File button. This will provide you with a CSV file containing your students and their identifying details, along with any already-existing tags.
Image
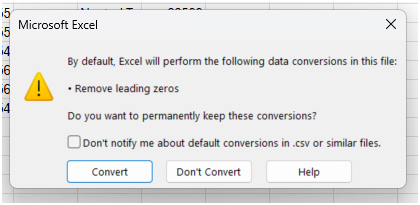
The downloaded file will provide a template based on current enrollments. The template will have three columns with identity data for each student. Two of the columns will be numerical data, with one data type having leading zeros. By default, Excel removes leading zeros from numbers when the file is opened.
When prompted, choose the Don't Convert option, or plan to delete the columns for “canvas_user_id” and “login_id” before beginning your import.
Once you have your exported file, populate the columns with the desired tags, using the guidance above or vendor documentation.
Save the file in CSV format, choosing the option for UTF-8 encoded. Return to the Import Tags interface in your course and follow the prompts to upload your file.