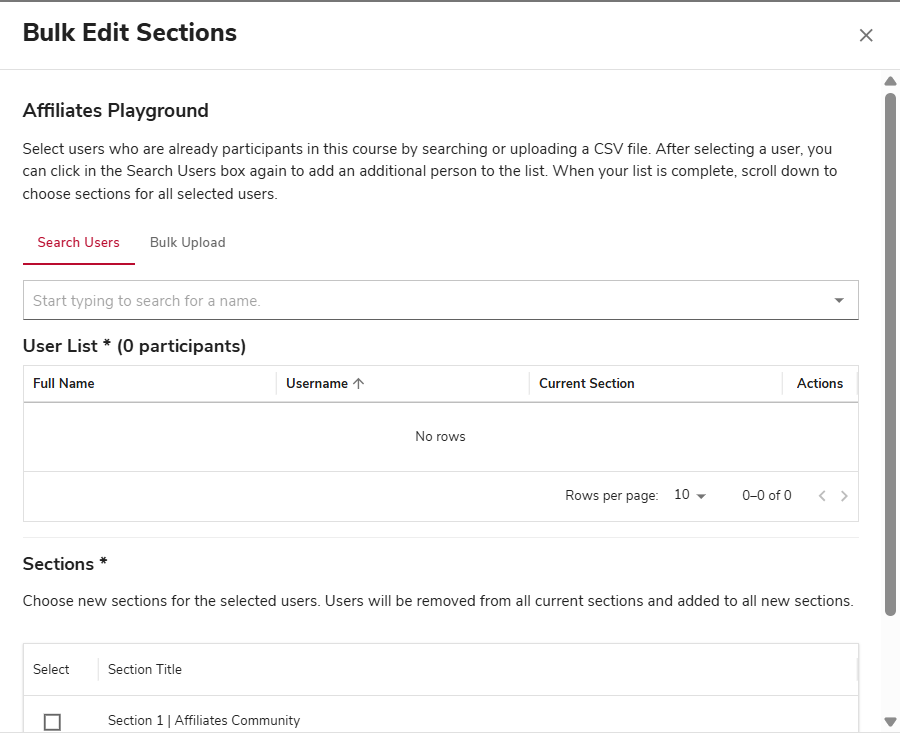
Manage Participants is the tool used to add, remove, or alter the enrollments of users in your CarmenCanvas course.
Accessing Manage Participants
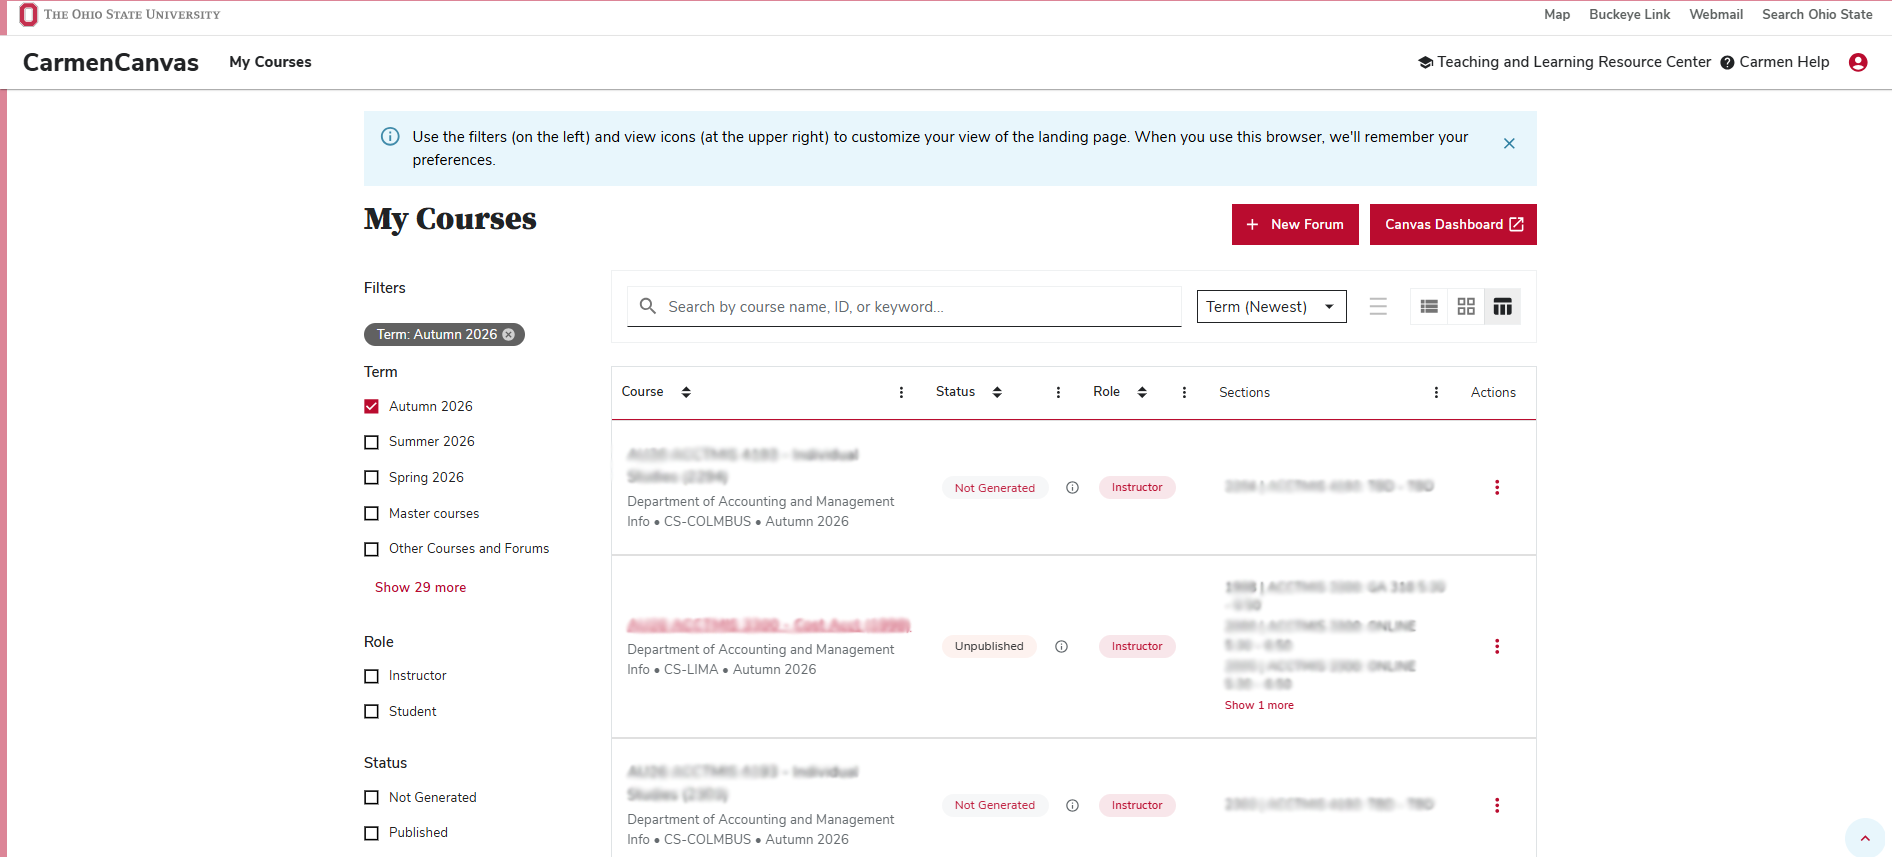
Navigate to the course you want to manage. You can refine the list by selecting a Term, Role, and Status in the Filters on the left-hand side.
Image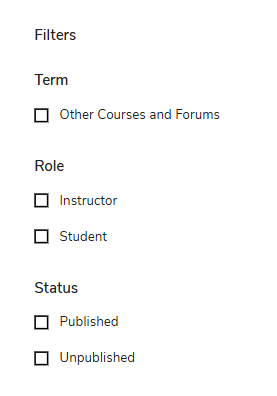
Additionally, you can search for the course by typing the course name in the Search by name, ID, or keyword search bar at the top of the course list. The search will start as you are typing.
Image
Once you have found the course you wish to manage, click the three-dot button on the right-hand side of the course’s entry on your course list.
Image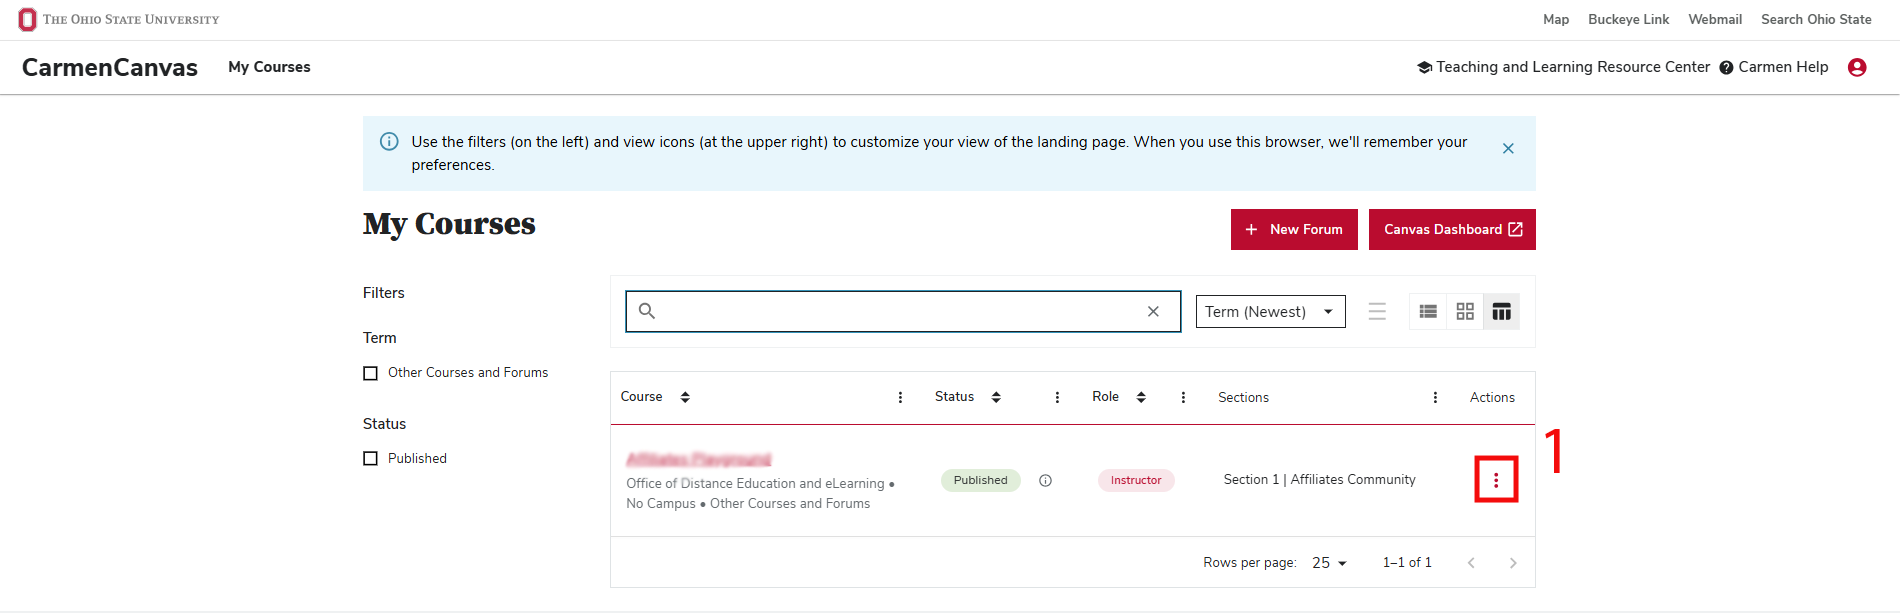
Then click the Manage Course button that appears on the drop-down menu. You can also choose to download your course roster as a .csv file, from this menu.
Image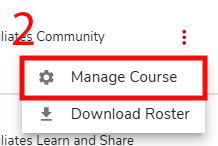
You will then be taken into your course roster, where you can see a list of all the users enrolled in your course.
Image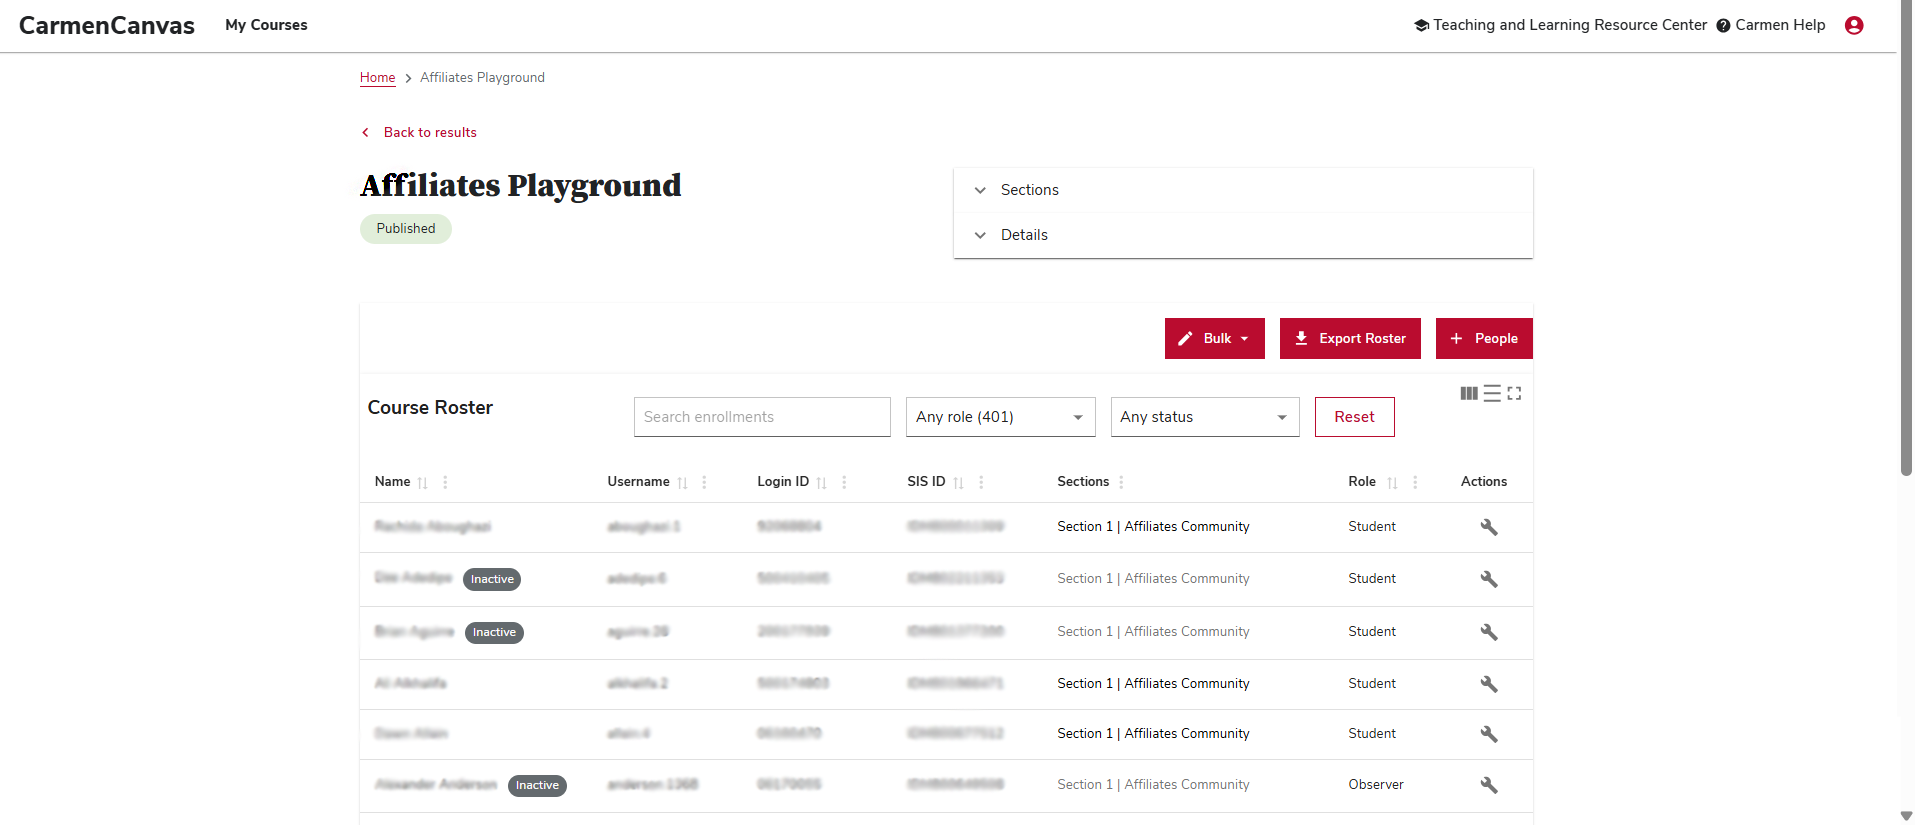
The People list in CarmenCanvas is updated nightly with enrollment information from the University Registrar's system. This update includes instructors and other instructional staff listed in the Registrar’s system, as well as all students currently enrolled in the course. For more information, see Standard Behavior for Enrollments.
Using Manage Participants
The Search enrollments field can be used to find a participant using their name or Ohio State username (name.#). You can also use the Role and Status dropdown menus to filter the list of participants. Typing a name or using the dropdown menus will sort the list automatically. Click Reset to return the list to its original state.
You can only adjust enrollments for current academic courses, and for Other and Master courses in Manage Participants. Adjustments to courses outside of their term dates will need to be made by the Learning Systems team; email carmen@osu.edu to request those adjustments.
Adding Participants
To add Participants to your course, click on the red “+ People” button in the upper right-hand corner of your course roster page.
Image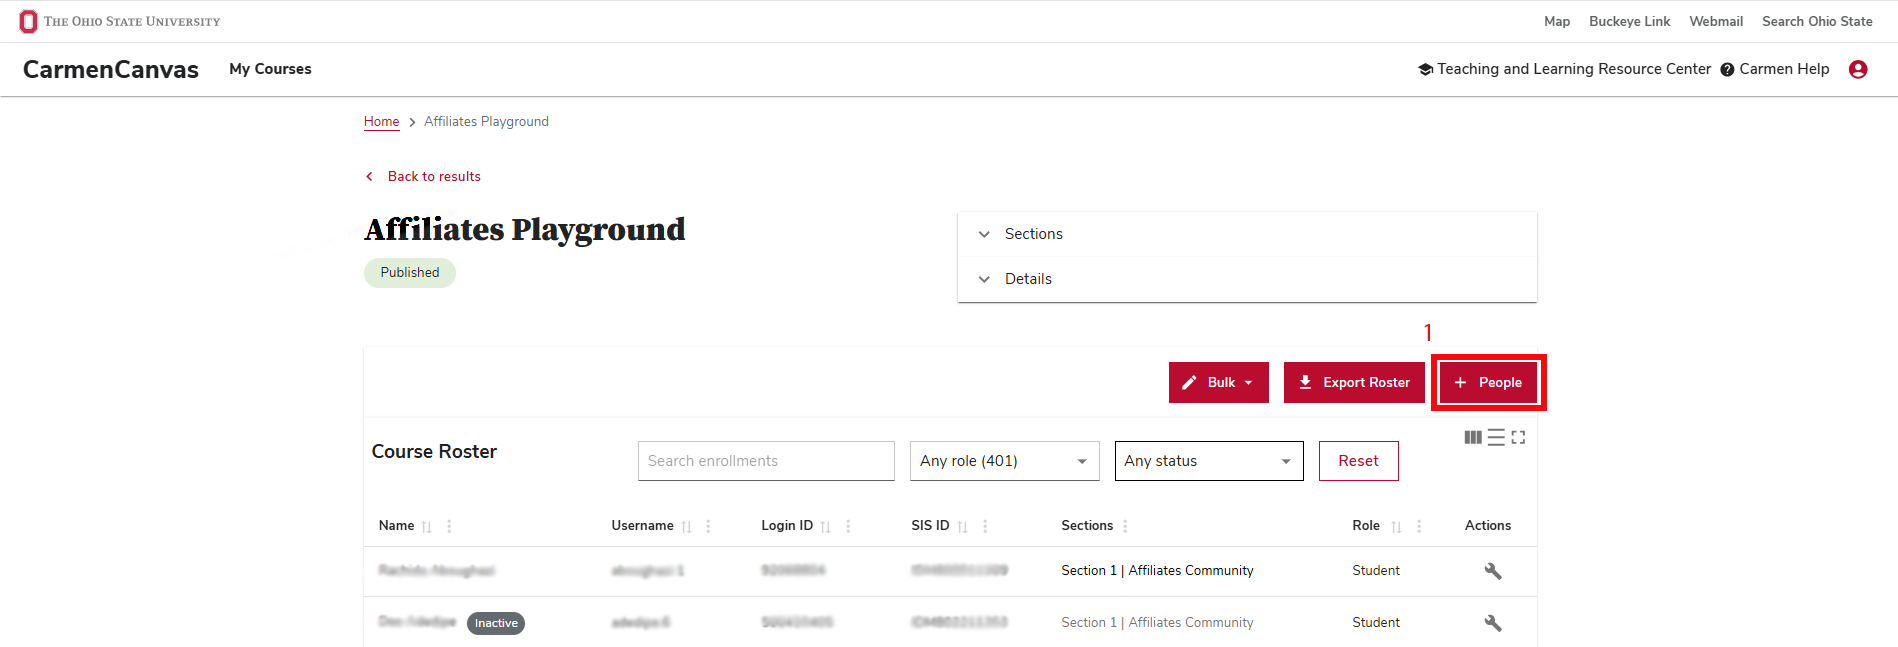
The enrollment menu will open where you can search for users to add to your course. Enter the user’s name.# and then click their name to add them to the User list (to be enrolled). You can add multiple users at once, if desired, by clicking again in the search box after your first choice is added to the User List.
Image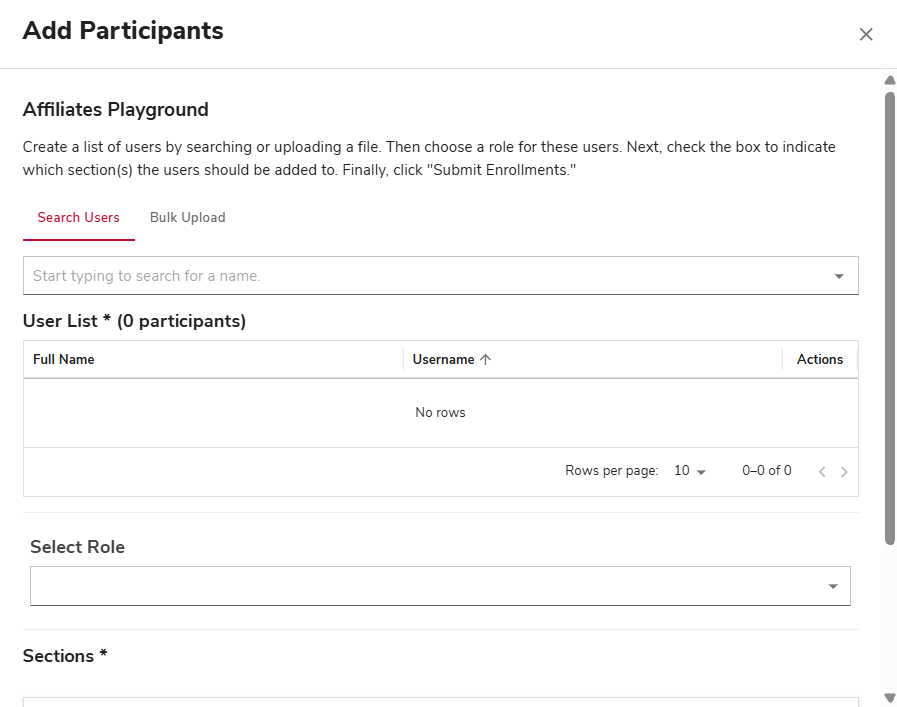
You can also bulk add users by clicking the “Bulk Upload” tab at the top of the menu. Click the red “Upload CSV” button to upload a .csv file with your list of participants in it. Your file will need to have the word “username” as the first entry, then each person’s name.# on a new row. If you use Excel to create the file, be sure to save it in CSV format.Image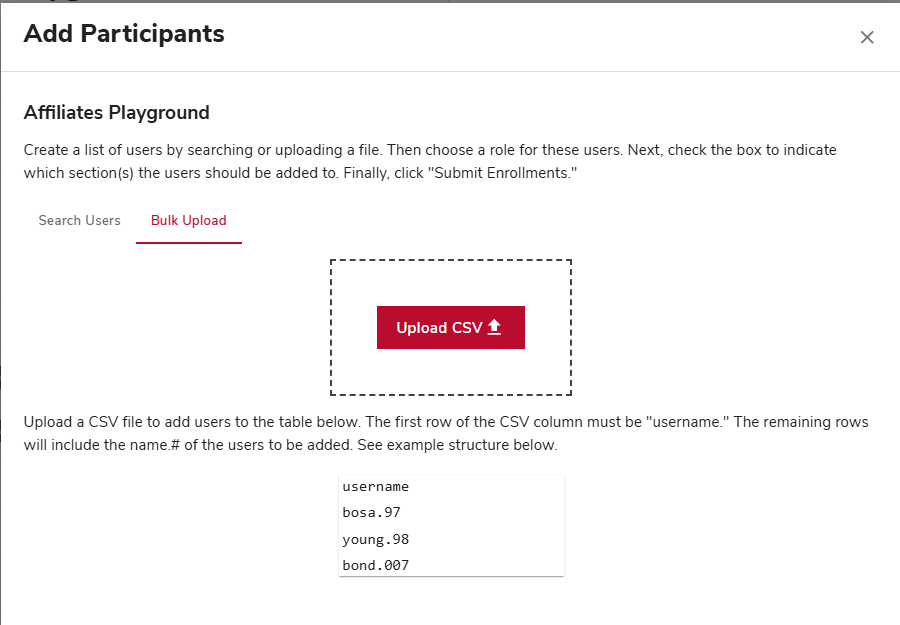
Once you have added the users you wish to enroll, select the Role you wish them to have from the “Select Role” drop-down menu. You can only select one role for your selected users
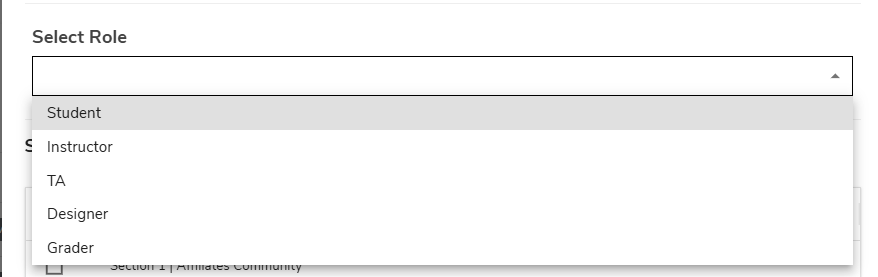
- After you have selected the role that you want your user or users to have, check the box next to the section or sections you wish to enroll them into.
- When you are finished, Click the “Confirm” button in the bottom right-hand corner. Your users will be added to the course immediately with the role and sections you have selected.
Removing Participants
A participant’s access to your course can be removed using the Make Inactive action. Making someone inactive in the Carmen course roster will prevent them from viewing and accessing the course and stop all notifications. Their name will still be listed on the roster on the Carmen People tab, but they will be marked inactive, regardless of the role they held.
- To remove participants from your course, navigate to your course roster page and find the user you wish to remove.
Then click on the grey wrench icon on the Actions Column.
Image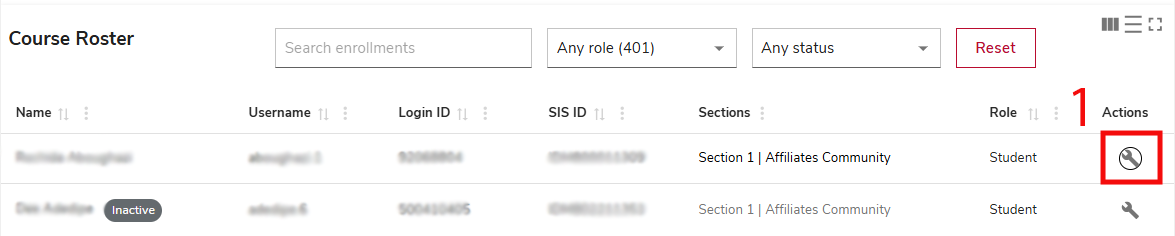
Click the “Make Inactive” button from the drop-down menu that appears.
Image
Click the red “Make Enrollment Inactive” button to make the user inactive and remove their access to the course.
Image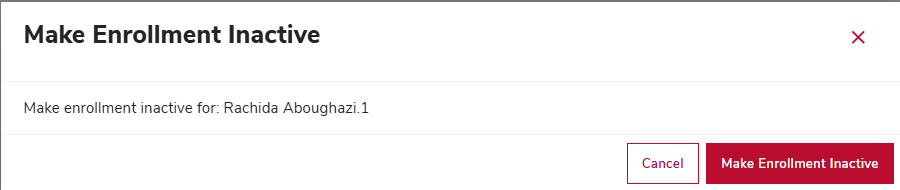
Reactivating Participants
If someone has already been manually removed from the course roster, you can reactivate their enrollment using Manage Participants. Note that your reactivation will be reversed during the nightly sync with the Registrar’s system if their enrollment is not reinstated there, too.
- From the course roster, locate the inactive participant for whom you wish to restore course site access.
Under the Actions column, click the wrench icon for their row and select Make Active.
Image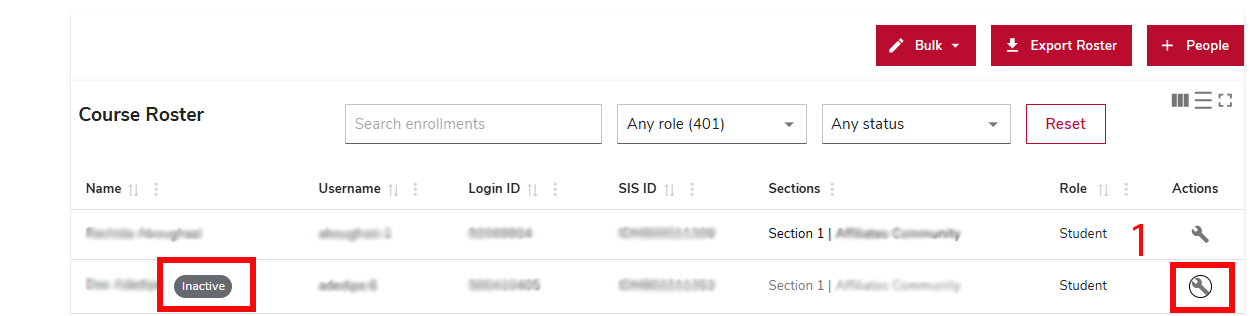 Image
Image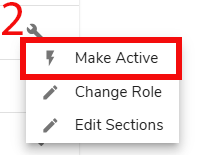
A confirmation window will pop up. Click the red “Make Active” button to finalize the reactivation of that participant.
Image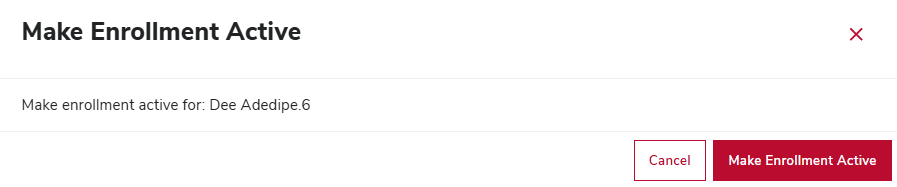
- Click Close to return to the roster once the reactivation has finished.
Changing Participant's Roles One at a time
- Enter your course roster and find the user whose role you wish to change.
Then, click the grey wrench icon in the Action column and click “Change Role”.
Image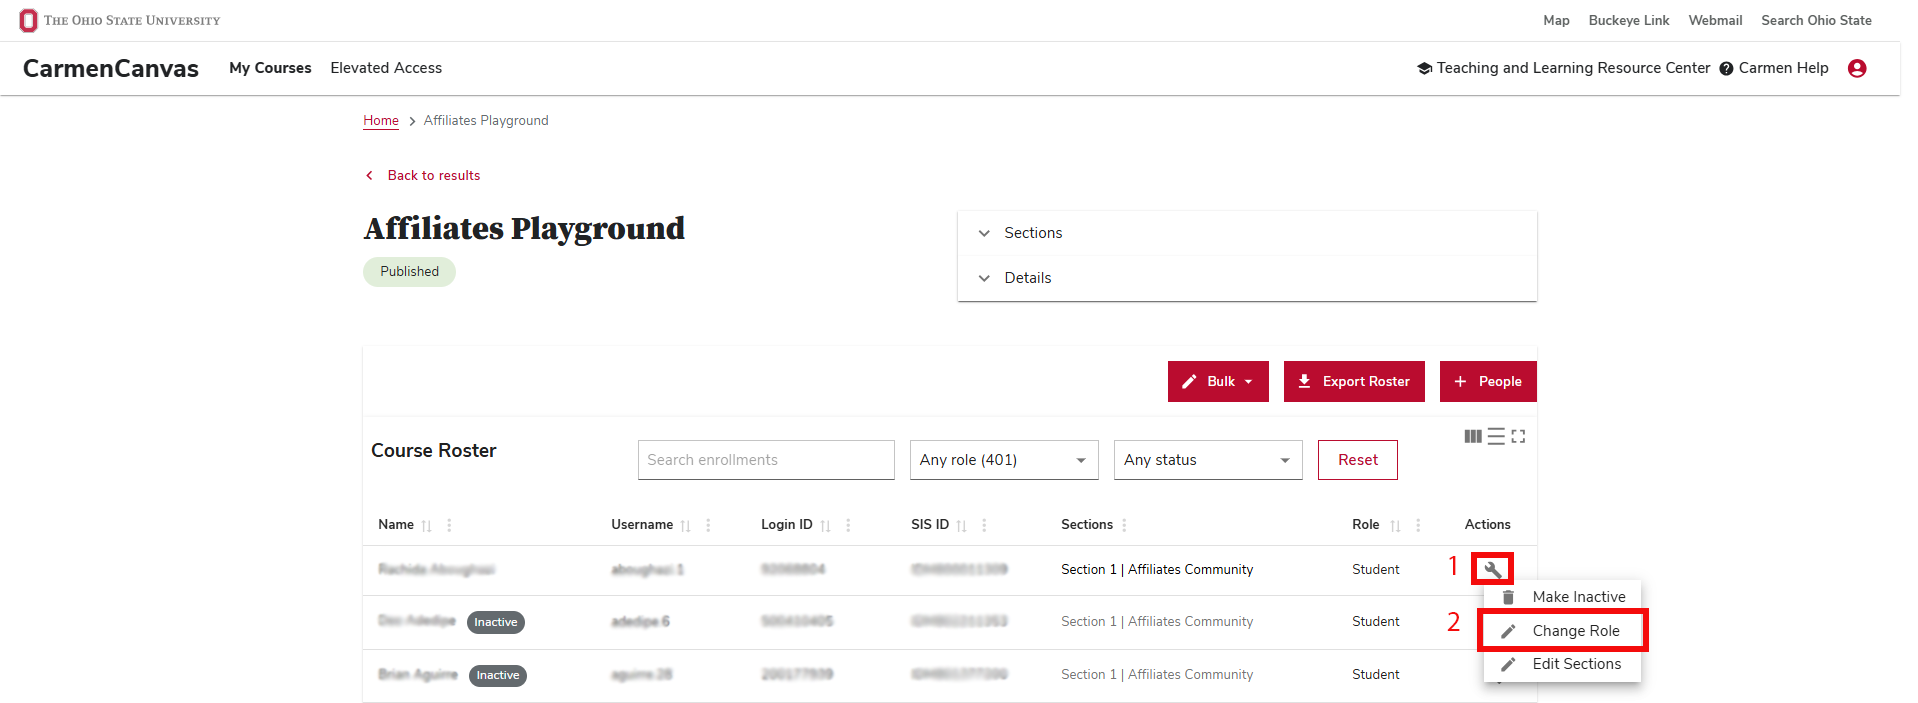
You will be taken to the “Select New Role” window. Then choose what role you want to give the user from the drop-down menu.
Image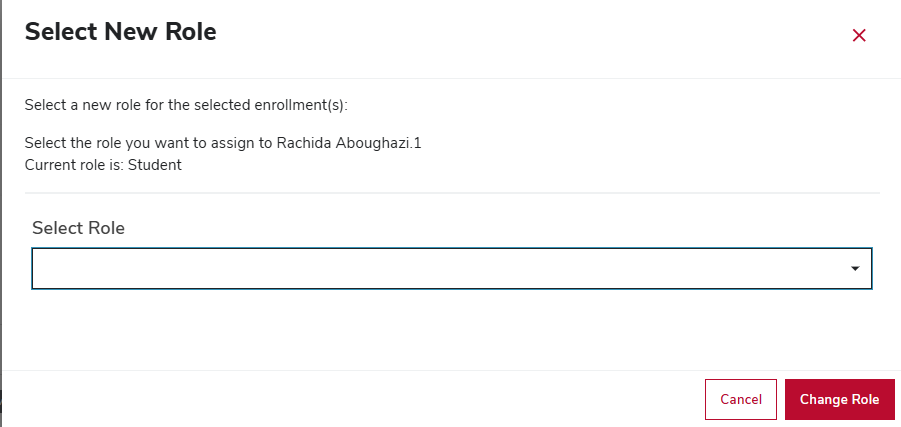
- When you are finished choosing the user’s new role, click the red “Change Role” button in the bottom right-hand corner.
Editing Participant's Sections One at a Time
If you need to change a participant's section enrollment in a multi-section course, Manage Participants can be used to add and remove sections.
- From the course roster, locate the participant whose section enrollment you wish to change in the course.
Click the wrench icon in the Actions Column and select Edit Sections.
Image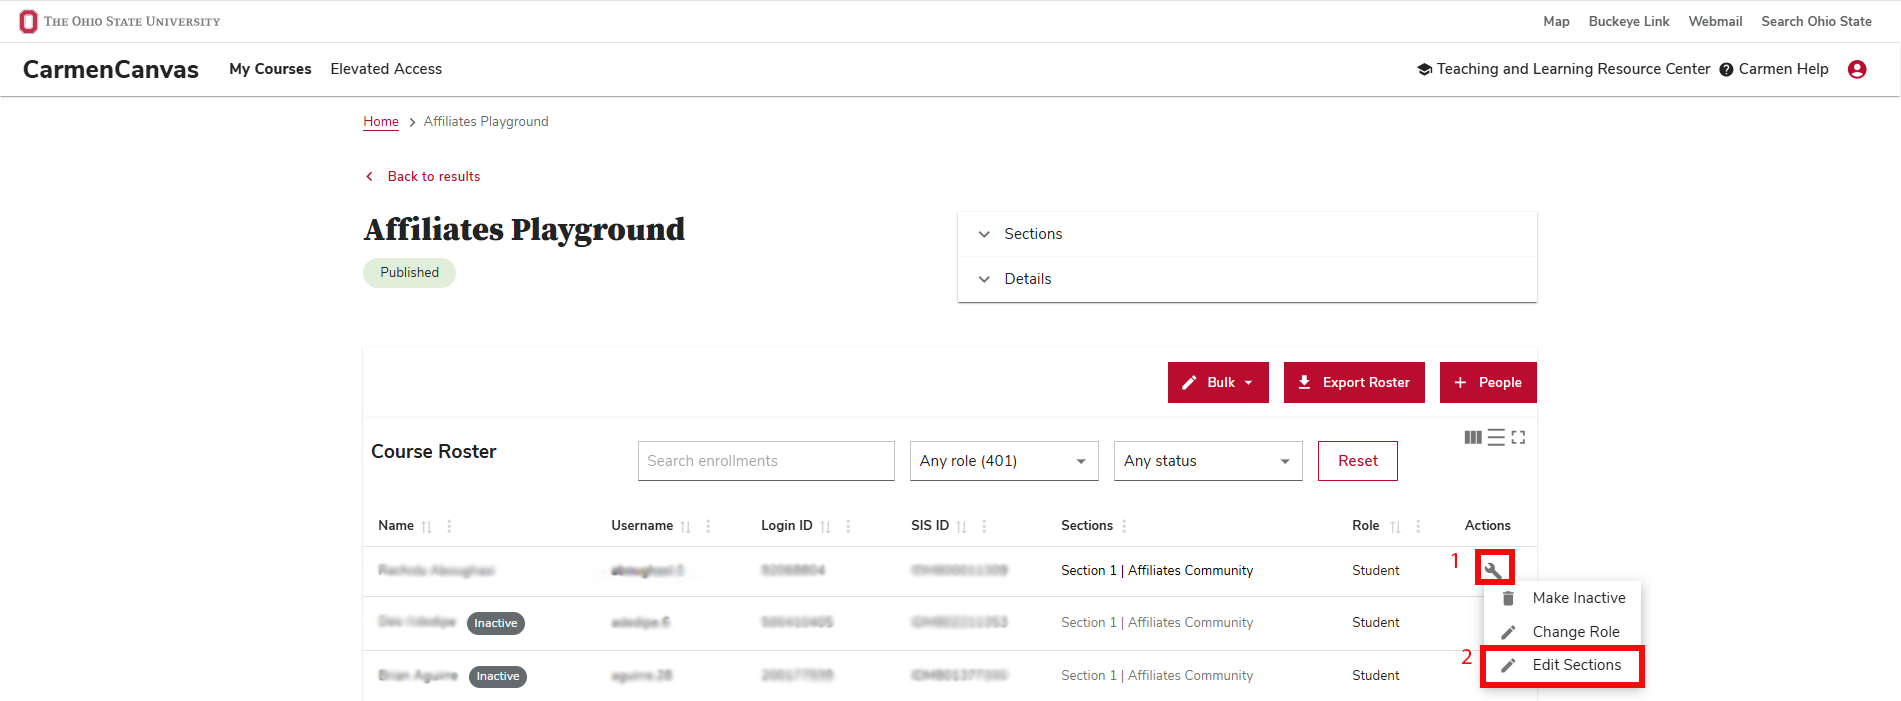
In the pop up window, click the dropdown menu to choose additional sections, or click the trash can icon to remove a section.
Image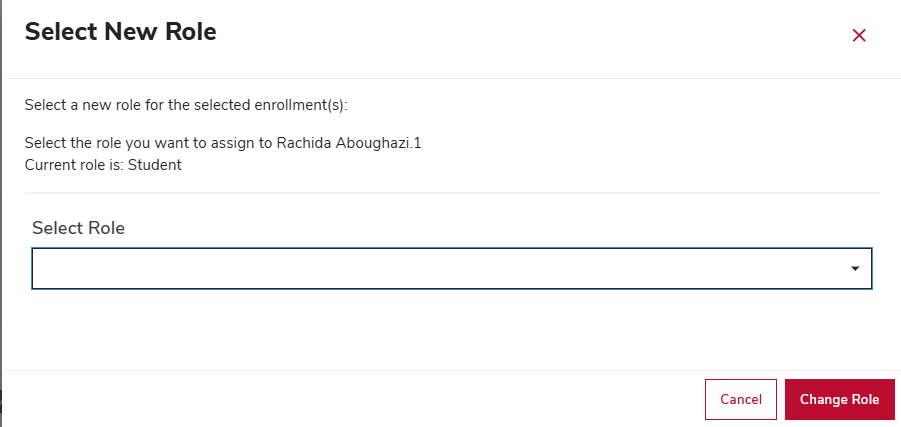
- Click Confirm when finished.
Bulk Edit Options for Changing Roles or Sections
You can bulk edit the roles and sections of your users using the Bulk Edit option. The process of selecting users, whether editing the role or section of the users, is the same. After you have added the names of the users whose role or section you are changing, you will then either choose a new role, or select new sections, based on which Bulk Edit option you selected.
Click on the red “Bulk” button with a pencil icon to open the Bulk Editing menu.
Image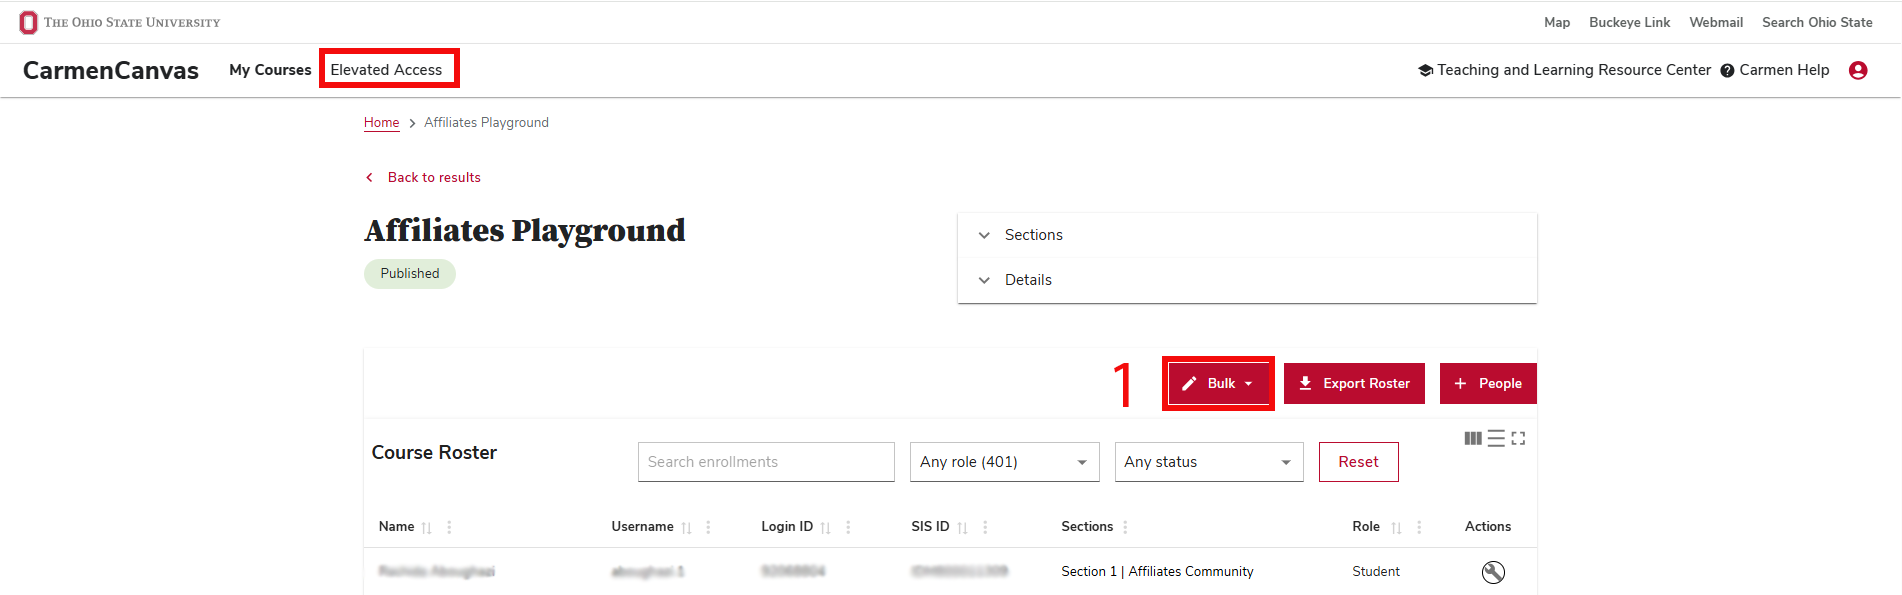
Click Edit Role or Edit Section from the drop-down menu to bulk edit user roles or sections. This will open a pop-up menu for your chosen option.
Image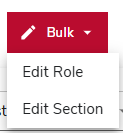
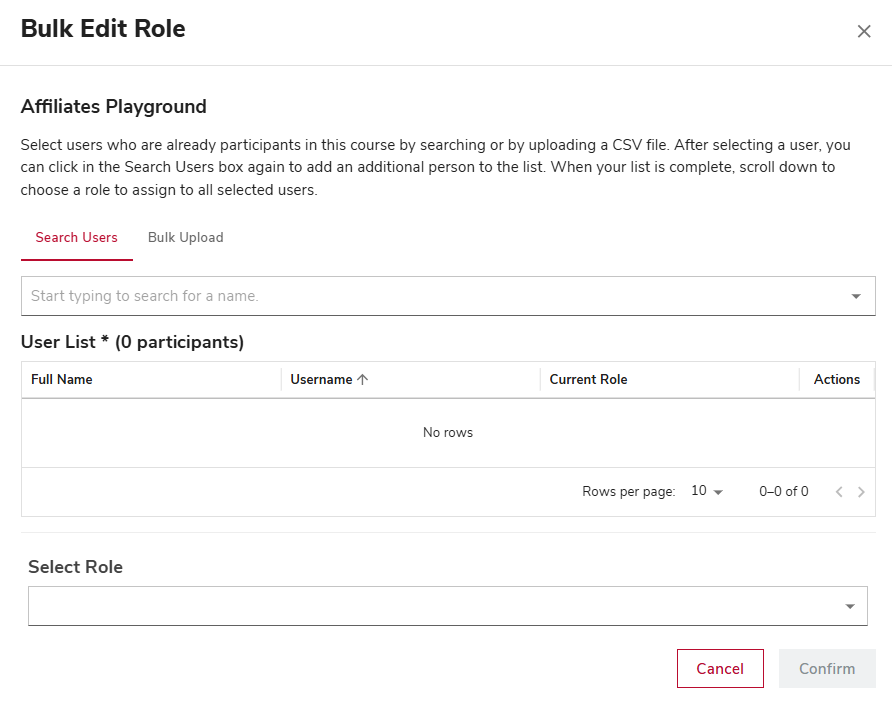
- Once you enter the pop-up menu, start by typing in the
lastname.# of a user you want to change. When you see the user’s name, click the name to add it to the User List. Repeat this process for as many users as you need to edit.
Bulk Edit Role
For Bulk Edit Role, choose the new role that all participants in your list will have once the process is complete. Once your choice is made, click Confirm at the bottom of menu.
Bulk Edit Sections
For Bulk Edit Sections, choose the new sections that all participants in your list will have once the process is complete. Once your selections are complete, click Confirm at the bottom of menu.