You are able to record your screen on iPad to share iPad-specific features with students, like app walk-throughs or handwritten content.
Prerequisites
- If the Zoom app is not already installed, download the Zoom mobile app from the Apple App Store.
- Log in to Zoom using your Ohio State credentials.
Enable Screen Recording
Before you can record your iPad screen, the screen recording option must be added to your Control Center. To do so:
- Open the Settings app.
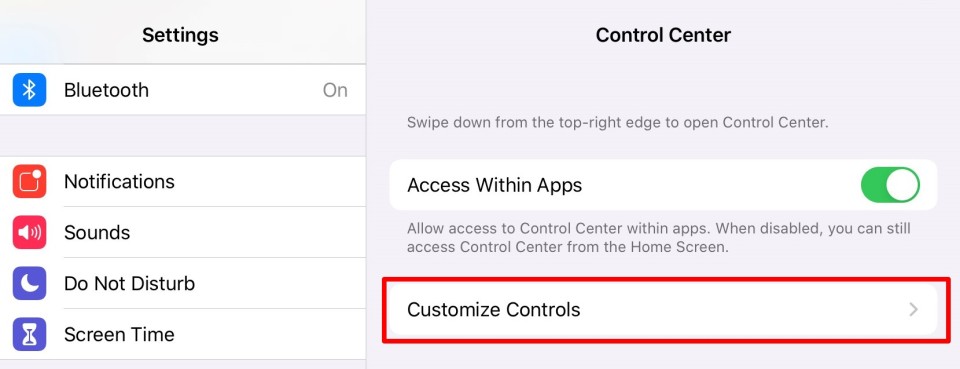
- Tap Control Center.
- Tap Customize Controls.
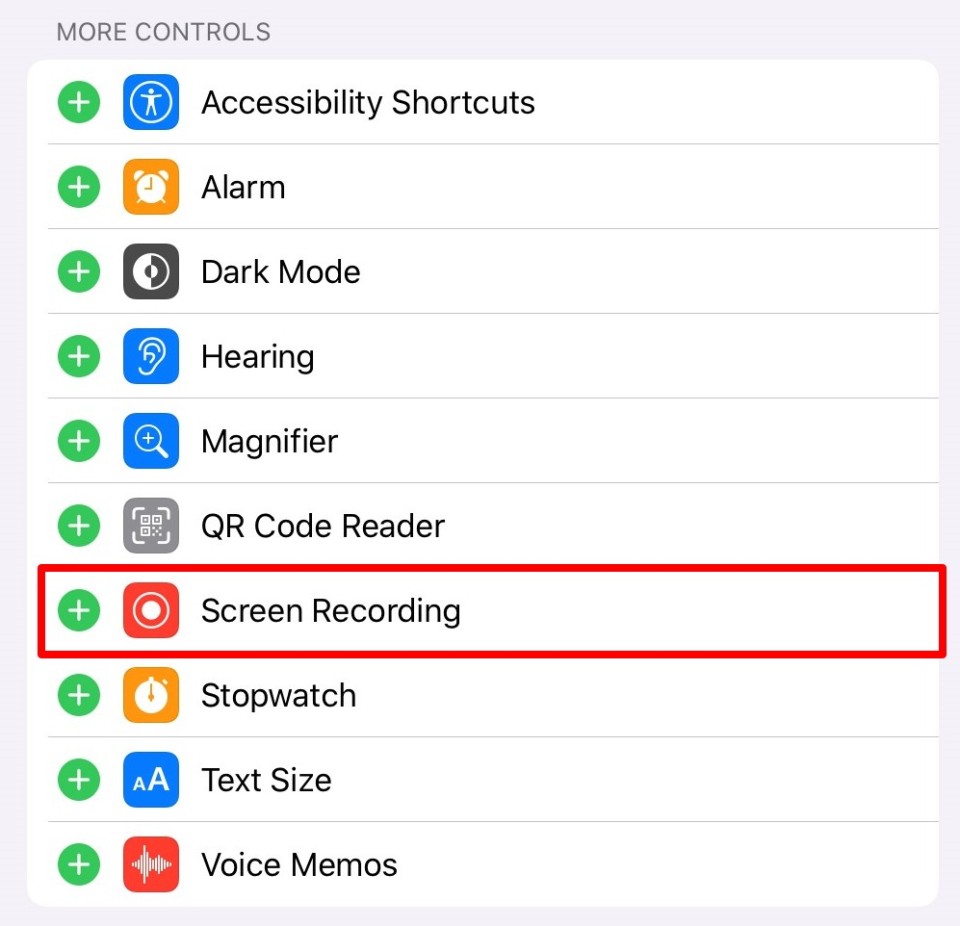
- Under More Controls, tap the + icon next to Screen Recording to add it to your Control Center.
Record using an iPad
- Open the Zoom app on your iPad.
- Tap New Meeting.
- Choose Video On if you'd like your face to appear in the recording. To record your iPad screen only, leave it off.
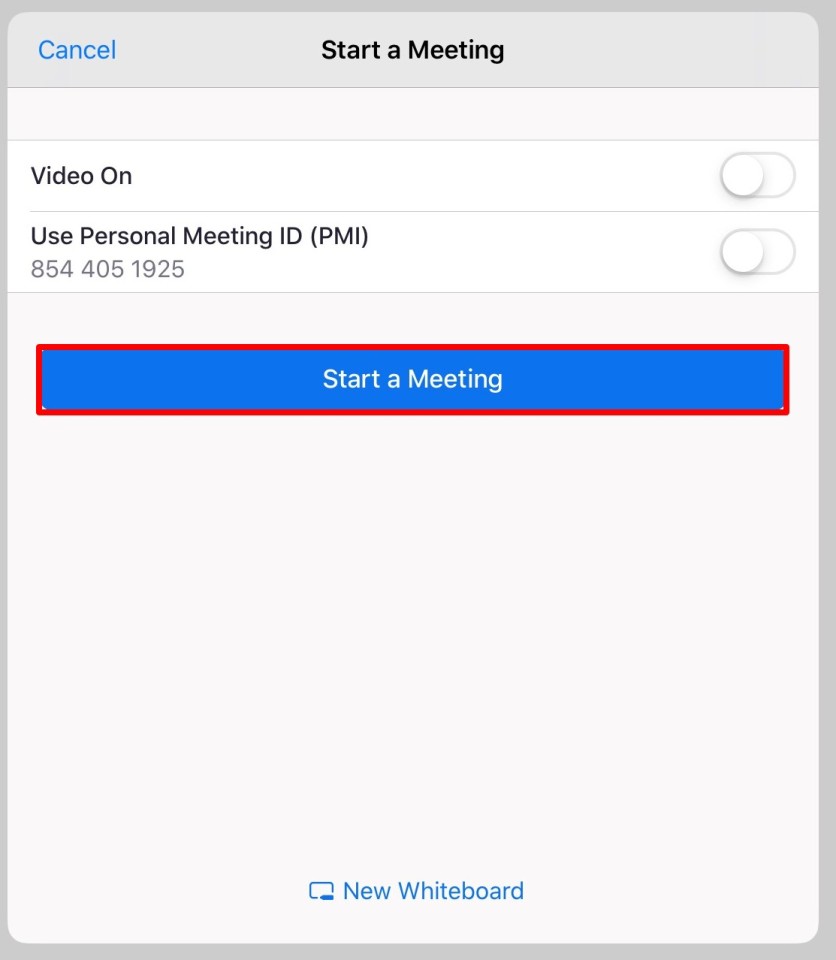
- Tap Start a Meeting.
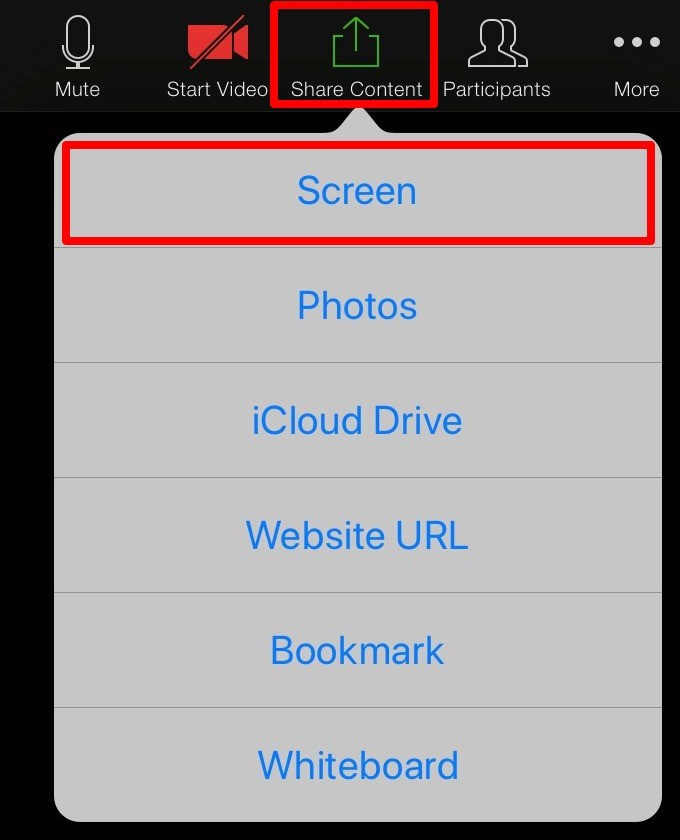
You are now in the Zoom meeting. A menu will appear at the top of the screen. If it disappears, tap the center of the screen. - Tap Share Content, then tap Screen to share your iPad's screen.
- Tap the Microphone icon to turn audio on so that your voice is heard during the recording.
- Tap Start Broadcast. Now you are sharing your screen.
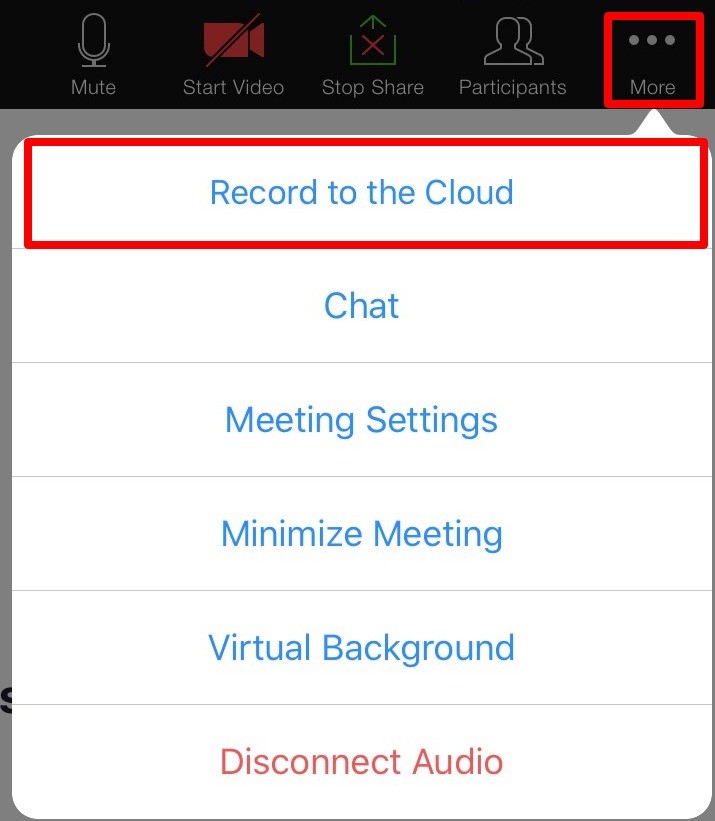
- Tap More (three dots).
- Tap Record to the Cloud. You are now recording. You can navigate to any iPad app to record your actions.
- To stop recording your screen, return to the Zoom app and tap in the middle of the screen so that the menu bar appears at the top.
- Select the More (three dots).
- Tap the Square button to stop the recording. Stopping the recording will upload the video to the cloud.
You can also pause and resume the recording here by tapping the Pause and Play buttons.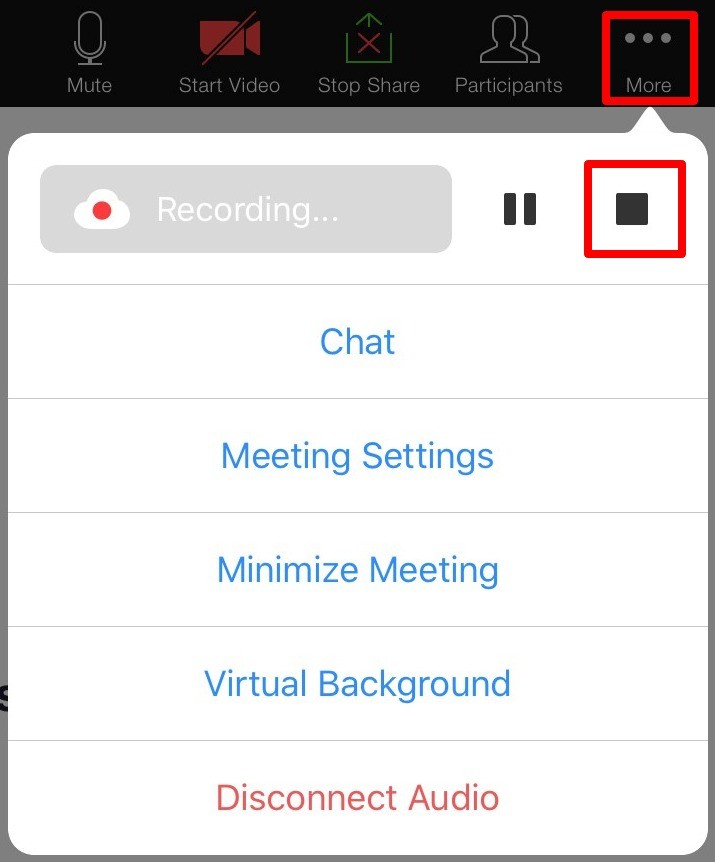
Zoom will email you when the video is finished processing. They will send you a second email when your automatic transcripts are available for your video.
If you would like to clip the beginning and/or ending of your Zoom recording, see Edit CarmenZoom Cloud Recordings for more information.

