

Oxley's sticky post feature can be used to highlight one or more articles at different times throughout the semester. Selecting a post as a "sticky post" maintains it at the top of the main blog page that is, by default, the site homepage.
- Login to your U.OSU site.
- Click Posts in the left-side Main Menu. A list of all posts display.
Image

- Select the post you would like to maintain as a sticky post.
OR
Click Add New to create a new post. - Add or edit content as needed. See the Embedding Videos and External Content or Working with Images guides for information about uploading media.
- Click Set Featured Image to add a featured image to your post. The featured image will be the visual used on the blog page to showcase the post. See the Using Featured Images guide for details.
- Click Edit to the right of Visibility.
Image
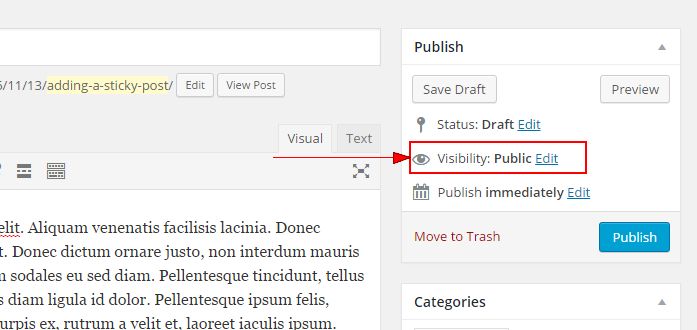
- Select Public if not already selected.
- Check Stick this post to the front page.
Image
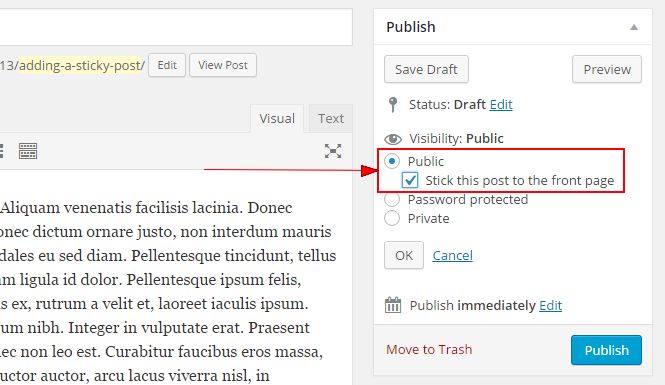
- Click OK.
- Select a Publishing option for your post. See Publishing Pages / Posts for more details.
- Click Preview to preview your post.
- Click Update.