

Within the MyMediasite Portal, click the presentation to access the presentation properties. The Information tab opens.
From the presentation properties, you can control each piece of your presentation.
The frame of your presentation is the Player (i.e., how viewers see your presentation). Each piece within the player (i.e., the video, captions, polls, download ability) can be individually enabled to fit your needs.
You can share individual recordings, edit video options, change security settings for your recordings, or delete recordings.
See the Using the Web Editor guide for more details about editing the video itself. See the Working with Channels guide for more details regarding managing channels.
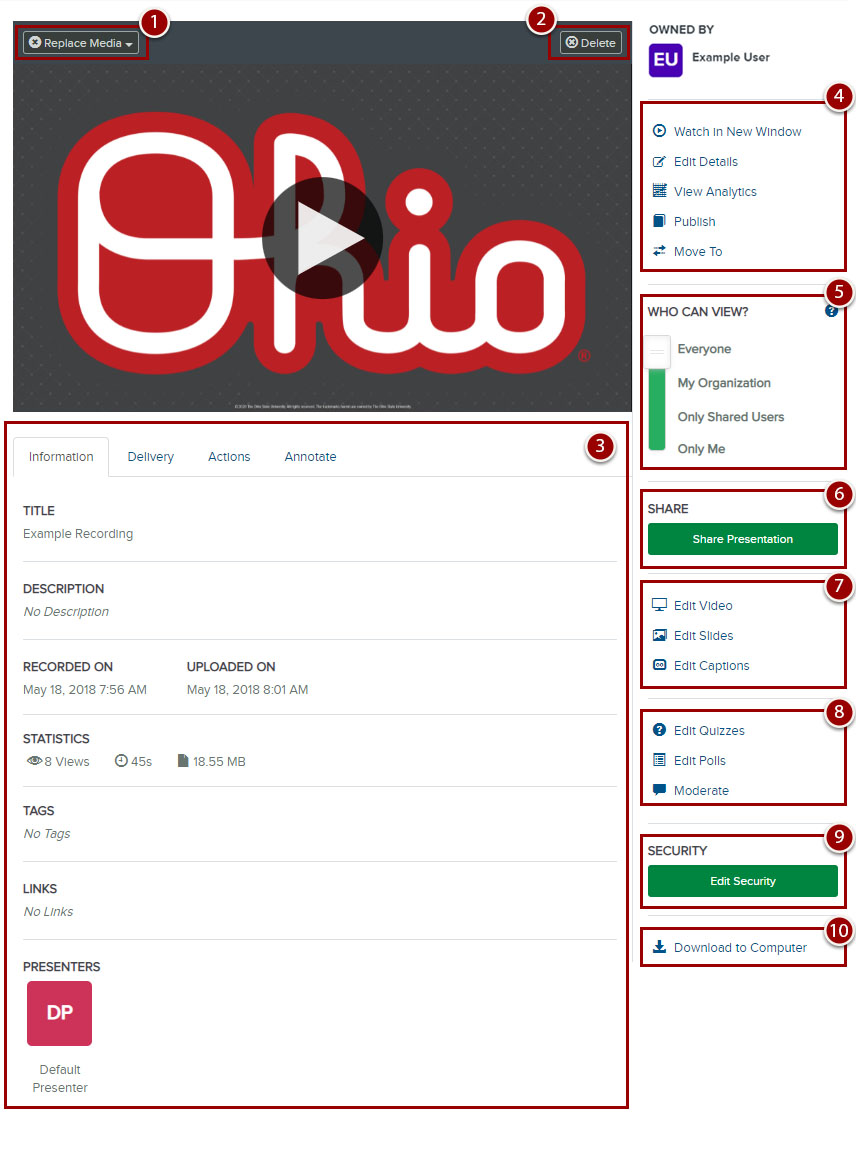
Information page - When you click to open your presentation properties, the Information tab opens by default.
- Replace Media - Use this button to upload or record new media for your presentation. Since presentations are a combination of discrete parts within a frame, this does not impact other settings.
- Delete - Click the Delete button at any time to delete your presentation.
- Information Details - The information tab shows your setting choices and provides the dates the presentation was Recorded On and Uploaded On. Modify these settings by clicking Edit tab. See Navigating Presentation Editing Options for more information
- Watch in New Window - Opens your presentation in a new browser tab.
Edit Details - Allows you to edit the presentation information including title, description, visibility, selecting a Player, enabling Q&As and Pools. See Navigating Presentation Editing Options for more information.
View Analytics - View presentation analytics information.
Publish - The Publish tab controls where your presentation appears. See Moving Presentations to a Channel or Shared Folder for details.
Move To - Move the presentation to a different folder or channel. - Who Can View? - Use this slider to give users view access to your presentations. These settings allow you to share your presentation quickly and readily determine who has view access to it.
- Share - Share your presentation.
- Editing the Video - Click Edit Video to open the Web Editor. Click Edit Slides to add a title and description to each slide. Click Edit Captions to launch the Caption Editor.
- Interactive Elements - Click Edit Quizzes or Edit Polls to moderate each tool if it has been enabled for your presentation. Click Moderate to open the Q&A forum for the recording.
- Security - Allows you to manage user roles.
- Download - Download options, will appear here if they have been enabled.