

As of August 2024, newly created presentations are captioned automatically once they finish processing. These captions are generated with an AI transcription tool and must be reviewed for accuracy.
Presentations created in Mediasite prior to August 2024 may still need to have captions added. Mediasite adds a Captions tag to your presentation when captions are present, so you can easily tell which presentation still needs captions added.

All Mediasite players will support presentations with closed captions. If your presentation was created with the CarmenZoom integration, the audio transcript will be imported with the recording and displayed as closed captions.
Add Closed Captions
Mediasite has an integrated automated transcription service, or you can manually upload a caption file.
Add Captions with Automated Transcription
- Login to your MyMediasite Portal.
- Choose the presentation.
Click Edit Details.
Image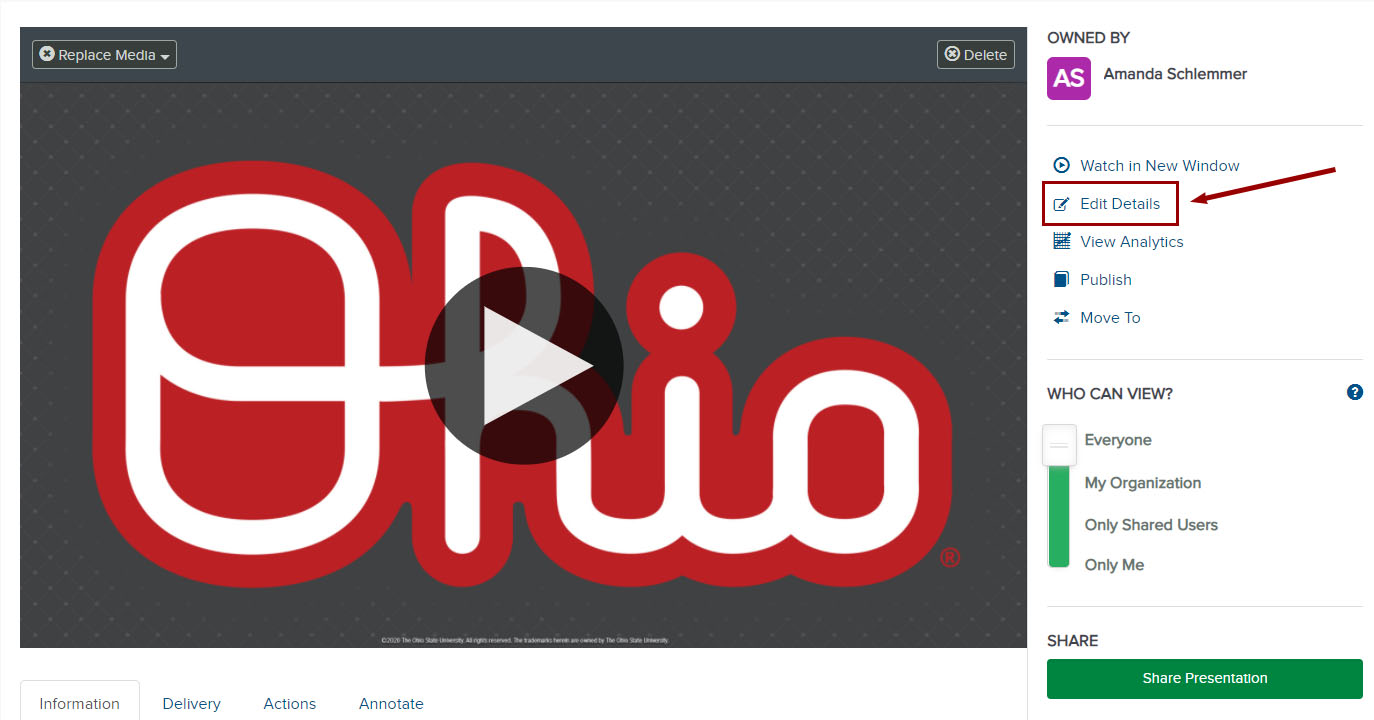
- Select the Delivery sub-tab.
- Check Audio Transcriptions.
- Select Choose a Provider for Captioning.
Click Select a Captioning Profile.
Image
There are two options for you to choose from. Select Automated Transcription (English) for recordings with English as the predominant language. Select Automated Transcription (Language Detect) for recordings in other languages. The captions will be displayed in the detected language in the presentation.
Image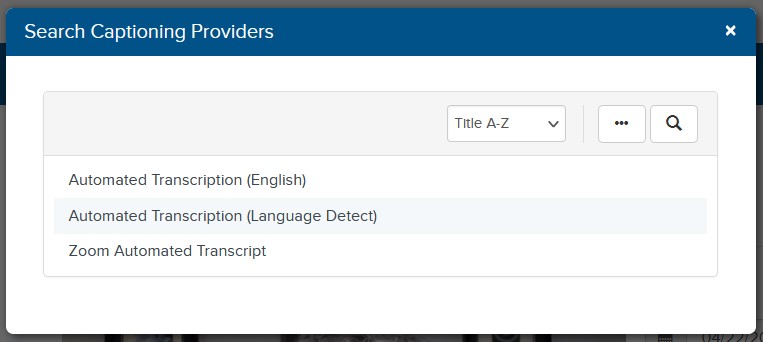
- Click Save. You will receive an email when the automated transcription is completed, but the process will only take a few minutes.
Add Captions with an Audio Caption File
Accepted file types include:
- Video Text Tract (VTT)
- Synchronized Accessible Media Interchange (SAMI)
- SubRip (SRT)
- Distribution Format Exchange Profile (DFXP)
- Login to your MyMediasite Portal.
- Choose the presentation.
Click Edit Details.
Image
- Select the Delivery sub-tab.
- Check Audio Transcriptions.
- Choose Manually Upload an Audio Caption File.
- Click Select a File.
Select and upload your file.
Image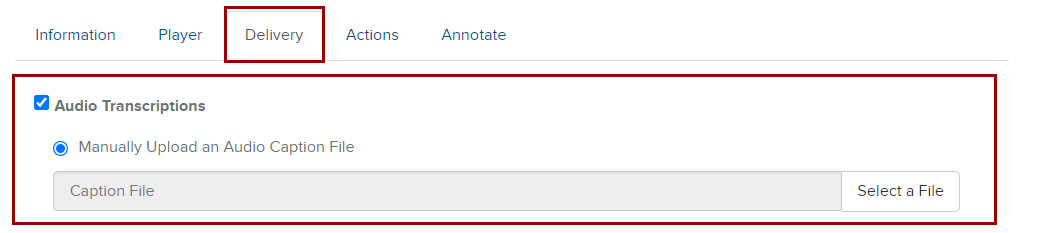
- Click Save.
Edit Closed Captions
Automated captions must be reviewed for accuracy. Closed captions generated with AI transcription tools do not meet the Minimum Digital Accessibility Standards for multimedia presentations. Captions generated with the automated transcription service must be reviewed for accuracy before the presentation can be considered accessible. Mediasite includes a built-in tool for editing your presentation's closed captions.
Open the caption editor
From within the list of presentations in your My Mediasite portal, select the name of the presentation for which you wish to edit the closed captions. A summary of the presentation will appear
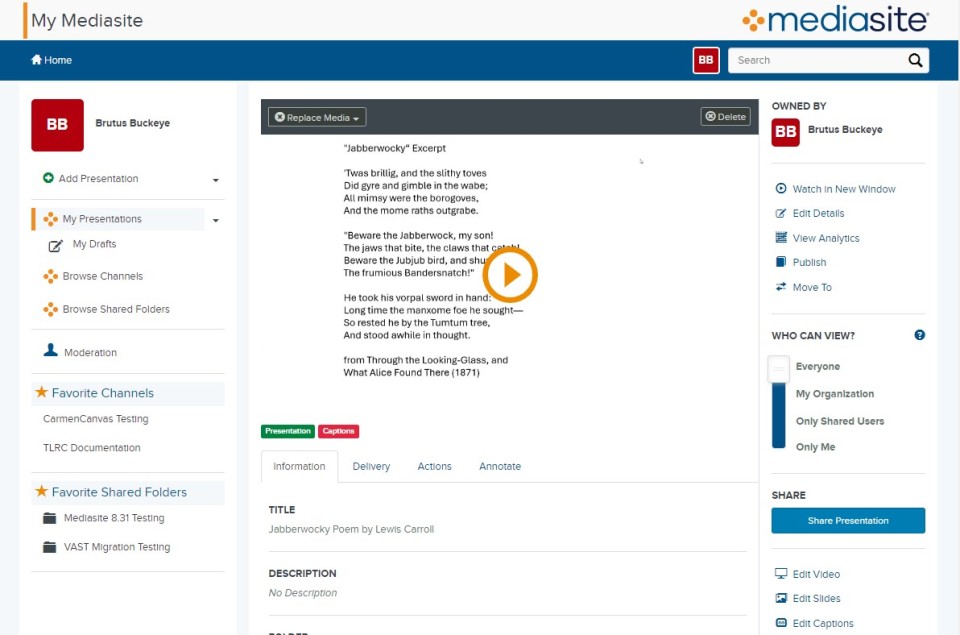
Click Edit Captions in the right column.
Image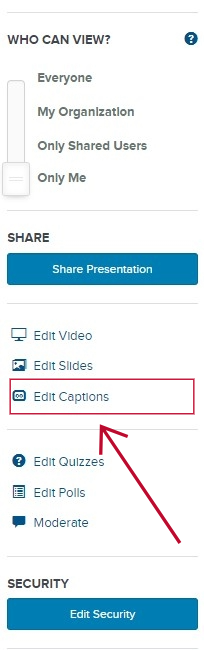
The caption editor will appear.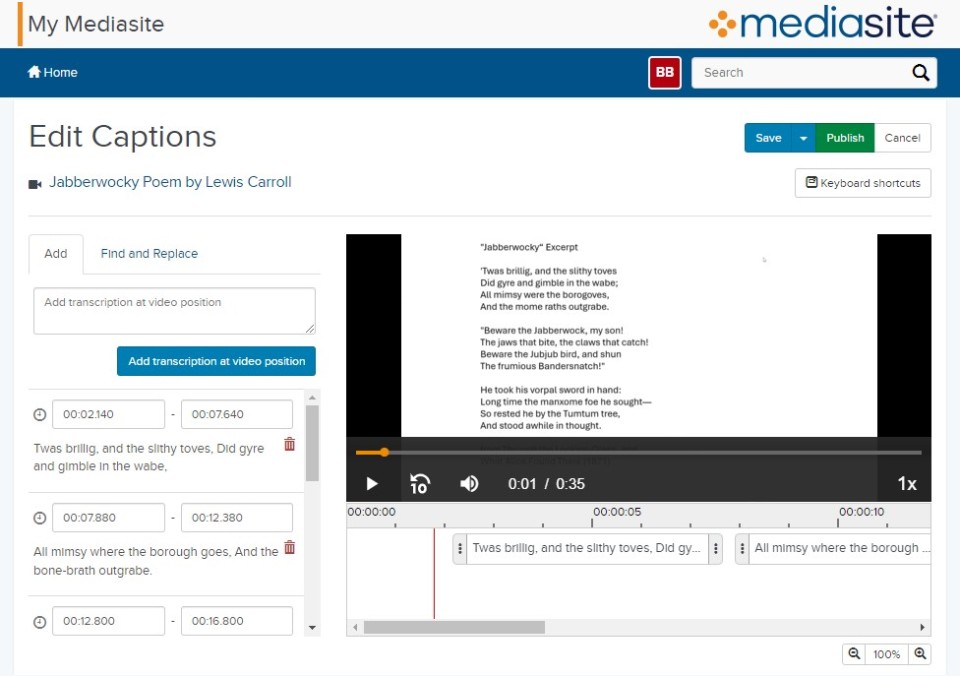
Add, remove, or change captions using the caption editor
Use the caption editor to add, remove, or modify the caption content. Save your work frequently using the Save button at the top right. Common caption editor operations are discussed below.
Edit caption text and timing
- Begin playback of the video preview within the caption editor to see the timing of captions along the timeline.
- Drag the edge handles of a caption to adjust the timing.
- Click a caption along the timeline to select it in the edit pane.
Edit the text as needed in the left-hand column.
Image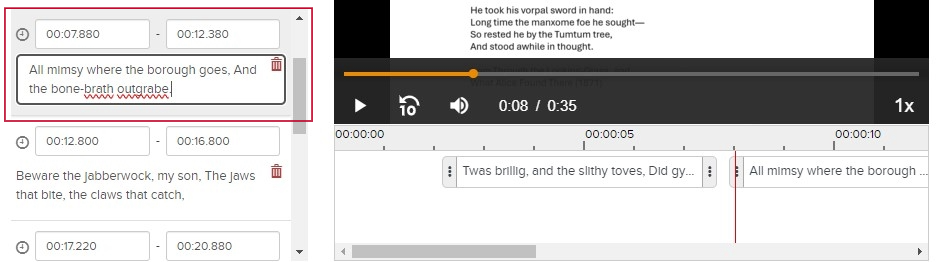
Add captions
Under the Add tab, enter the caption text.
Image
- Click Add transcription at video position. The caption text will be added to the current video position.
Find and Replace
Click the Find and Replace tab on the edit column of the caption editor.
Image
- In the Find field, type a search term.
- Click Find to view captions where the term appears.
- In the Replace field, type the replacement term.
- Click Replace all to change all instances of the Find term with the Replace term.
Enable caption display and save your edits
Once all edits are complete within the editor, click Publish. This will enable your captions to be displayed in the video player your audience sees.
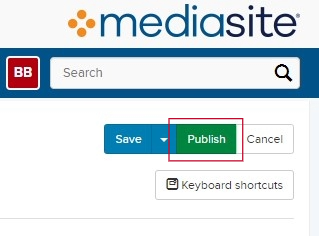
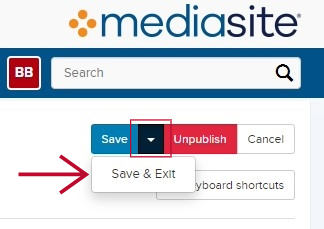
Click the drop-down arrow adjacent to the Save button and click Save & Exit to apply the edited captions to the video and return to the presentation summary.
More documentation
Please see Mediasite's caption editor documentation for more information on caption editor operations.
Other references to help you create and edit closed captions include:
DCMP Guidelines and Best Practices for Captioning Educational Video