

Use the Editor timeline to cut material from within a presentation or crop from the ends of a presentation. You can use the audio track in the timeline to identify and remove pauses in your presentation.
When you crop or cut your presentation, the area becomes a dark portion of your track; it is not removed from the Project until you commit your changes. However, when you play your presentation in the Web Editor, all portions you cropped or cut will be skipped over to give you a good indication of how your presentation will appear.
There are five key sections of the timeline you want to pay particular attention to when cutting and cropping:
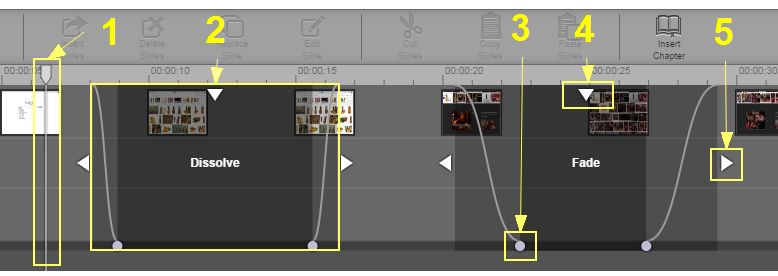
- Timeline cursor - Use the timeline cursor to "scrub" (e.g., select) portions of the timeline.
- Cut area - The cut area is the area selected. The darker gray area will be cut, while the light gray area (if "fade" or "dissolve" is the chosen cut) will be faded or dissolved.
- Fade handle - Click and drag here to change the duration of the fade / dissolve.
- Selection handle - Click the selection handle (e.g., the arrow at the top of the cut) to change the cut type or to click and drag the cut on the timeline.
- Cut handle - Drag the left or right arrow to change the length of the cut.
Crop Your Presentation
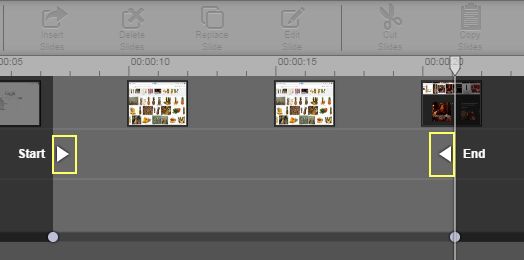
Cropping your presentation allows you to change the Start or End points.
- Click and drag the left and right arrows for a new starting (or ending) point.
Image
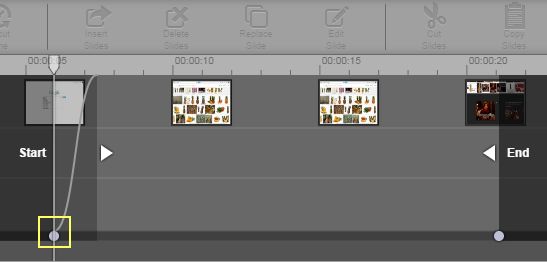
- Adjust the fade-out position using the fade handles as needed.
Image
- Click Undo or Redo to undo changes as needed. Once you finish your edits, click Commit. See Saving Changes for details.
Cut Your Presentation
When you cut portions of your presentations, you remove points in the middle of the presentation. When doing so, you might choose to fade, dissolve or simply cut from one section to the next.
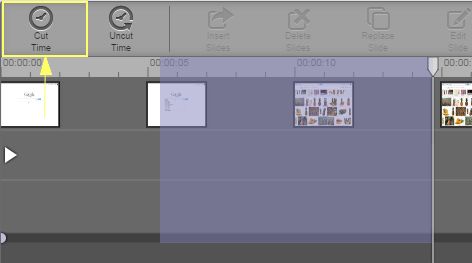
- In the timeline, select a portion to cut by clicking and dragging the timeline cursor.
Image

- Click Cut Time.
Image
- If necessary, click the top arrow (i.e., the selection handle). A drop-down menu appears. You can specify one of three types of cuts:
Image
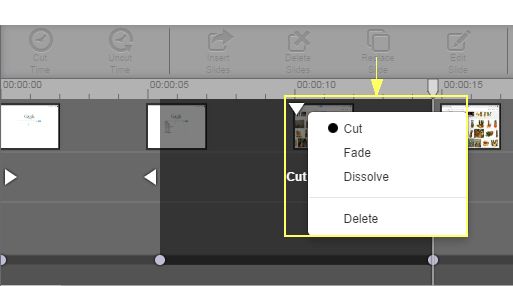
- Cut - By clicking cut, the presentation simply skips to the end of the cut and continues the presentation.
- Fade - Fades gradually darken your video from black and mutes the audio level.
- Dissolve - Dissolve smoothly fades the video out and back in from one end of the cut to the other.
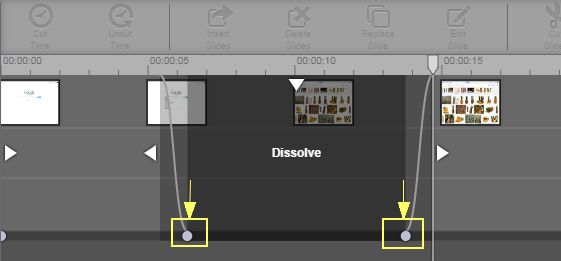
- If necessary, click and drag the fade handles (i.e., the small circles at the bottom of the track) to adjust the length of the fade / dissolve.
Image
- Click and drag the selection handle to move the cut to a different section of the track or click the selection handle to display the drop-down menu and change your cut option.
Image

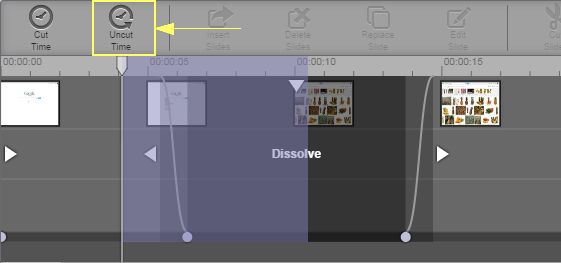
- If you decide you would to keep some of the section that is within a cut segment, use the timeline cursor to select the portion you want to retain and click Uncut Time.
Image
- Click Undo or Redo to undo changes as needed. Once you finish your edits, click Commit. See Saving Changes for details.