

From the timeline, you can add, remove, or replace a presentation's slides as well as update the title and description. You can also move slides along the timeline to adjust their timing in the presentation. This is useful if your recording is based on a slideshow + audio or slideshow + video presentation.
Editable slides appear below the audio track. Slides that appear above the audio track are part of the Screencast or Video portion of the presentation; they are not editable.
TIP To select multiple slides at once: Press the Shift key and click two slides successively to select a range of slides that includes the two slides selected and the ones in between or press the Ctrl key and click individual slides successively to select multiple slides individually.
If you have too many of the same slides on your timeline (or not enough), click Rerun Slide Detection.
Move slides
When you cut material from your presentation, you might need to adjust the timing for one or more of the slides in the presentation.
- Select one or more slides.
- Click and drag the selected slide(s) to their new location in the timeline.
Image

- Click Undo or Redo to undo changes as needed. Once you finish your edits, click Commit. See Saving Changes for details.
Add slide titles and descriptions
Slide titles can be read by screen readers; they are an important accessibility feature. You can edit slides in one of two ways.
From the Web Editor
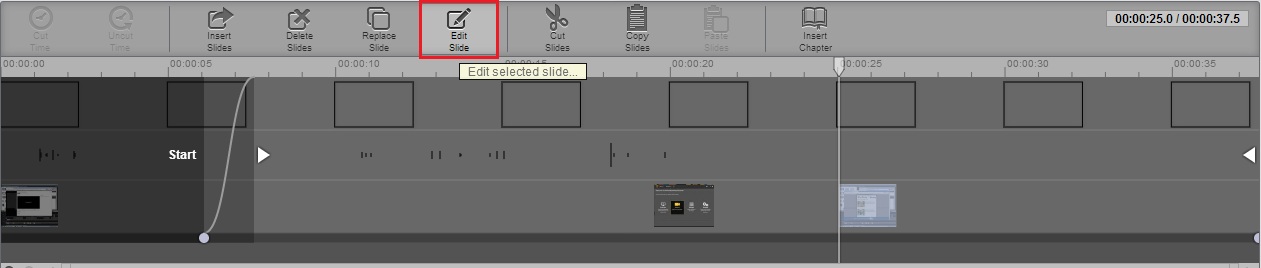
- Select a slide.
- Click Edit Slide.
Image
- Enter a title and description for the slide.
Image
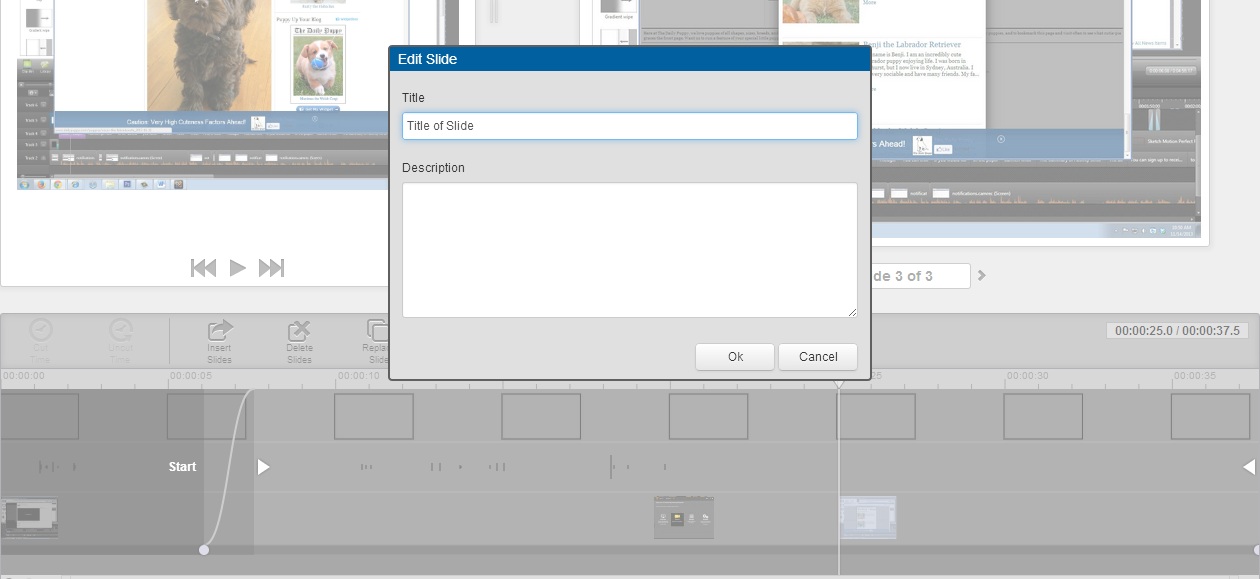
- Click OK.
- Click Undo or Redo to undo changes as needed. Once you finish your edits, click Commit. See Saving Changes for details.
From the MyMediasite Portal
- Log in to the MyMediasite Portal.
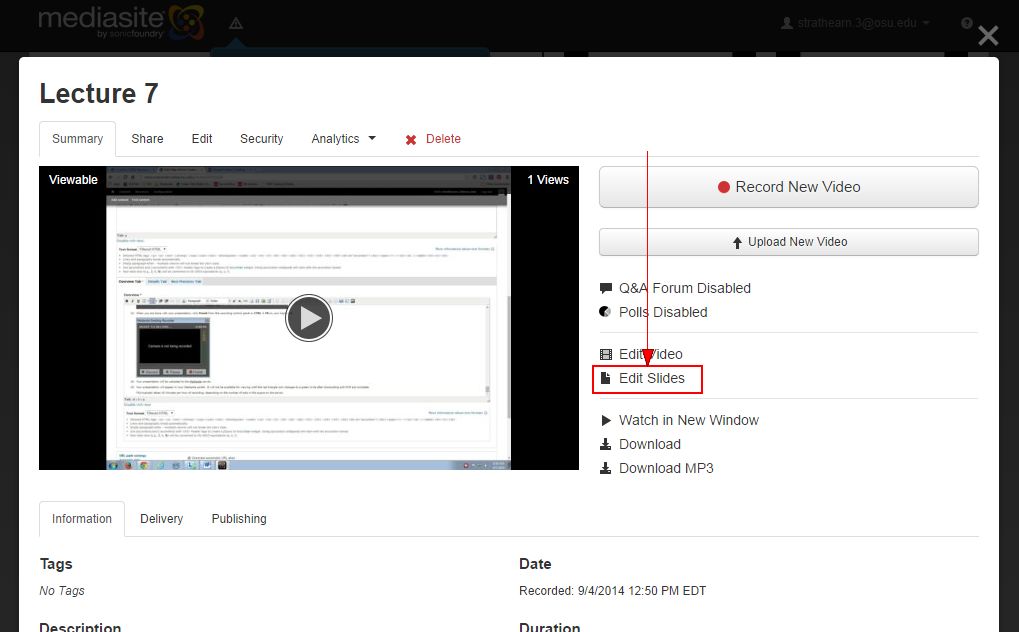
- Choose a presentation to modify. The Summary page opens.
- Click Edit Slides. The Slides Editor opens.
Image
- Click the slide title you would like to change. A pop-up appears.
Image
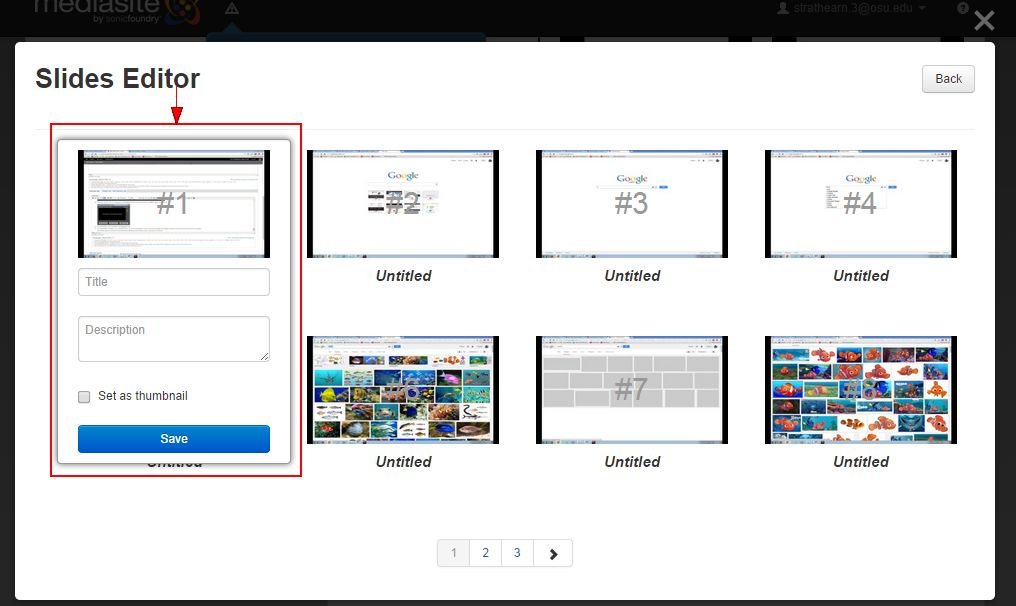
- Type the new title and description.
- Click Save.
- Click Back to return to the Summary page.
Add new slides
You might add slides to introduce a chapter or title section. Likewise, you might want to add additional visuals to clarify a portion of the presentation.
To add new slides, you upload images (.jpg, .png, etc) files to your presentation.
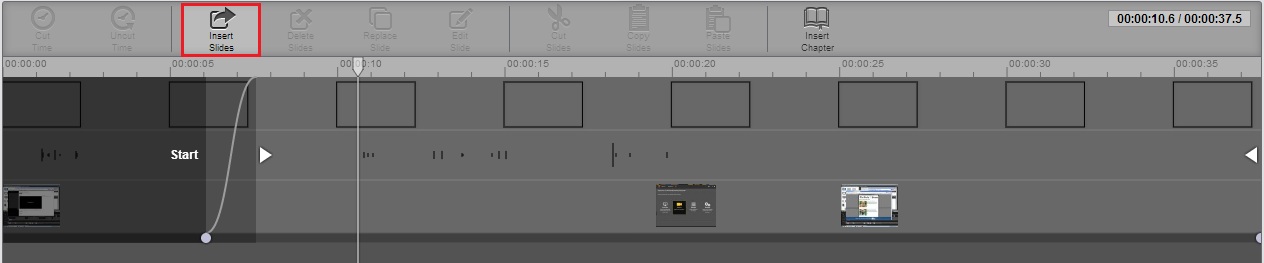
- Find in the timeline where you'd like to add the new slide and pause the video.
- Click Insert Slides. The Browse window opens.
Image
- Find the image you would like to add as a slide (.jpg, .png, .tif) and click Open.
- Click Undo or Redo to undo changes as needed. Once you finish your edits, click Commit. See Saving Changes for details.
Replace slides
You might wish to replaces slides if they contained an error or seemed confusing to your viewers.
To replace slides, you upload images (.jpg, .png, etc) files to your presentation.
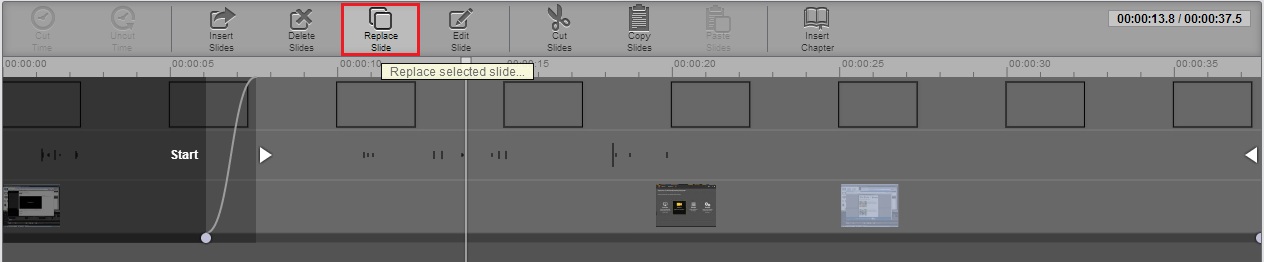
- Select the slide you would like to replace.
- Click Replace Slide. The Browse window opens.
Image
- Find the image (.jpg, .png, .tif) you would like to use instead of your slide and click Open.
- Click Undo or Redo to undo changes as needed. Once you finish your edits, click Commit. See Saving Changes for details.
Copy and paste slides
You can rearrange and insert slides into your presentation by copying and pasting from the timeline.
- Select one or more slides.
- Click Copy Slides.
Image

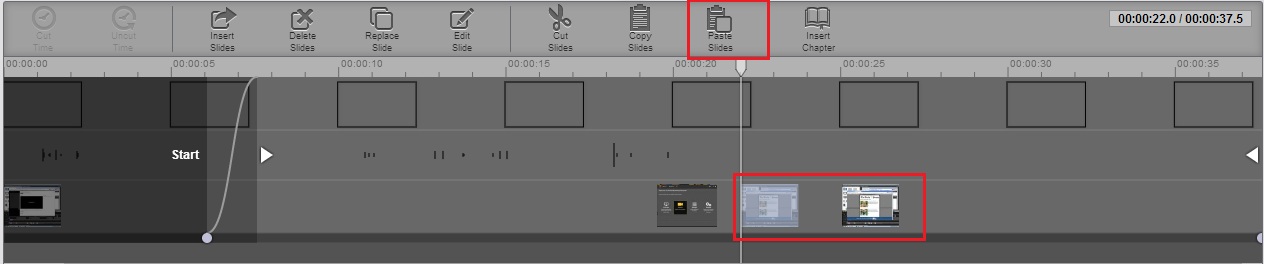
- Navigate to the new location on the timeline.
- Click Paste Slides.
Image
- Click Undo or Redo to undo changes as needed. Once you finish your edits, click Commit. See Saving Changes for details.