When you open a presentation for editing, it is saved as a project. You might wish to use the projects panel of the web editor.
A presentation can have multiple projects associated with it. For each project, you can see when it was created, last modified, and the last time changes made to the project were committed (i.e., saved) to a presentation. You can manage projects and revisions in the Projects/Revision History area.
See Saving Changes for more information on how to save presentations.
- Login to the MyMediasite Portal.
- Choose the presentation you would like to access. The Summary page opens.
- Click Edit Video.
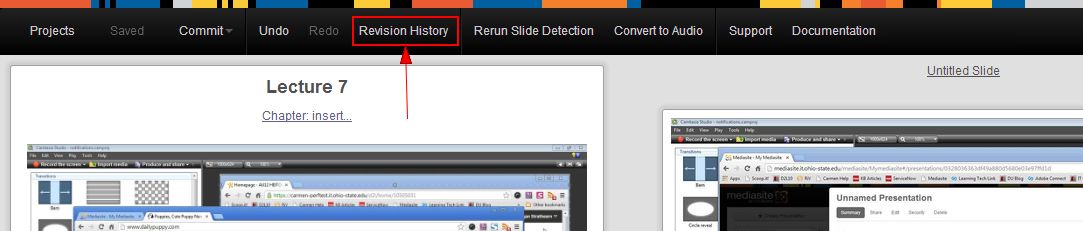
- Click Revision History from the top navigation. The Projects/Revision History panel opens.
Image
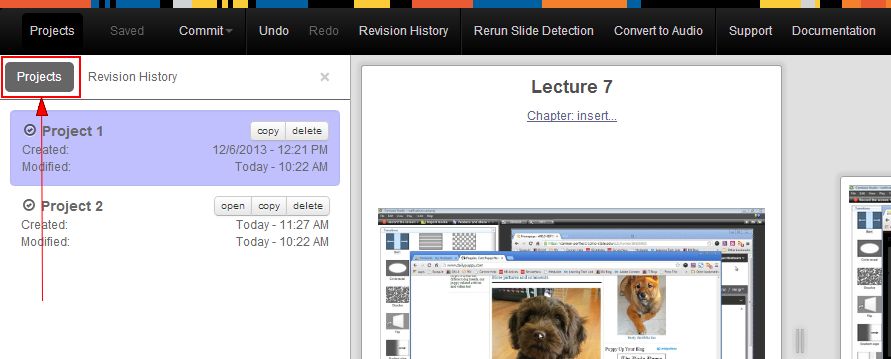
- Click Projects. A list of projects appears.
Image
- At this point, you might to do one of three things:
-
Copy project - Click the Copy button to create an exact copy of the project you currently have opened. This might be useful if you've made edits to the current Project (e.g., reran slide detection), but want to divide the Project into smaller parts. Creating a copy of the project means that you don't have to rerun slide detection for each.
-
Open - Click Open to open a project. You can only have one project open at a time. For example, you might work on "Part 1" and then save it and open "Part 2".
-
Create new project - Click New Project in the lower-right corner of the panel to create a new project based on the original. The new Project opens the presentation exactly as it was the first time you began working. For example, you might click this if you decide you do not like the project version you've created.
-
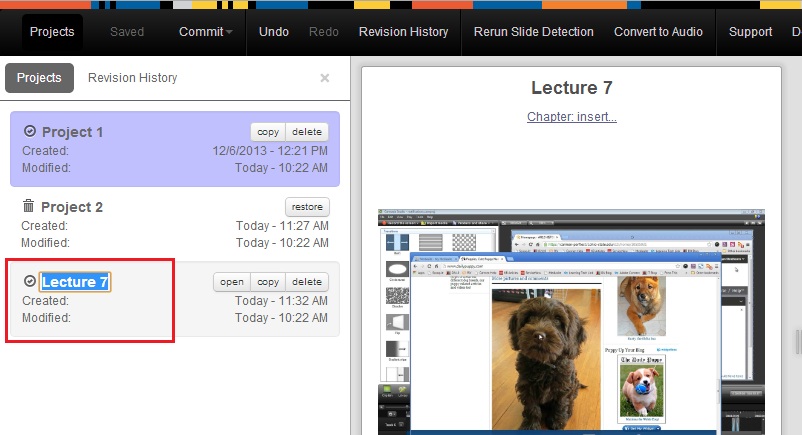
- Give your project a descriptive name. To rename your project, click the project's title to highlight it and type in a new title.
Image
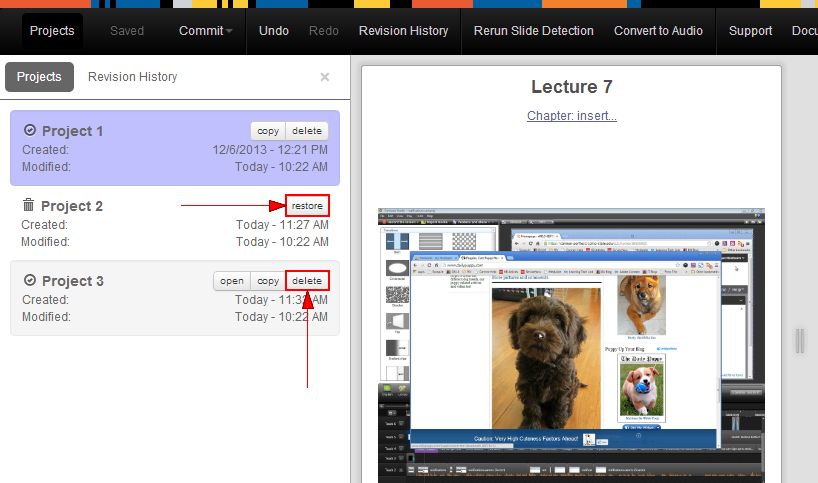
- If needed, you can delete (or restore deleted) projects. To do so, click the Delete button in the row of the project. If already deleted, click Restore to restore the project.
Image