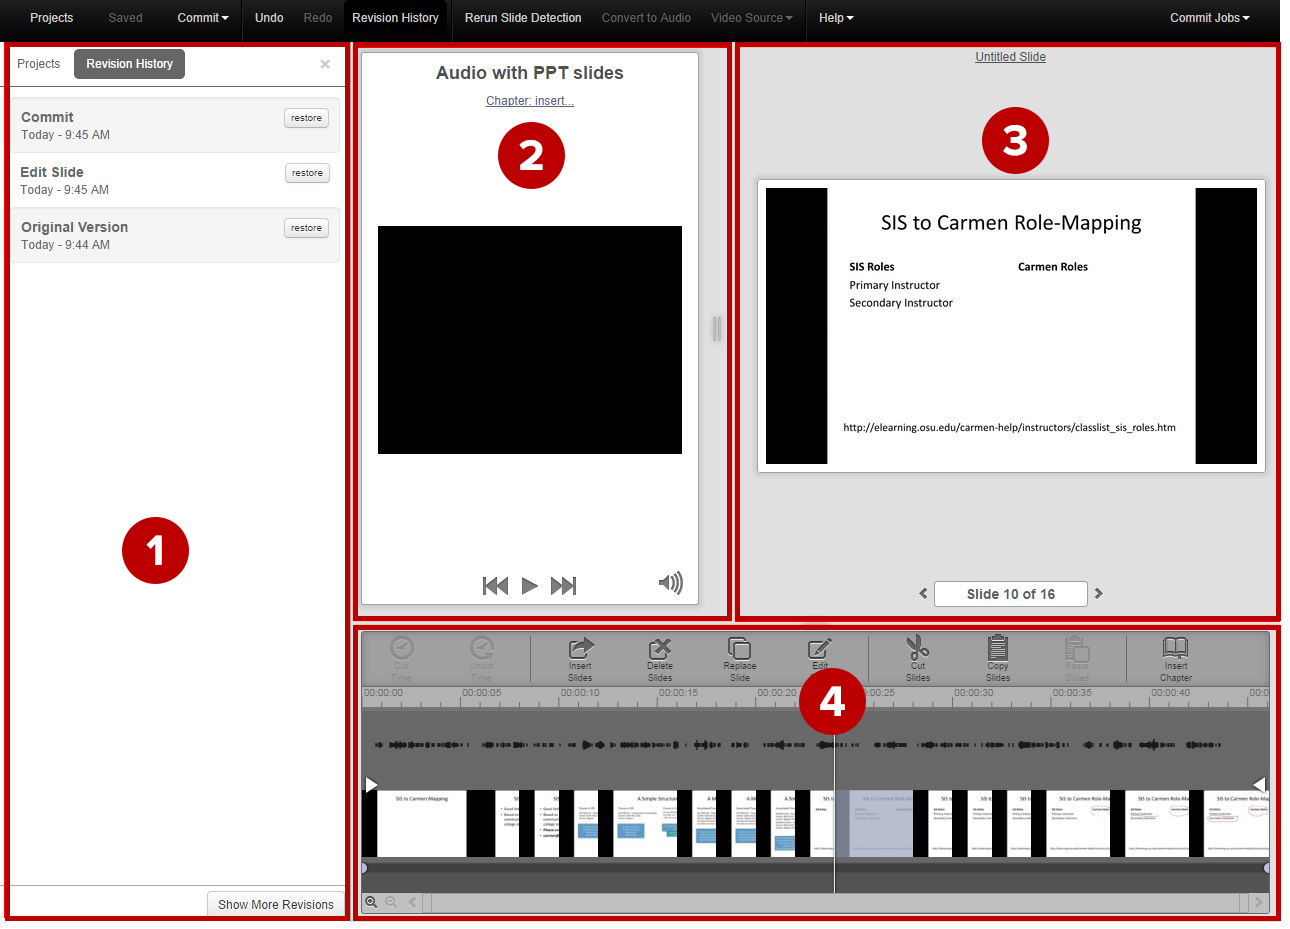
The Editor workspace is divided into four main areas: projects/revision history, video, slide and project timeline.
Image

- Projects/Revision History
Click Revision History from the top navigation to see this panel. Within the Projects/Revision History panel, click Projects to manage the associated projects with the presentation. Project view allows you to open, copy, delete and restore projects, as well as create new ones. Click Revision History to see a list of all changes made in a project and restore previous revisions. - Video
The video area includes the presentation name, video preview window, chapter name (if applicable) and play controls. If there is no video, this area appears blank. - Slide
The slide area includes a preview window, the slide title, slide number indicator beneath the slide preview and slide controls. You can navigate the slides using the "< >" controls beneath the slide preview or enter a number in the slide number indicator. - Project Timeline
The project timeline allows you to navigate and edit the presentation. You can enter a time in the time display in the upper-right corner of the timeline, or click anywhere in the timeline to navigate to that point in the presentation. The project timeline also allows you to edit, move, and replace slides as well as add chapters and insert cuts, fades, and dissolves.

